

Alexander Grabovetskiy, woodcarver, School of Woodcarving · Published 2017
Is chip carving only geometric?
Quick answer: Chip carving is a knife technique of angled passes, straight down, right or left, and it reaches well past geometric patterns. On my Greek acroterion I used it on the palm leaves, removing heavy chunks with one cheap knife, then switched to gouges for the concave hollows.
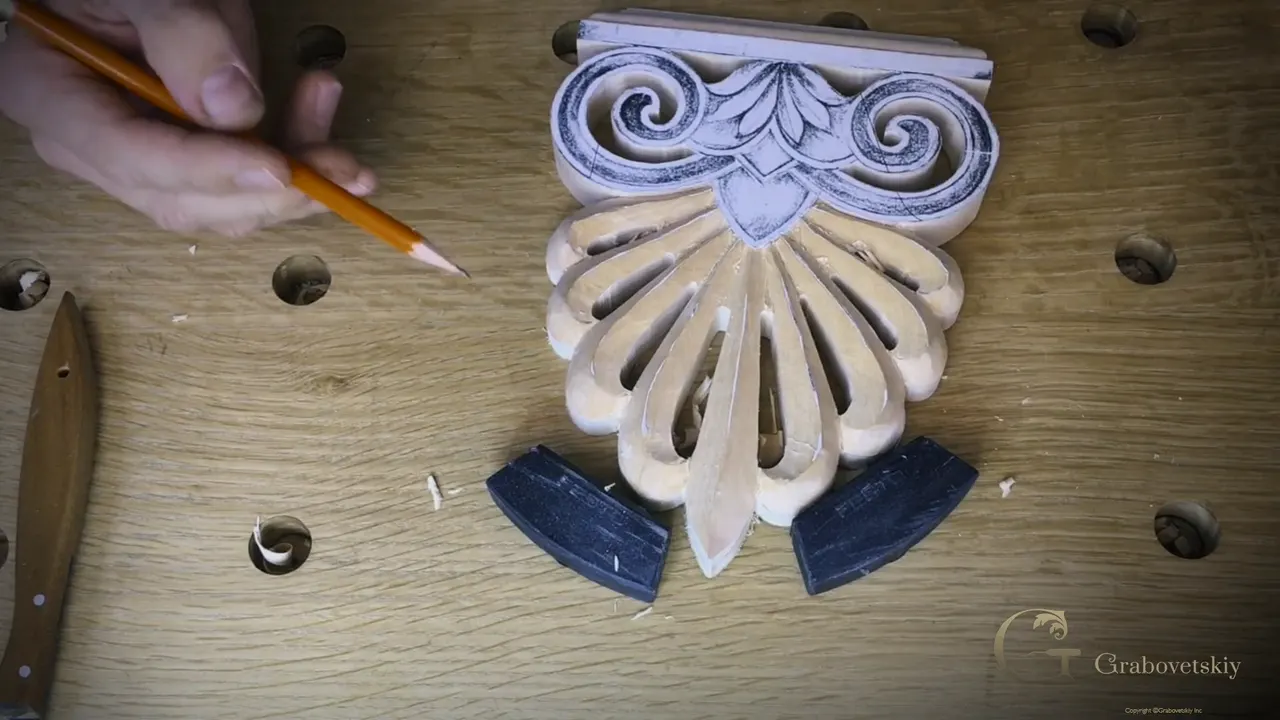
Chip carving is knife work done in angled passes, and it is a lot more than geometric patterns. Most people hear those two words and picture geometric carving in their heads, and nothing else. In lesson 3 of my Greek acroterion course I shaped the palm leaves in the old northern way, with a single knife in heavy chunks, then took gouges for the hollows. So if you came here wondering about chip carving vs relief carving, this one piece has both of them on it.
Want to see a knife shape leaves instead of triangles? And then the spot on the same leaf where a gouge has to take over? I filmed all of it at the bench in six short parts, on the palmette that sits on top of this acroterion.

What a knife and a few gouges did on this palmetto
- In chip carving the knife sits at three angles, straight down, to the right or to the left.
- It does not have to be geometric, and the old northern style used one blade for ornament.
- A cheap knife took the palm leaves down in big, heavy chunks.
- Each leaf kept its ridge as the high point.
- Gouges came in later for the concave shapes.
- Every hollow got a gouge that fit it, smaller and smaller toward the end.
Is chip carving only geometric?
Geometric work is only one side of it. When we say chip carving, most of the time, at least for most of the people, they imagine just geometrical carving. But chip carving, I said, is a lot more than geometrical, and I said it on camera while the knife was working the leaves.
Here is how I described the technique. It is usually an angled pass, with the knife held at different degrees, and you make your passes in pretty much three angles, straight down, right, or left. Nothing in those three angles says the pattern has to be geometric.
I was careful with the name, too. There is such a thing as old northern style chip carving, and I said it's not really chip carving, you cannot call it that. The technique is just like chip carving. And it was exactly what I was doing to the acroterion at that moment.
Carved wood found in northern Europe, dated between the 8th and the 12th century, is that more ornamental chip carving style, done pretty much with just one knife, and some call it Viking style. Ornament, then. Here, a palm fan on a Greek plinth.
I even wandered off for a second about Canada and Alaska being quite far north too, before I said I was talking about culture.
One acroterion, chip carving vs relief carving
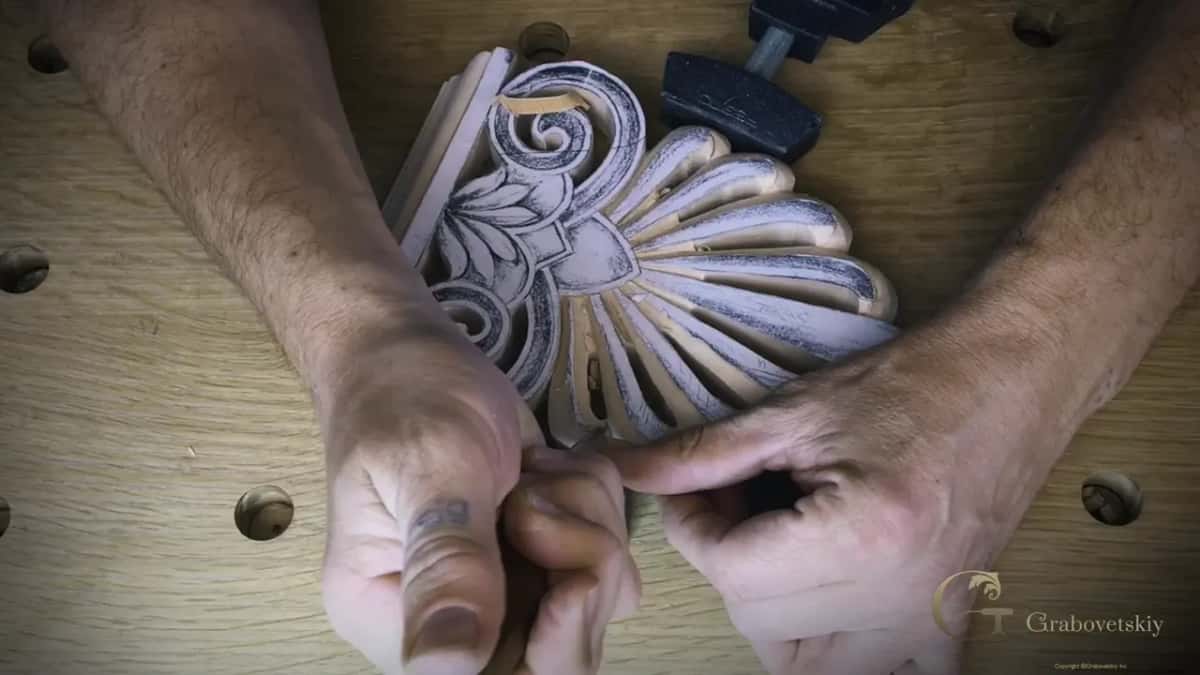
On this block the two sat side by side, and I could point to the moment one gave way to the other. For the first stretch of the lesson only the knife worked, and on the video you can see me shaping pretty much the whole acroterion that way. It took off whole sections of the leaves, big chunks of wood, with the same angle held on both sides. Carefully shaping, I called it, and I said a gouge would come a little later for the concave work.
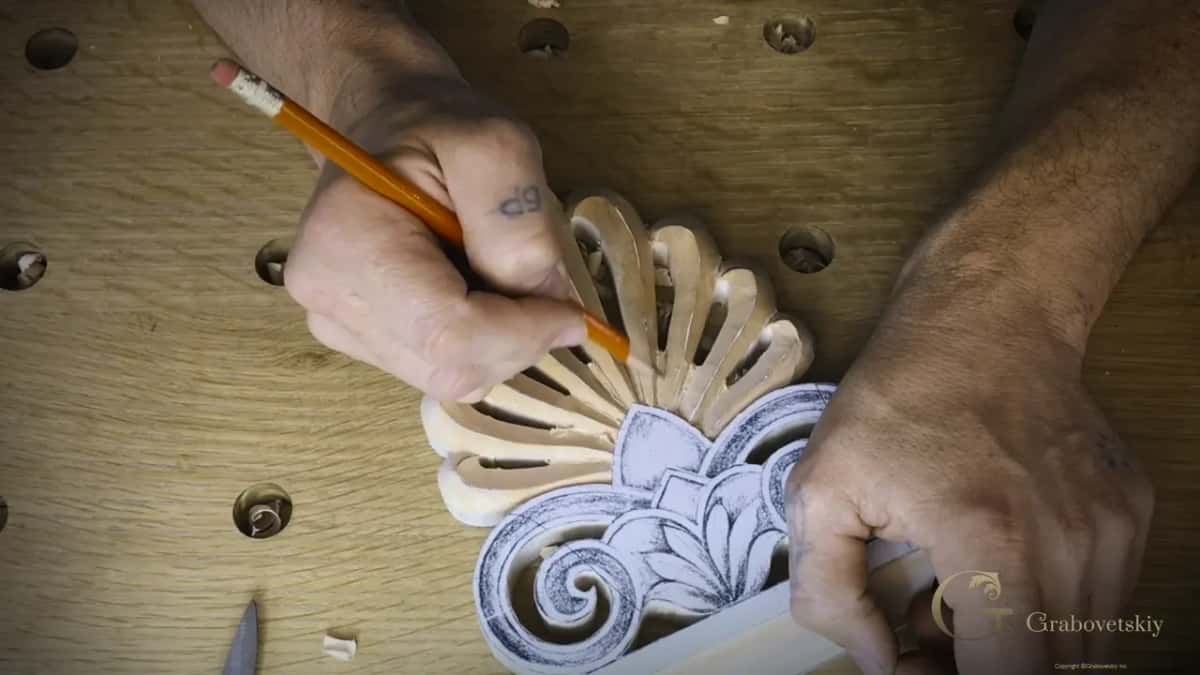
A few sections needed a somewhat different approach. I drew those on the wood first, with a pencil. After that I took a small Dockyard gouge and made a concave shape inside each of those areas, and from there on the gouges did the hollowing, the part of this piece that is relief work.
Here is the order, as it happened on camera.
| Stage | Moment | Tool |
|---|---|---|
| Leaf sections off | Big chunks came away, blade turned toward me | Cheap knife |
| Angles held even | Same angle kept on both sides of each | Same knife |
| First concave shapes | Inside the sections I had just drawn there | Small Dockyard |
| Hollows taken deeper | Rotating move, cleaner once I changed sides | #7 gouge |
| Last hollows reshaped | Smaller and smaller, down to 1/16 in (1.6 mm) | Tiny gouges |
How did one knife shape the palm leaves?
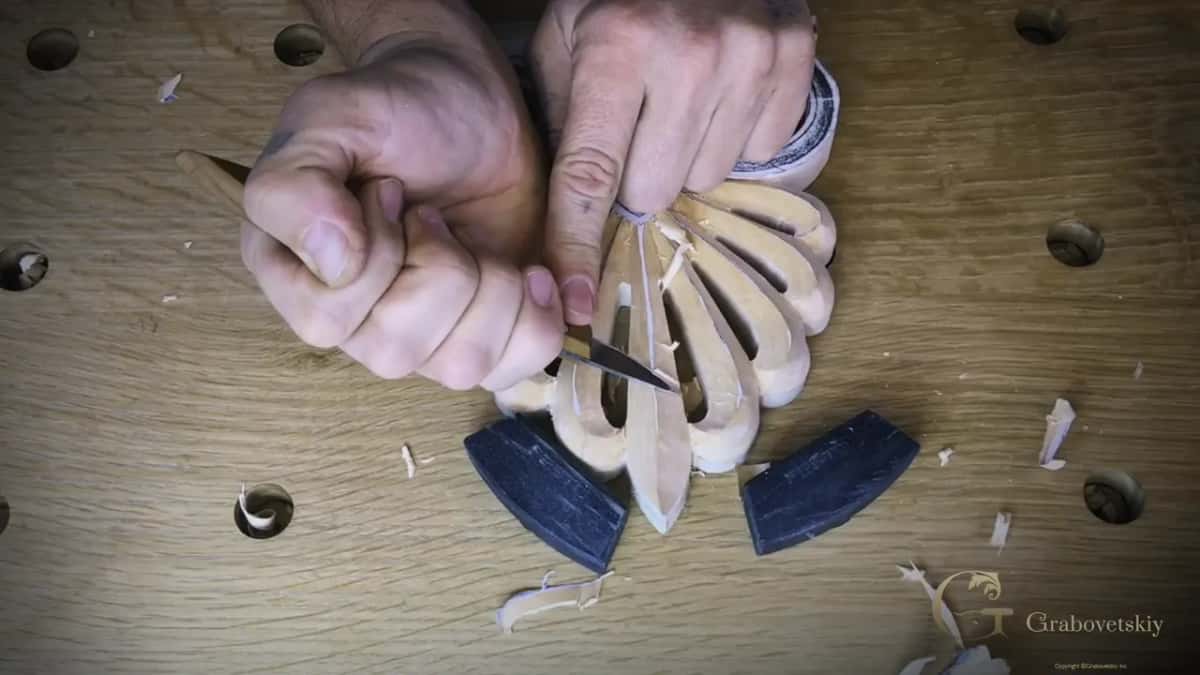
I placed the knife right in my palm and held it with the blade toward myself, then just angled it into the leaf. How to hold a chip knife on a flat board is the subject of workshop 7 of the kitchen cutting board.
Keeping an eye on the line was really important to me. Later on, I said, a gouge would make the final pass on this palmetto.
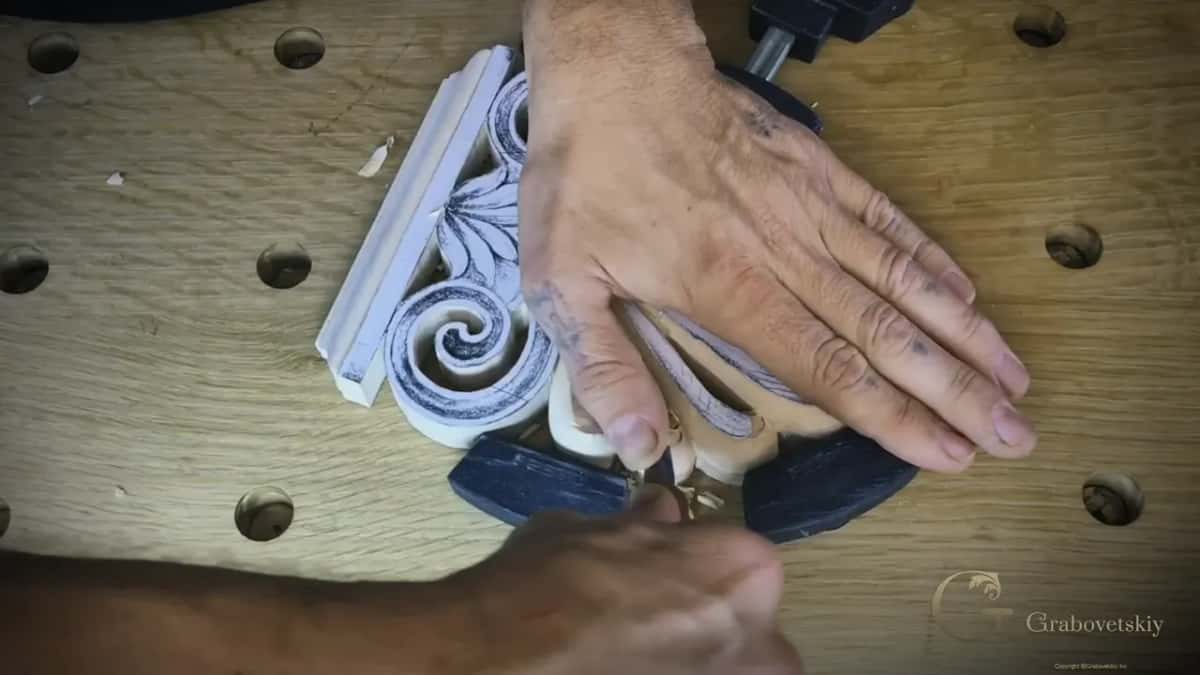
Twice the grain got in my way. On the first leaf I said I was just controlling the knife, and then, oh. The grain meant I had to be really careful there, so I went from the opposite direction and took the piece off that way. With the next one I rotated the block and came at it from the other side, and I guessed I would have a lot more control like that.
Each leaf had a line that would be a high point, the ridge, and I did not want to remove it. The paper stayed on it, and a page about high spots, Venice Room lesson 113, quotes what I said about that.

More passes followed. Big chunks. Really heavy ones, where you have to create a lot of force with the hand and still keep the angle the same, a consistent angle on both sides every time you tip the blade.
It was raining outside that day, and I could hear the rain while I worked.
Why use one knife for so much of the work?
Speed, mostly. I took the knife at the start of the lesson to make it quicker, and I said I thought it would help me, and a little later I called it probably the quickest way.
The knife was my number 12 Pfeil, Swiss-made, one of my favorite cheap carving knives, and I use it a lot to expedite my work because I can remove a lot of material in a single pass. In 1998 I carved all the sides of a coffered ceiling with one cheap knife in about one month, and the course page tells that story.
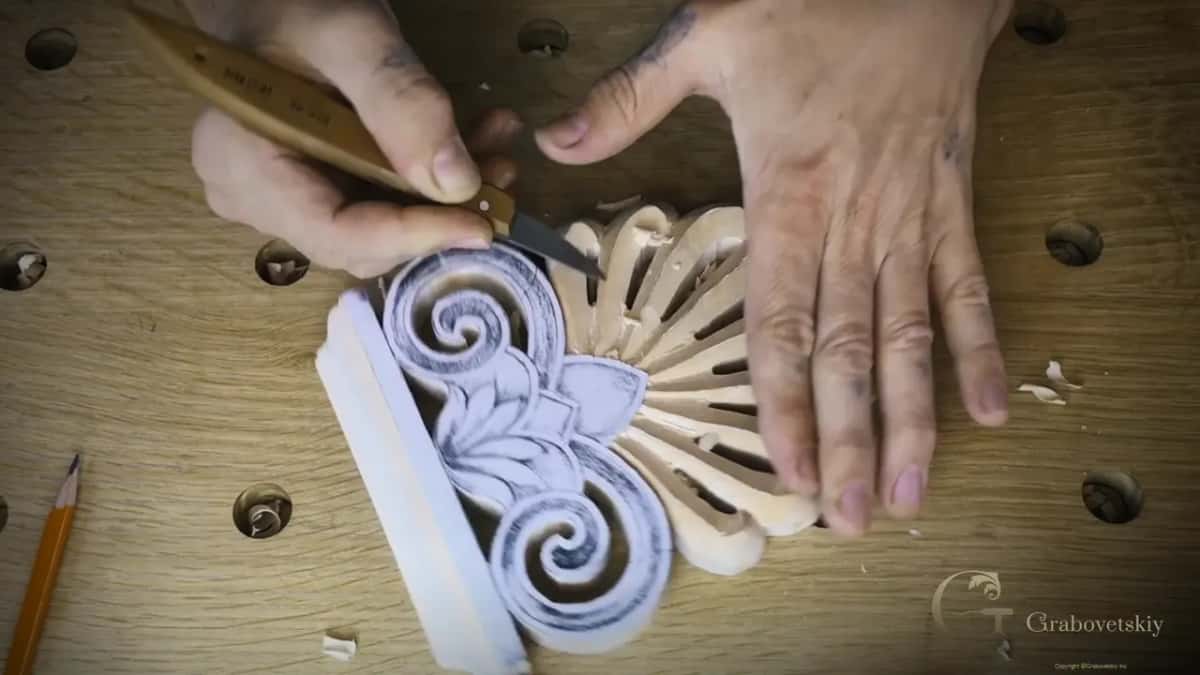
There is a lot of stuff you can do with just one knife, as I mentioned in some of my workshops. Fireplace mantel front onlays, paneled columns and small jewelry boxes have all come off a single blade, and I said I did a lot of those projects with one knife because it was much quicker. I don't think they look bad at all. They look actually good, and you can do really nice stuff with a single knife.
I was just taking my passes then, creating my initial form. Before the gouges came out in this lesson, I stopped, checked the form the knife had left, and said it does look good. You can get really good results with the one-knife technique.
Where does the knife stop and the gouge take over?
The knife stopped where I had drawn. A couple of gouges came out there, just because they are a little different in profile.
The first one was a little too big. I checked again, and the next was slightly smaller, so I made the concave with that one. Learning what each gouge does before you buy it is a whole course of mine, All About Tools for Wood Carving.
By the next part of the lesson I had made enough of a channel. Before the gouge went in, I took that spot a little deeper first, because the gouge was about to dig inside. I figured a number seven would probably work, checked it, and yes, it fit.

How the number seven followed the line
I followed the line with a rotating move, and at first I was working against the grain. Against the grain was not helping. I took that concave all the way to the middle section, then tried it from the other side, and it was a much cleaner pass from that side because of the grain. Then I took it down.
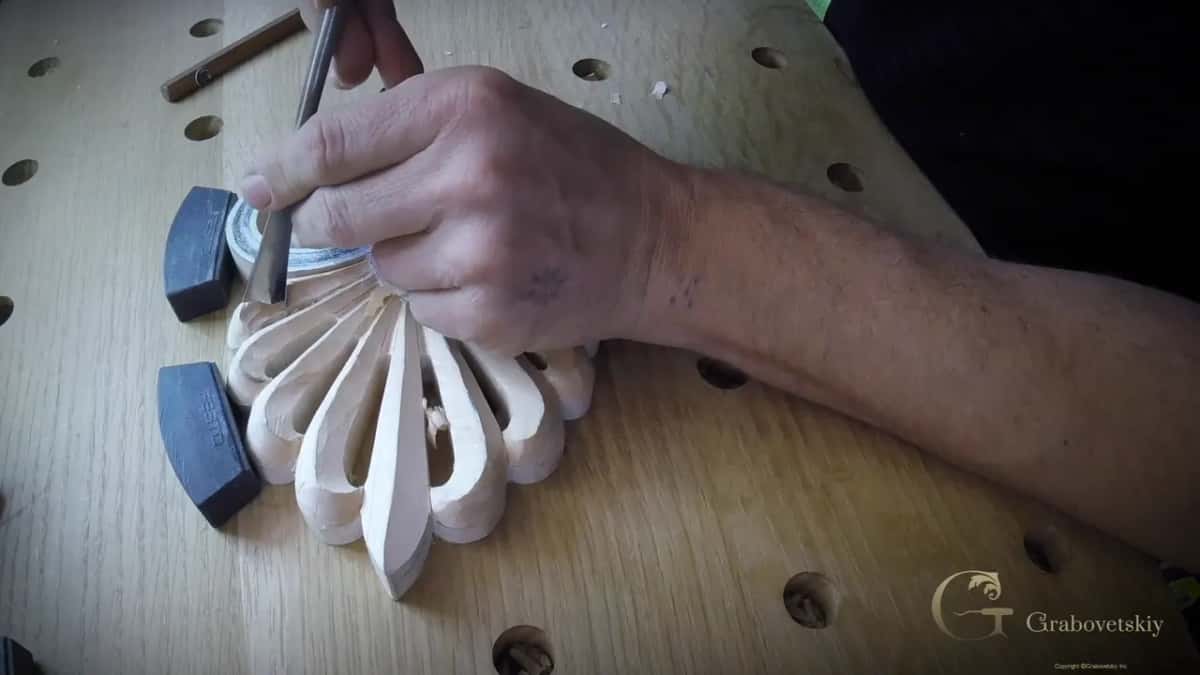
For now, I said, it should do. A small gouge would come back later to recreate the true line, the flow line. More depth next. Then a cleanup and a bit of reshaping on one part, and I kept taking passes until I could feel how deep it was supposed to be.
And yes, I am saying that correctly. You have to feel it, or I should say, I have to feel it.
One spot I was not too happy with. The grain was going up there, it kind of changes direction, so I cleaned that side as well, and I mentioned one more tiny pass might go right there.
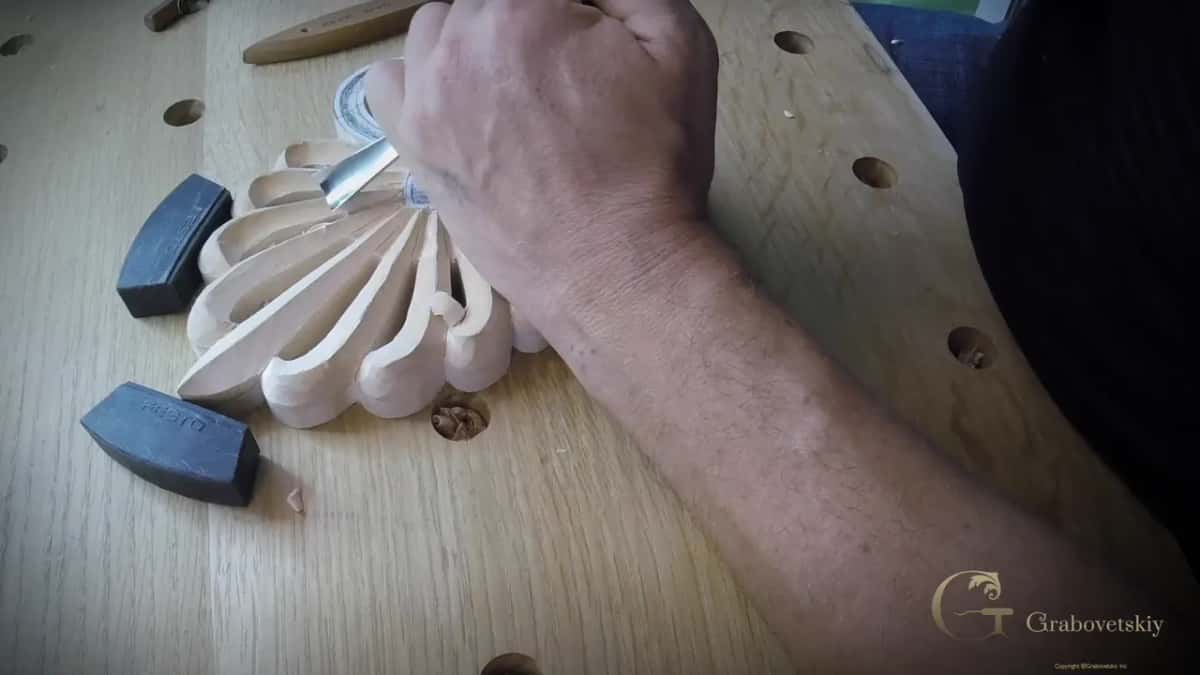
Should you take one long pass or several small ones?
Near the ridge I took several, and I said why on camera. Of course, I could probably just try one, but I feel more safe about my ridge, about my line, when I am doing multiple passes.

If I damage my high point, there is no way I can add that. For me it is critical.
On one leaf the grain went all the way up and down and then changed direction at a single point. I rotated the block, came in again from the second side, and carefully brought the two passes together, then made one final clean pass, really carefully. Where they meet is the seam I call a marriage line, and the course page says more about it.
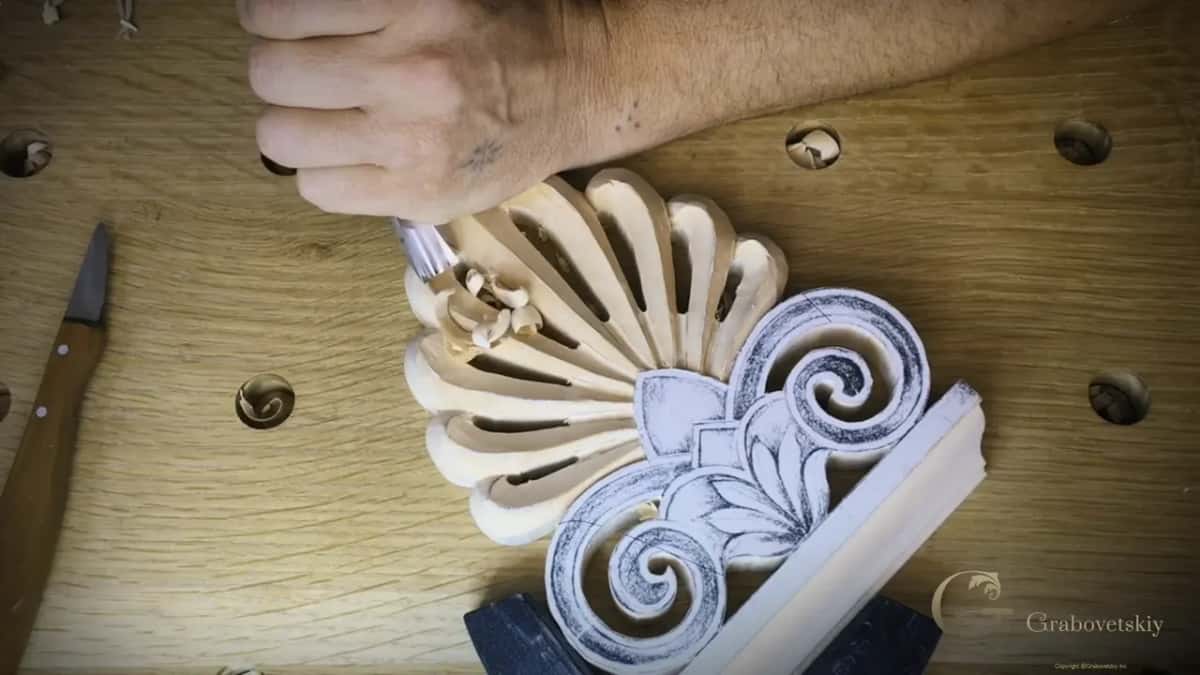
On the next side I started whatever way felt right to me, just because my grain went that direction, and worked my way in without forcing. That one came out really clean. One spot needed cleaning.
Slicing passes took me to the edge, to that line. Once I tried for one long pass, if I was able to. I wasn't. So I just removed that bit. Later, while I was at it, I did the next one, too.
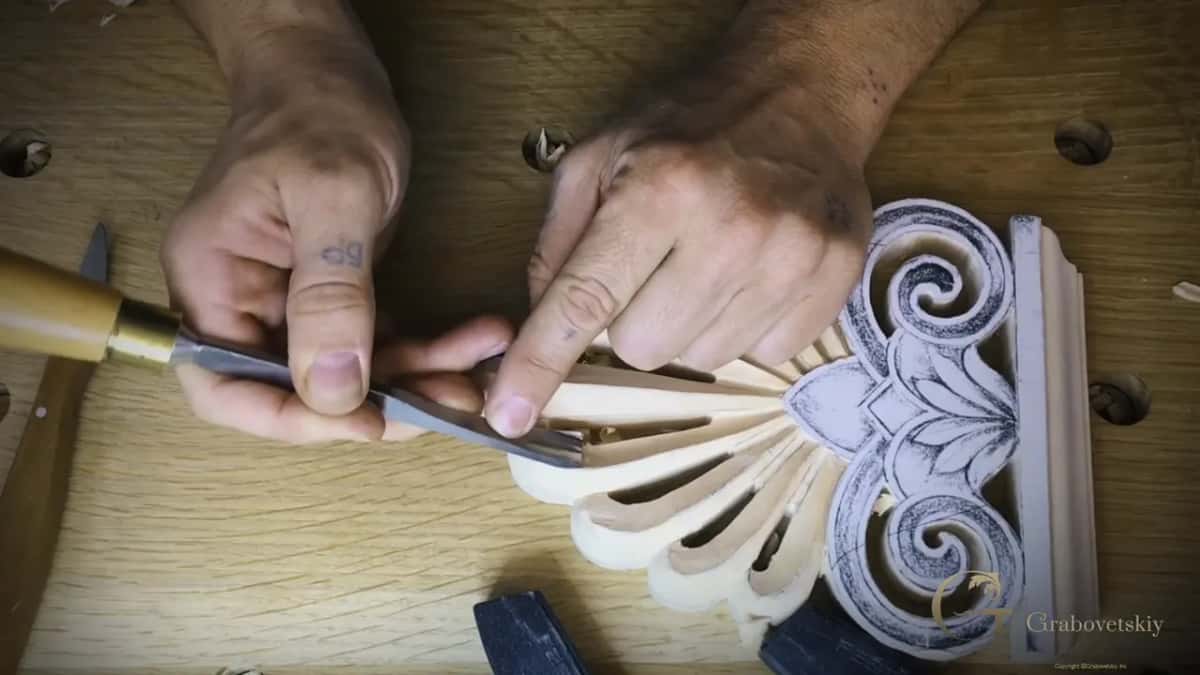
I don't want to rush it, I said, and then said it looked like I did, a little bit, and then said the first part again.
How small does the last gouge get?
Small. Earlier on these leaves I had my number seven, which is 5/8 of an inch, about 16 mm, and for the last hollows I went far below that.
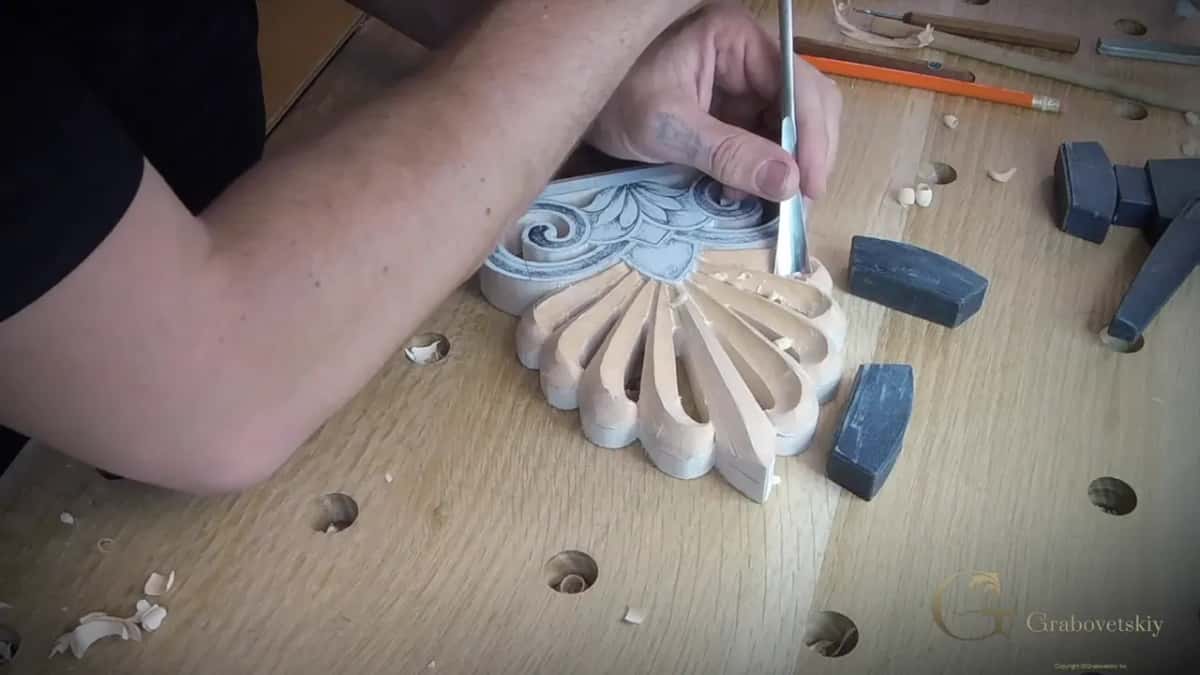
I needed to reestablish my concaves, so I took my small Dockyard again and cleaned a little. Next I said I needed a smaller one, even smaller than what I had, and then I took even smaller and got that concave a little deeper. This one, I said, is about only 1/16.
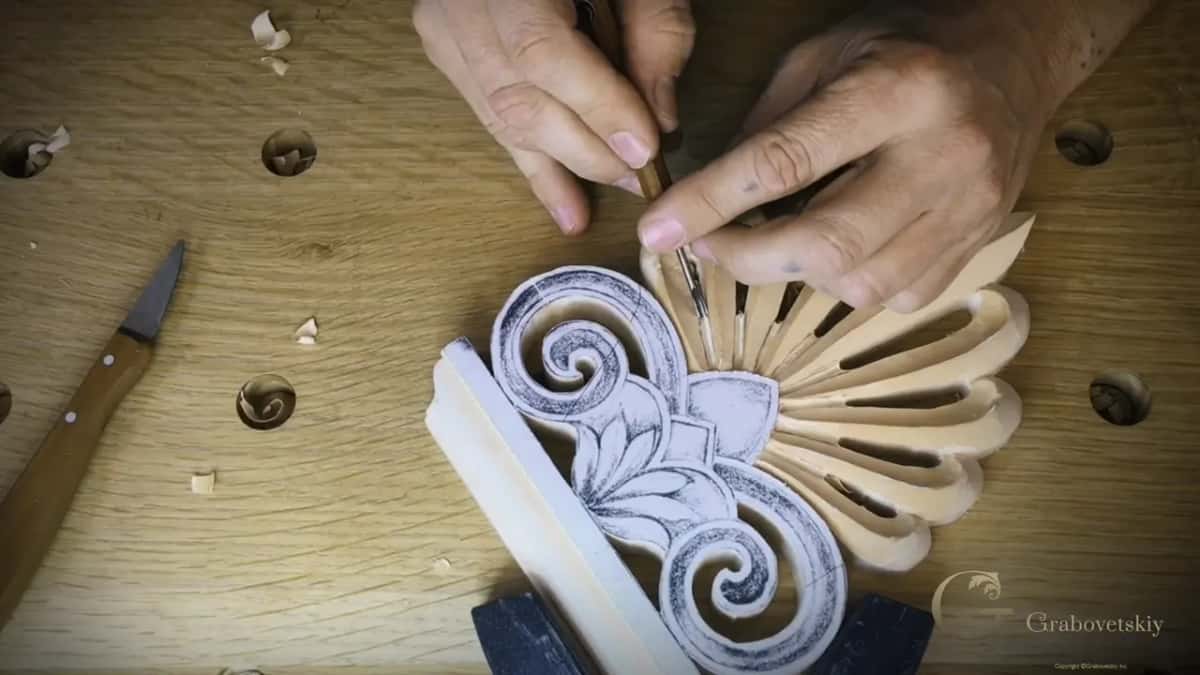
Those concaves create the shadow line, and the shadow line is a really important element. In one place I got a little too deep. Easy to fix, I said. Then I had to recreate exactly the same on the other side.
I am not afraid of going a little deeper than I planned, because, like I said, it creates the shadow line. By the end of the part the whole palmetto had its shape, and I was happy with it.

Is old style carving still authentic with modern clamps?
People in the 17th century would have used them, given the chance. Somebody would say, oh, it's not authentic, not how people in the last century or the 17th century did it. Of course not. But if they had a system like that, I said, they definitely would use it.
The clamps holding this acroterion were made for woodworking, not for carving, to hold work on a multifunctional table. Glue gets the same debate. Should you still use hide glue for your furniture, or a yellow or white glue by Titebond, a contemporary glue and a much stronger one?
I like Titebond 2 particularly. If they had that glue in the 17th or 18th century, I have absolutely no doubt they would have used it.
Back then the school forum had a really interesting topic going about work holding, everybody with their own methods, and I asked students to share theirs.
Where should a beginner try this kind of chip carving?
If you have never held a gouge, my First Cuts for Beginners course is where your hands go first. The three chip carving passes on a kitchen cutting board have a lesson of their own.
Leafage from a lone knife, with no background, is another lesson, workshop 2 of First Cuts. Sharpening comes next for any of it, and Carving Tool Sharpening is the whole of that subject, while the Greek acanthus leaf course comes easier once you have carved a palmetto.
The lessons map lays the whole road out in order. The next lesson of this acroterion picks up where this one stops.
Can you hold a knife in your palm? And keep one eye on a ridge line while your hand moves? Then you can carve the way I carved these palm leaves, and you can pick your first course here.
How it's done
- Hold the knife in your palm. Set the knife right in your palm with the blade toward you, the way I held my number 12, and tip it into the leaf.
- Leave the ridge standing. Keep the ridge of each leaf as the high point. I kept the paper on mine and did not take it lower.
- Remove big chunks at one tilt. Take the waste off in heavy passes with real force behind the hand, and hold a consistent angle on both sides.
- Turn the block when the grain fights you. If the grain is in your way, come from the opposite direction or rotate the piece for more control.
- Draw what needs another approach. Draw the sections that need a different approach, then make a concave inside each with a small gouge.
- Size the gouge down. Try a couple of gouges on the line. One too big? Take the next smaller one, and keep going smaller for the last hollows.
- Go several times near the high point. Close to the ridge, take multiple passes rather than one long try, since there is no way to add that wood back.
Frequently asked questions
What angles do you hold a chip carving knife at?
Straight down, tipped to the right, or tipped to the left. On camera I said chip carving works in pretty much those three, and on the acroterion I kept the tilt consistent on both sides of every leaf while I removed the big chunks.
Which gouges followed the knife on the acroterion?
A small Dockyard made the first concave shapes inside the drawn sections. My number seven, 5/8 of an inch or about 16 mm, went into the hollows once I had checked it against the line. For the last ones I kept going smaller, down to one I called about 1/16 of an inch.
Can chip carving be used on architectural ornament?
On this Greek acroterion it was. Its palm leaves got the same angled knife work, in heavy chunks with real force behind them, and gouges only came in for the hollows. I told viewers you can get really good results with the one-knife technique.
What to carve next