
Alexander Grabovetskiy, woodcarver, School of Woodcarving · Published 2017
How do you carve a Greek acroterion?
Quick answer: Greek acroterions are carved shallow, mostly between 1/16 and 1/8 of an inch deep, from lime wood with the drawing glued straight to the board. A marking gauge and a plane shape the base. The palm fan gets one knife, then hollows beside every ridge to throw the shadow.
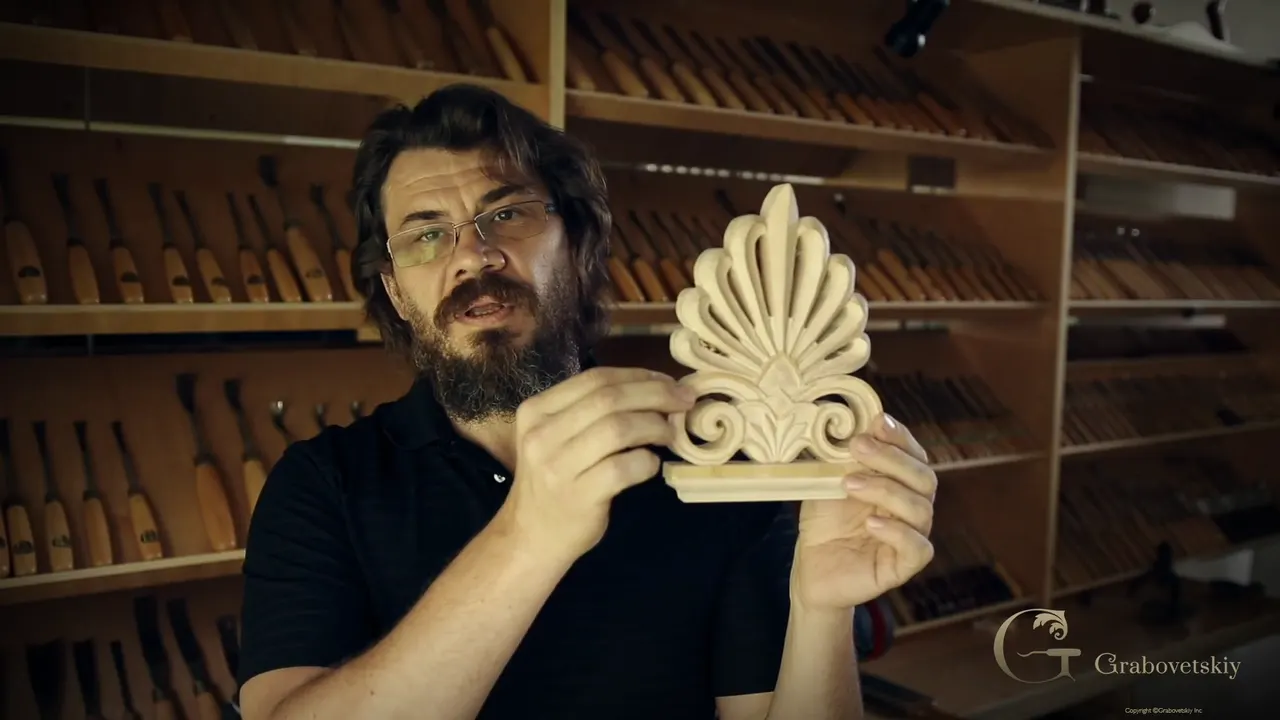

Ever seen a stone palm leaf standing up on the roof line of an old building? Wondered how a carver pulls that shape out of a flat board? Start at the bottom, with the base. Not the leaf.
What is a Greek acroterion?
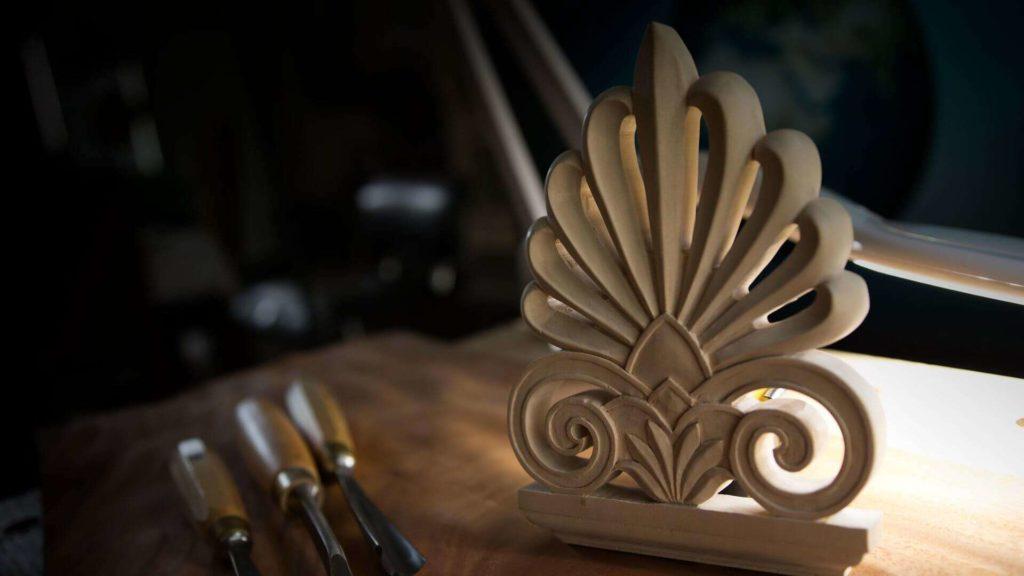
A Greek acroterion is an ornament that stands on the roof line of a building, and the oldest version of the one I carve here is a stylised palm tree sitting on a flat base. The palm part is the palmetto. Underneath it sits the akroter, and you and I would just call that a plinth.

Carved stone in this style goes back to about 450 or 500 BC, which makes it one of the oldest designs on the planet. The meaning of it is victory. Why a palm tree stood for victory I tried to research, and I have no idea. Absolutely no idea. Most likely there was some spiritual meaning they put in it.
Mine was never going on a roof. An architect asked me for a prototype. The plan was to take my carving, make a form off it, cast it in metal, and put several of them on the building. What you see me carving is the prototype they would cast from.
What wood do you use for architectural carving?
Lime wood, which is the same tree as American basswood, and it is soft enough that I am not afraid to put a knife into it. Two names, one tree, depending on which side of the ocean you learned the trade.
That matters. A lot of this piece gets shaped by a knife and a bare hand, and the mallet comes out only in some places. This is shallow work, nothing like a deep panel.
How should you transfer a pattern onto wood before carving?
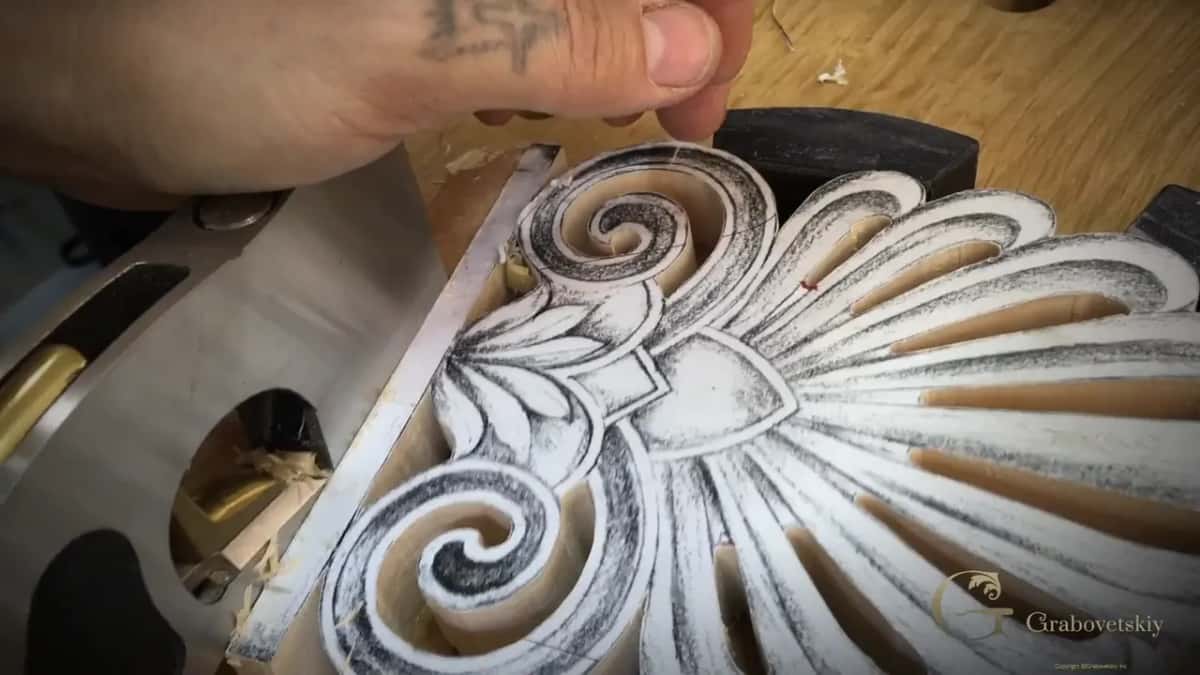
Draw it by hand, print it to size, glue the paper flat to the board, leave it overnight, then saw around the outline. I could take a design like this into AutoCAD. Or SketchUp. Or Illustrator. I draw it by hand anyway.
Two reasons for that. Drawing keeps my hands trained, and it leaves the shape feeling like a human being made it. And I just love to do it.
Once the glue is dry, that paper is your guide for the next five workshops. I keep an eye on its lines the whole time, and where the paper sits on a ridge I leave it there, because that ridge is my high spot.

Should you thin the glue for a paper carving pattern?
I use it straight out of the bottle, not watered down. Some carvers add water first, and I don't think anything is wrong with that.
Water carries the glue down into the fibres. If a clear coat is all you plan to put on, I don't think it's a problem. Put a stain on that wood and you get blotches, spots where the glue soaked in, and sanding will not save you from them.
Straight glue sits on the surface and stays there, and it's a lot quicker. Titebond original or Titebond 2. I wouldn't use Titebond 3, it can take too long to dry. One more thing. Your blade will squeak going through that dried glue line, because the glue dries hard, like a resin.
What is a marking gauge for in wood carving?
A marking gauge scores a line into the wood that no chisel can wander off, and I start marking the base before I put any chisel to it. Ordinary gauge. Nothing clever about the one on my bench.
One trick makes it far better. Set a knife tip into the board first and make a small notch, then let the gauge point drop into that notch and pull. The notch catches the point. The line comes out really straight.
I marked one line on this base at 9/16 of an inch, 14 mm. Small steps either side of it go near 1/16 inch, roughly 1.5 mm. That one I read off my drawing.

Is it cheating to use a hand plane on a carving?
A hand plane is a hand tool, and they were using them in ancient times. Roman planes have been dug up. People claim the Egyptians had them too. The Roman one looked a little different from what sits on my bench.
So a shoulder plane goes on the flat of the base and a block plane knocks a high ridge off. Somebody would call that cheating. I don't think so.
Where I do draw the line is a router bit. One could make this whole base for me, and that would be faking it. Everything here has to be done by hand.
Is an ogee moulding Greek or Roman?
Greek. The Greeks were using that S curve before the Romans did. Some people call it a Roman ogee, but it is not Roman at all.
The ogee runs on three sides of this plinth, and all three have to match. I shape it with a back bent gouge, a number 25 at 10 mm, three eighths of an inch, and I sharpen that tool inside and out before I begin.
Watch your shaving while you work. How wide it is, and how evenly it curls off the tool, tells you how true your base will come out.

How deep should the cuts be on an acroterion?
Shallow, and I keep it that way on purpose. Most of this piece sits at 1/8 of an inch, 3 mm, or at 1/16, about 1.5 millimetres.
I looked up the original designs online, and the old ones are not deep either. They kept them shallow so they would look outlined.
Here is the ladder on this piece. V tool channels go 3/16 of an inch, 5 mm. Backgrounds drop 1/8, 3 mm. The channel around each spiral is 1/16, near 1.5 mm, and it stays that same 1/16 the whole way round, so it has the same look as the other places. On that channel I go 1/16 first, then take my time and look at the whole piece. If it needs to go deeper, I always can, but going back up is not an option, not ever.

What does bosting mean in wood carving?
Bosting is the roughing stage, where you get the whole form standing and no detail at all. Some carvers say boasting, some just say roughing. Same stage, three names.
On the palm fan I do this with one of my number 5 gouges, in sweeping rotating passes, and one eye stays on the line the whole time. Reach the line. Never go past it.
Woodcarving is an art of deduction, and you only ever subtract. Some mistakes are fixable and some are not, and once the wood is off the board the wood is gone, so shape comes first and detail comes last.

Which gouge should you pick for a curved line?
The one whose curve fits that stretch of the line, and finding it means trying them one by one. On the two spirals I work down through my number 7s, biggest first, standing each one on the drawn line to see where it sits perfectly.
The widest 7 owns the outer sweep. Then a smaller 7, then smaller again, and eventually one so small it is frightening to use, each owning its own piece of the spiral. A light tap with a mallet and no more. I am only making an outline here, and that part is easy to break.
A gouge line is more accurate than a line drawn by hand. Even a shallow one gives me plenty of room to drop a knife point in and follow it around.

Can you carve architectural ornament with just one knife?
A knife can carry a lot of an architectural job, and I have paid bills proving it. Nearly the whole acroterion is shaped with one cheap carving knife, a number 12 by Pfeil, taking heavy chips.
Back in 1998 I designed a coffered ceiling for a client, then designed the carving on it to be a one knife job. Every side of it. The whole ceiling, one month, one knife, and I made money that month. Fireplace mantel onlays came after. Panelled columns. Small jewellery boxes.
The old northern carvers worked this way, in Norway and Sweden and Denmark and Finland and Russia, and there is carved wood dated between the 8th and the 12th century done with nothing but a blade. Some people call it Viking work. That name does not sit right with me, because not every northern man was a Viking, and I think the British did the same thing.
My own lesson in what one knife is worth came somewhere I would not recommend to anybody. I carved mirror frames in a prison in Russia. Nobody there was going to hand me a roll of gouges. A knife I could keep, smaller than the one in my hand now, because they would not allow a blade any longer than that.

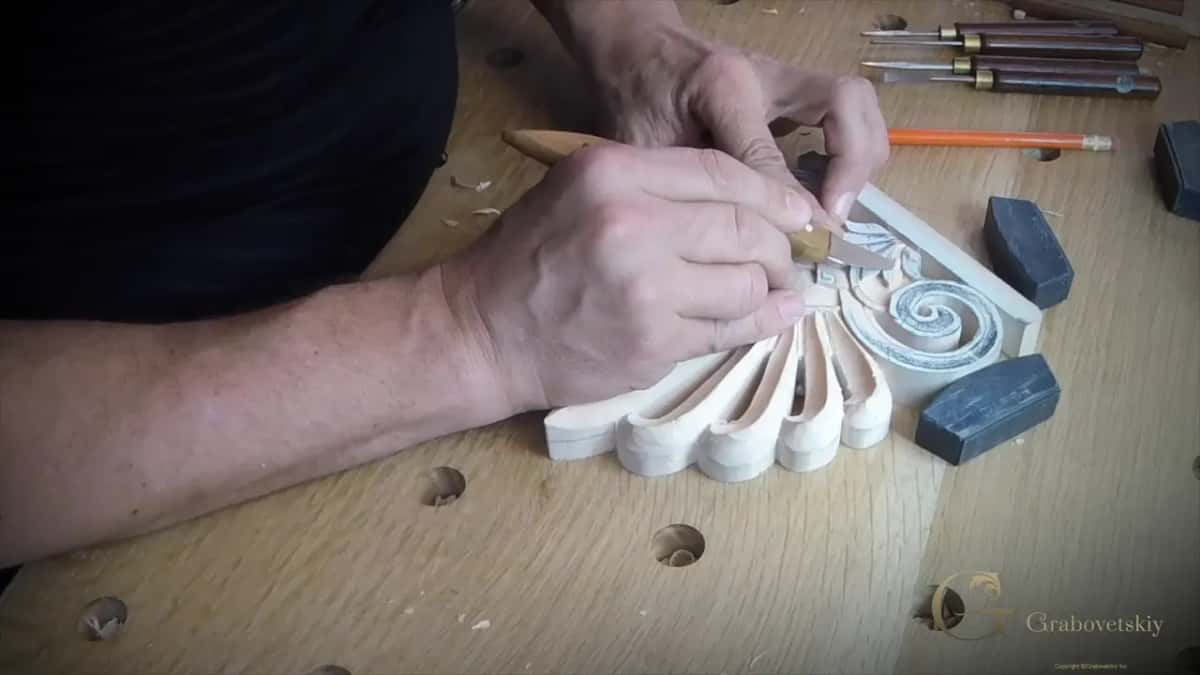
How do you hold a carving knife?
Rest the blade on your middle finger, squeeze the handle with two fingers, and block those two with a third. You could hold it like a pencil, and sometimes I do. That grip can hurt your finger.
Set your fingers my way and you get a lot more pressure with the same control. Enough pressure that you can even work hardwood with a knife.

Where should your hand be when you hold a gouge?
Flat on the work, as close to the edge as you can get it, with the gouge lying as low as it will go. Sometimes you raise the handle and just start digging, and you can't control a tool that way.
Look at the bevel on my gouges. Long and low. Not every tool has that, and mine have it for a reason. When you carve by hand, a bevel like that helps you a lot, because the gouge can lie as low as possible.
Then rest that hand right on the piece, right up near the tool's edge. That way you control it a lot easier.

Should you carve with the grain or against it?
Read the grain first, and be ready to turn the piece around rather than force a cut through it. On this palm fan the grain runs the length of the petals and then changes direction partway up, and where it changes I come at it from both sides.
I carve against the grain in places, and you will watch me do it. A nice curl coming off the wrong way means the tools are really sharp. If the wood starts chipping instead of curling, I have to be really careful not to overdo it.
Then rotate. Come at the same hollow from the other side, and rotate again if you need to. Nobody is timing you.

Why does a rough seam show up where two cuts meet?
When the grain changes direction you carve from both sides, and the line where those two passes meet is the marriage line, if you wish to call it that. On this piece you can see exactly where the grain turns.
Then rotate the piece and attack the marriage line from a second side, carefully, until it is completely gone. One long pass might do it, but I feel safer about my ridge doing several.

Where does the shadow in a carving come from?
Out of the hollows. The concaves next to the ridges are what create the shadow line. This design is shallow, and the shadow line they make is a really important element.
I'm not afraid to go a little deeper than I planned, because of that shadow. On one of them here I went a little too deep. Easy to fix.
If that just changed how you look at your own work, come and stand at my bench for the rest of it.


When should you sharpen a carving gouge?
Run a finger along the edge and feel for a burr, then watch the surface the tool leaves behind. When a gouge starts putting little marks in a cut that used to come out clean, there is a micro burr on that edge.
Sharp is not a preference on this piece. Around the spirals you work with the grain running in different directions, and every pass should come out clean.
My fix takes seconds. A buffing wheel on the Worksharp, a couple of passes, straight back to work. Leather strops do the same job by hand and I still keep one, they just ask for more of your time.
Do wood carvers use sandpaper?
On a clean gouge cut, no, and you can see why in the hollows here. That concave came out clean, so I don't need any sandpaper on it.
Two places I do reach for it. End grain on the base. And lifting the last of the paper pattern and its dried glue off at the end, with 100 grit, rubbing gently so the paper comes away and the carving does not.
My piece had one more reason. It is just a prototype for a metal casting, so I planned to sand it after I was done.

Do you measure a carving or just eyeball it?
Mostly you eyeball it, and then you check yourself afterwards. On a piece like this I hardly ever reach for a rule, though I did measure the base.
Set the middle finger of one hand against the edge of the wood, run it along with a pencil pinched in the same hand, and out comes a line parallel to that edge without measuring anything. Halfway marks come the same way. If a finger and a pencil bother you, measure instead, nobody is watching.
Eyeballing trains your eyes, and there is one more thing hiding in it. A line that is not perfectly parallel is proof a human being did the work by hand.

How long does architectural carving take?
As long as it took a thousand years ago. Carving is one of the oldest trades on earth, and next to the rest of woodworking it has hardly changed.
Every other part of woodworking got machines. Routers first, then CNC, and a five axis machine will carve a great deal of detail. Not all of it. Nobody has yet built a machine that can carve in the Grinling Gibbons style. The most advanced tool for that job is a human hand.
The hours in this acroterion are the hours a carver spent 200 years ago, and 300, and 500, and a thousand. Same knives, same chisels, same gouges, same planes. The only real difference between him and me is which of us was better at it.
Scripture even has a carver in it who worked stone and wood and metal, and it calls him a wise man, filled with the spirit of knowledge and understanding. I picture him carving the Ark of the Covenant with the same knives and chisels I have. We live in a society of quick and cheap. Quick, and cheap. I do not think that is right.

Can a beginner carve a Greek acroterion?
The design is not that complicated, and I call architectural carving like this somewhat easy carving. None of it is deep. One knife does the bulk of it. For the base you need a marking gauge, two planes and a few gouges, not sculpture.
What it asks of you is patience and a sharp edge. If you have never held a gouge, First Cuts for Beginners is where your hands go first. Sharpening comes next, because every paragraph above depends on it, and Carving Tool Sharpening is the whole of that subject. To learn which tool does what before you spend money, All About Tools for Wood Carving will save you a drawer full of regret.
After this one, a door opens. I love acanthus leaves, and the school has a Greek acanthus and a Roman one. My lessons map lays the whole road out in order, and the old carving books in the library cost nothing to read tonight.
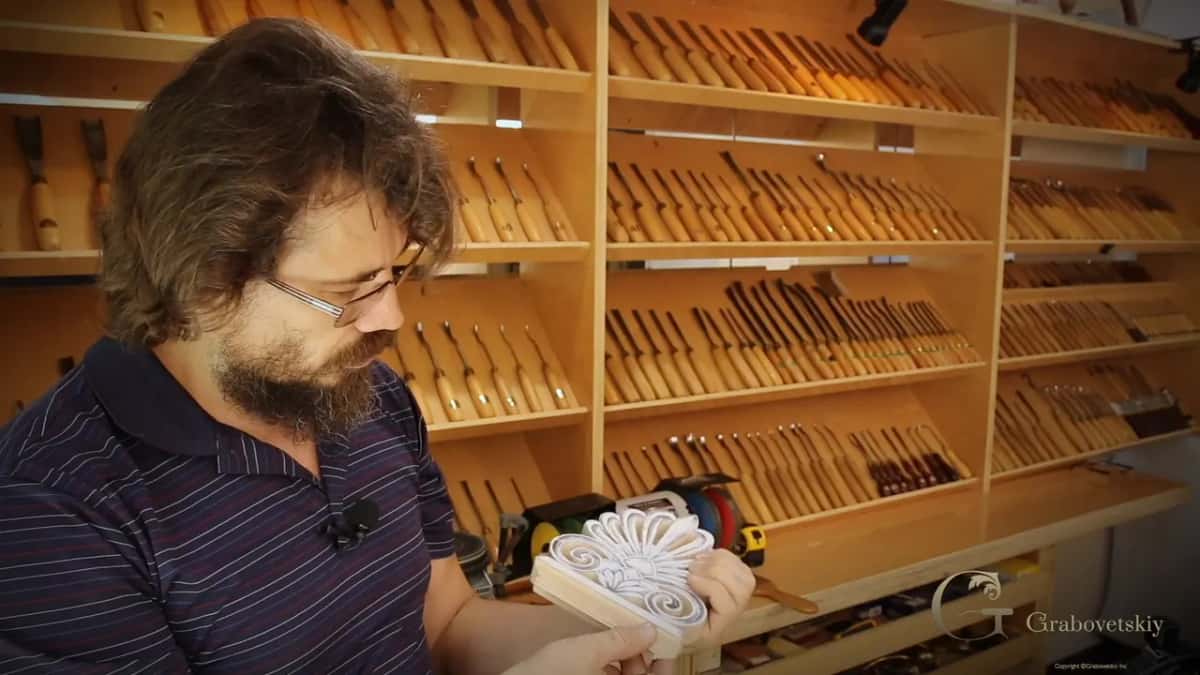
People want to know who is teaching before they ask what it costs, which is fair enough, so here I am.
So the drawing is glued down, the saw has been through it, and there is a board on your bench with a palm tree drawn on it. Where does the first line go? Come and find out at the bench, and by the fifth workshop you will be reading the grain before I say a word about it. Shall we carve?
Five workshops make up Carving Greek Acroterion, filmed at the bench, the first gauge line all the way through to the sandpaper, and the piece at the end of it was made for an architect as the prototype for a metal casting.
| The job | Reach for | Size |
|---|---|---|
| Marking the base lines first | Ordinary marking gauge | one line at 9/16 in, 14 mm |
| Sawing the outline | Scroll saw, once the glue is dry | keep the paper on |
| Flattening the base | Shoulder plane | any width |
| Knocking a high ridge off | Block plane | any width |
| Shaping the ogee | Back bent number 25 | 10 mm, 3/8 in |
| Opening the steps in the base | Number 8 gouge | 10 mm, 3/8 in |
| Cutting the first channels | V tool, tapped with a mallet | 3/16 in deep, 5 mm |
| Clearing the middle of a spiral | Number 5 gouge | 6 mm, 1/4 in |
| Rounding a petal in one pass | Number 7 gouge | 25 mm, 1 in |
| Cleaning a hollow | Number 7 gouge | 16 mm, 5/8 in |
| Nearly all the shaping | Number 12 carving knife | cheap, and sharp |
How it's done
- Draw it, glue it, saw it. Draw the design by hand, print it to size, glue the paper onto lime wood with Titebond straight from the bottle, and leave it overnight. Saw the outline on the scroll saw and keep the paper on. It is your only instruction sheet for the next five workshops.
- Mark the base before any steel. Score every line on the plinth with a marking gauge, dropping the point into a knife notch so it cannot drift. One line sits at 9/16 inch, 14 mm, and the small steps either side land just under 1/16, a millimetre and a half.
- Plane the base, then carve the ogee. Flatten the step with a shoulder plane and knock the ridge off with a block plane. Shape the S curve with a back bent number 25, 10 mm wide or 3/8 inch, and match that same profile on all three sides of the plinth.
- Separate the palmetto from its base. Stand a knife straight down on the line at 90 degrees with no lean either way. Then open a channel beside it with a V tool tapped by a mallet, about 3/16 inch deep, 5 mm.
- Bost the palm fan. Rough the whole fan down with a number 5 gouge in sweeping, rotating passes. Reach the line and stop there. Shape only. No detail yet, not one line of it.
- Round the petals, hollow between them. Take one pass with a wide number 7 to round each petal, then cut the concave beside each ridge. Those hollows give you the shadow line.
- Stamp the spirals with the gouge that fits. Work down through your number 7s, standing each on the drawn spiral until one matches that stretch exactly. Tap it in lightly, then follow the steel line with a knife instead of the pencil.
- Bring the whole piece to one depth. Cut the channel round each spiral to a sixteenth of an inch, one and a half millimetres, and hold that depth the whole way round. Clean the facets, buff the tools, then lift the paper with 100 grit.
Key takeaways
- Depth is the discipline here. The V tool channels go 3/16 inch at the most, 5 mm. Most of the rest sits at 1/8 or 1/16.
- Mark the base lines with a gauge before any steel touches the wood, and drop the gauge point into a knife notch so it cannot drift.
- A hand plane is a hand tool and the Romans had them. Reaching for a router bit is faking the job.
- One cheap carving knife, a number 12, shapes most of this piece.
- Carving only ever subtracts. Once the wood is off the board, the wood is gone.
- The hollow beside each ridge throws the shadow, and I let a hollow go a little deeper when the shadow needs it.
- Go a sixteenth of an inch, a millimetre and a half, then stop and look. You can always go deeper, and you can never add the wood back.
Frequently asked questions
What does an acroterion mean in Greek architecture?
An acroterion is the ornament sitting up on a Greek roof line, and the oldest design is a stylised palm tree on a flat base called an akroter. Carved stone in this style dates to about 450 or 500 BC, and the meaning of it was victory.
Is one carving knife enough for architectural work?
It can cover a lot of it. Nearly all of this acroterion was shaped with one cheap number 12 carving knife, and back in 1998 I carved a whole coffered ceiling that way in a month. Northern carvers worked with a single blade for centuries.
Is an ogee moulding Greek or Roman?
Greek. The Greeks were using that S curve before the Romans did, even though you will hear it called a Roman ogee. My own base gets its ogee from a back bent gouge, a number 25 at 10 mm, three eighths of an inch, sharpened inside and out.
What to carve next
More on this: Acroterion, the ornament on a Greek roof line, Palmette, the stylised palm behind the design, Ogee, the S curve moulding on the base, Tilia, the lime and basswood tree, Marking gauge, how the tool scores a line, Relief carving, from shallow to high, Chip carving, the one knife tradition, Grinling Gibbons, whose style no machine can carve, Metal casting, what a wooden prototype becomes