

Alexander Grabovetskiy, woodcarver, School of Woodcarving · Published 2020
How do you carve leaves on a turned vase without losing its shape?
Quick answer: Keeping a turned vase's shape while you carve leaves is a matter of shallow wood removal. Lesson 2 kept the background to about 1/16 in, thinner still near the curvature, and the middle of each division and the stem stayed as high as the turning left them.
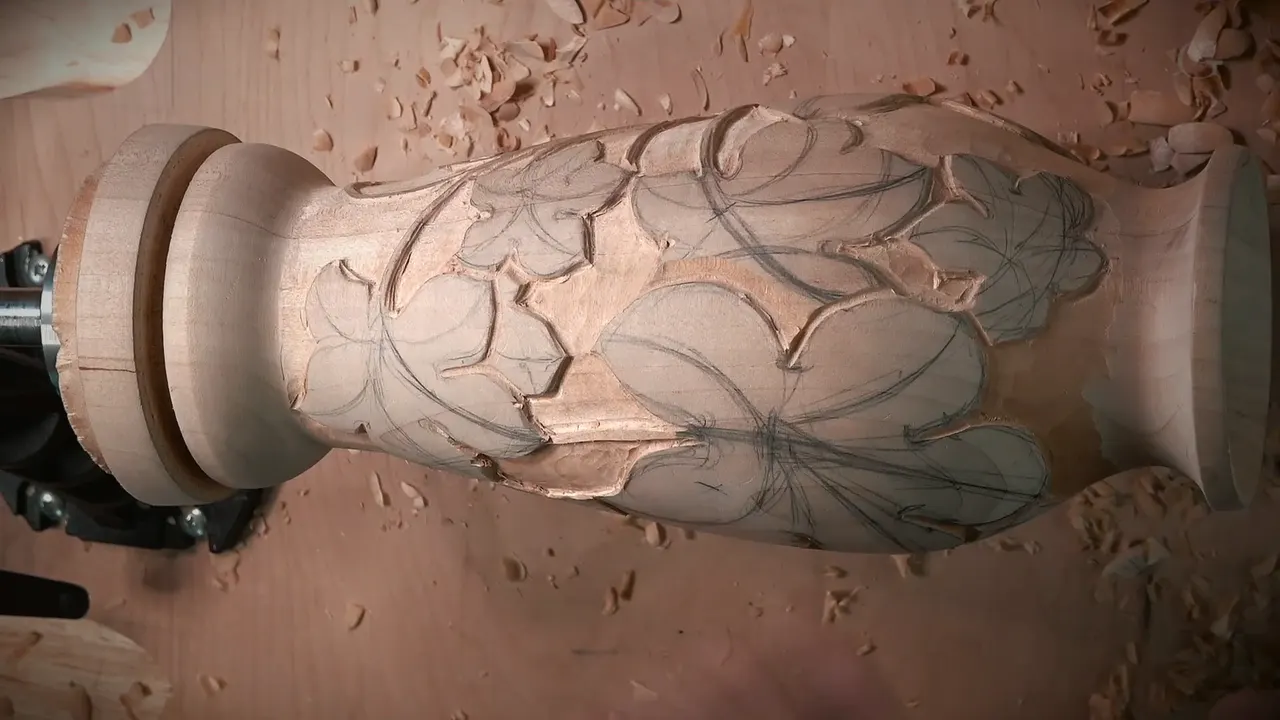
Carving leaves on a turned vase without losing its shape is taking the wood off the round in thin layers while the middle of every division stays at the height the lathe left it. In lesson 2 of this wood carving vase course the background goes to about 1/16 in (1.5 mm), a little deeper in some areas, and right at the curvature it thins to about 1/32 in (0.8 mm). Even the stem keeps its original height. Overlaps get sliced lower, each leaf gets its hollows and rounds, and the last part puts in the notches.
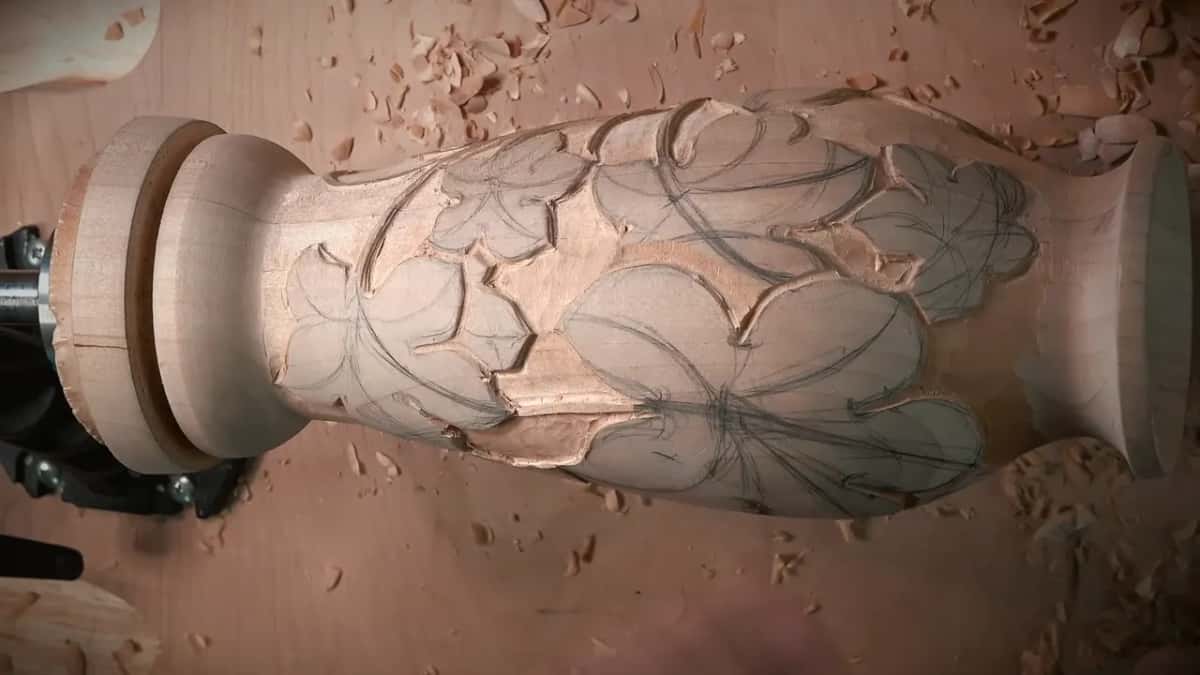
Have you run your hand over something smooth and round, a bowl or a stair rail? Can you see how one deep gouge mark would break that line? Then watch how slowly the wood comes off in this lesson.
Turning made the shape before lesson 1 even started, and lesson 1 drew the design onto the bare turning. Here the carving starts, and I will give you the depths I used, the tools in my hand and the places where I slowed down and said so.
Lesson 2 on the vase in seven lines
Background stays near a sixteenth, and at the curve it thins toward a thirty-second.
Every division keeps its middle at the height the lathe left.
Where a stem or a leaf goes under another one, a number 3 slices it lower.
Red meant high, blue meant low.
Concaves came from a 10 mm #11 veiner, leaned so they cast shadow.
Its stem stayed narrow and kept full height.
Notches with a letter S movement split each division into three.
Which gouge takes the background off a wood carving vase?
A number 7 did most of it, a fishtail 14 mm wide, a little bigger than half an inch. The letter F on it means fishtail. It looks like the tail of a fish.
The size I chose, 14 mm, is the number 7 most sets carry, and I said any number 7 will work, 12 mm or 10 mm.
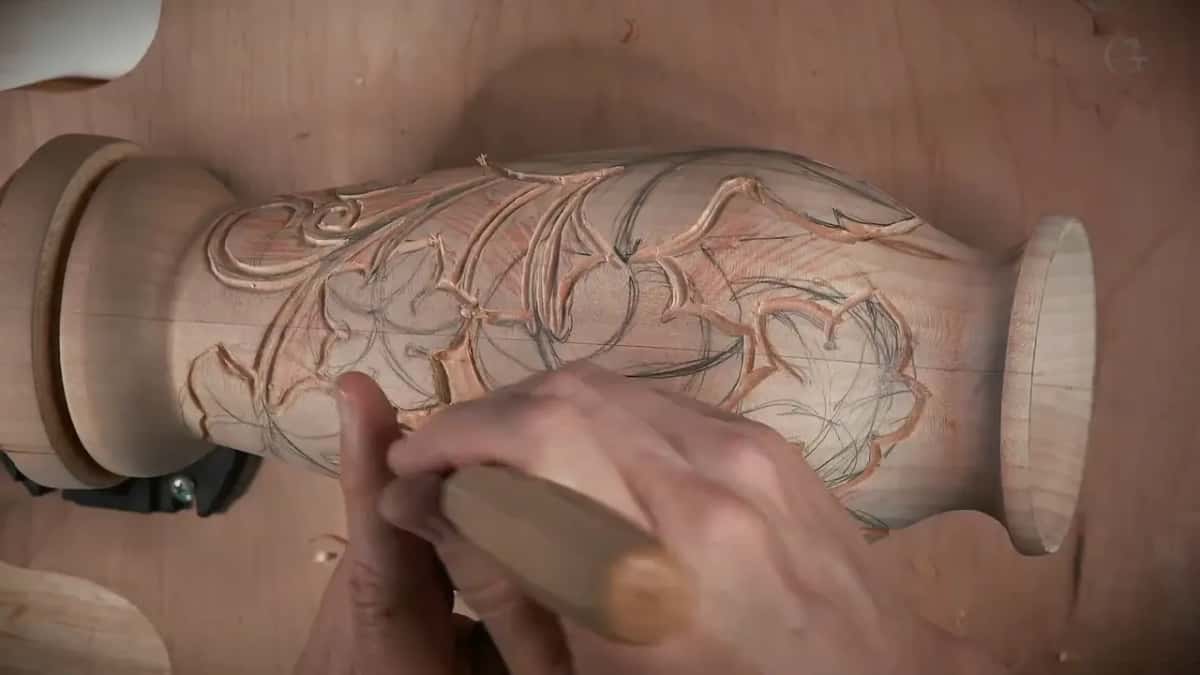
I take the background off without talking at first. I keep it to a sixteenth of an inch at most, and every pass goes across the grain.
A few areas go a little deeper. Those are the spots where leaves overlap, and there the same #7 shaves in and blends underneath.
A flat panel is a different job, and two other pages cover getting a relief background flat and the background on a low relief panel.

Why slow down where the leaves meet the curvature?
Right there the round is easiest to spoil. On camera I put it this way, we have to blend that, and blend it nicely, and make it look round, because we can mess up.
Closer to the curve I don't dig as deep. The background blends in out of nothing to get to the picture, and in one spot it was maybe a thirty-second deep, with a sixteenth right beside it.
The tool starts straight. Then I lean it to the right, toward the outline, almost across the grain but angled, maybe 40 or 45 degrees, and slice.
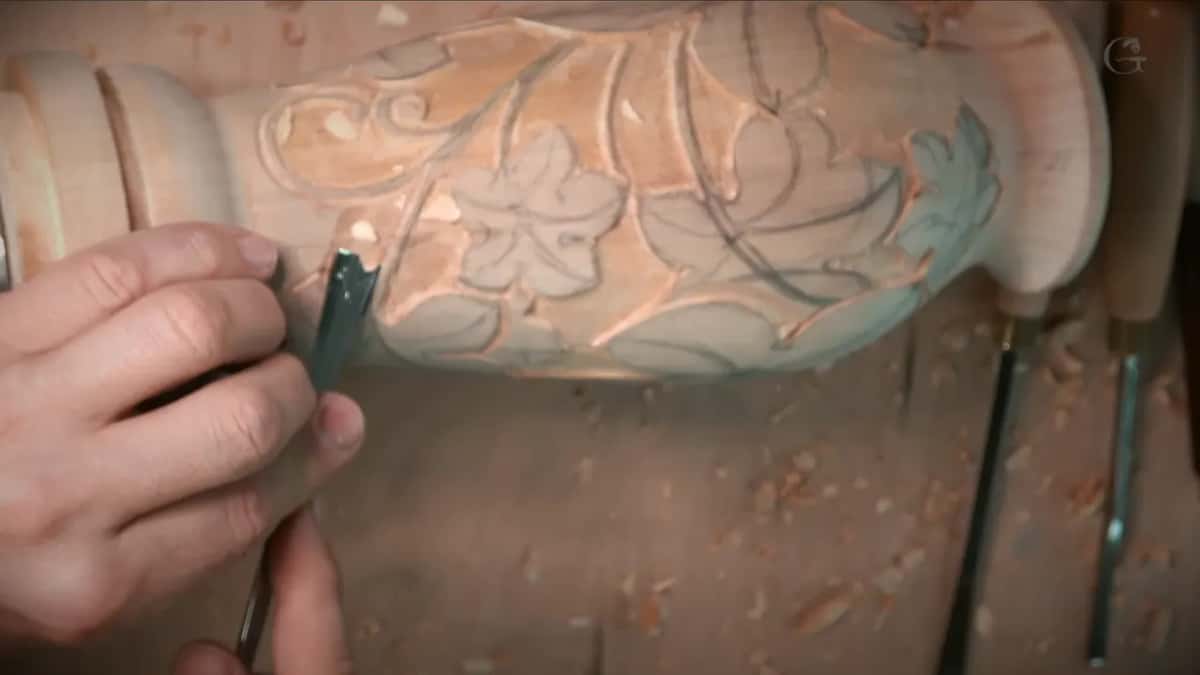
While I worked I added four number 3 gouges, at 3/4 in (about 19 mm), 3/8 in (10 mm), 1/4 in (6 mm) and 1/8 in (3 mm). Turned upside down, they clean the ridges.
The 10 mm was a little too big beside the curvature, so I took the 6 mm, leaned it a little to the right and made the first pass toward the design. I really don't want my edge to touch the curvature. That is why I did not go really deep there.

Before that, a 3 mm #11 went straight down with the flute facing out, and I said it was a little too early to undercut.
The back bent #3 came out at the end of that part. If you understand how the grain runs, you always start from the upper position and go downhill, and that tool needed sharpening.

What keeps each division's middle at lathe height?
Leave it alone. When I lower a section next to a high spot, I go in from the middle somewhere and keep away from the top.
In part 2.5 I marked one big leaf for you. Red marker went on the high spots, the convexes, and blue on the deep hollows, the concaves. The middle line of every division is a high spot, a ridge of convex.
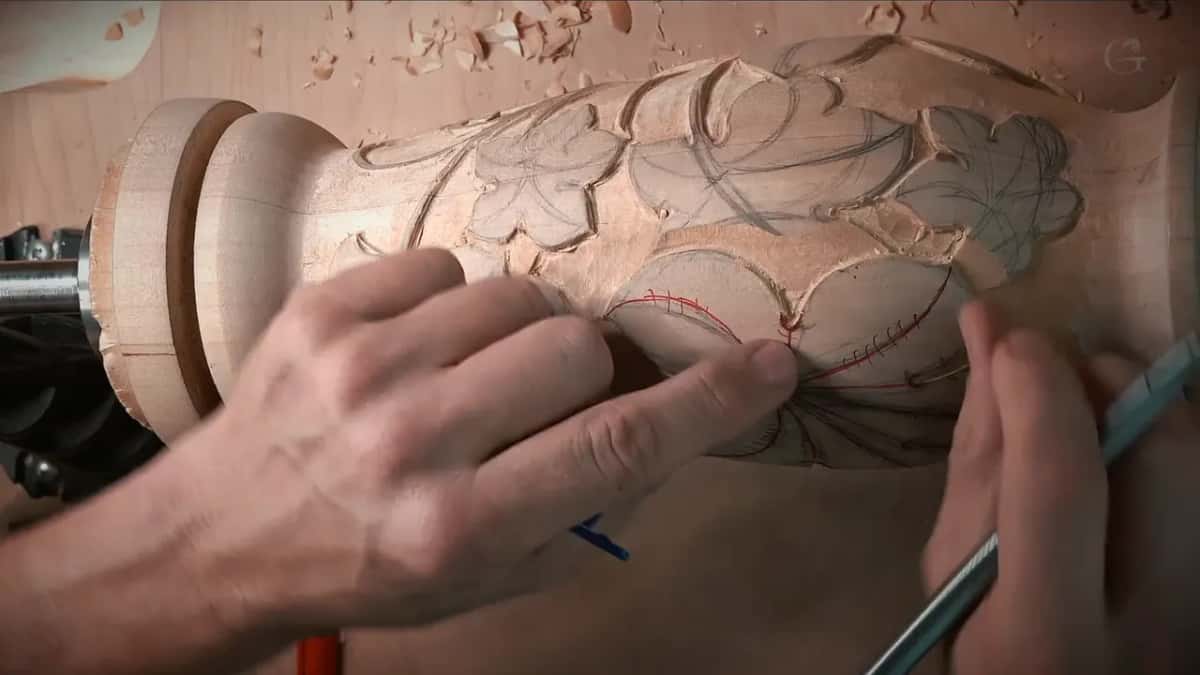
I marked only that one leaf. There is not much material to remove, and on the rest I want those high spots as high as possible, almost untouched. Otherwise we are going to lose the overall shape.
That middle sits about 60 parts out of 100 between two points, 62 percent to be exact, and I eyeballed it instead of reaching for calipers. The golden ratio behind that number is the subject of the course page.
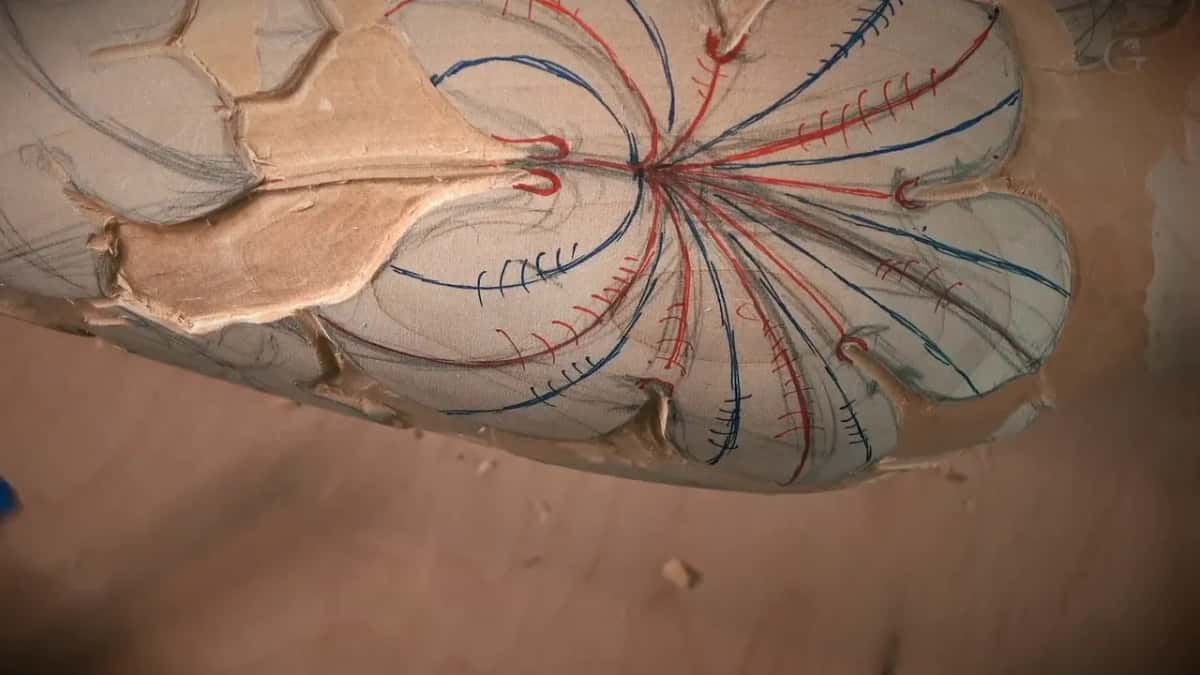
Later, in part 2.9, I stopped to show it. I didn't touch the center of that division, and all of those centers stay high, so I know for sure I will not lose the overall feel of my shape. That meant the shape of the vase itself.
The general idea of a high spot has its own page, from a flat leaf in the Venice Room.
What makes a stem look like it goes under a leaf?
A slice, and a shallow one. Wherever a stem goes underneath a leaf, I take any number 3, here the 10 mm, and slice it so it feels like it goes underneath.
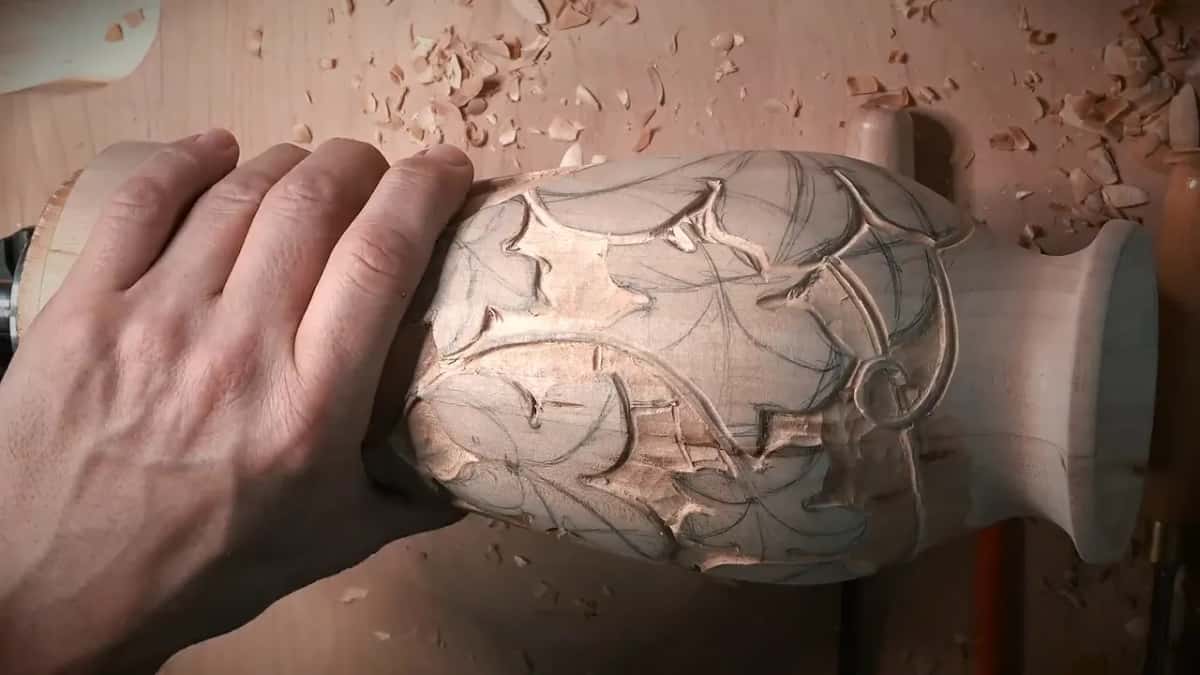
One leaf on this vase grows from underneath another, so that section gets blended lower too. It is not the final depth yet. The movements inside the leaves still have to come.
Grain decides the direction. Between two high points the grain ran toward the hollow, so I came in from each side, and that gave me a clean, nice result.
A leaf goes under the stem in part 2.4. I took the 3/4 in #3 upside down there, and I said I could go a little deeper on that side to match the opposite side of the stem.
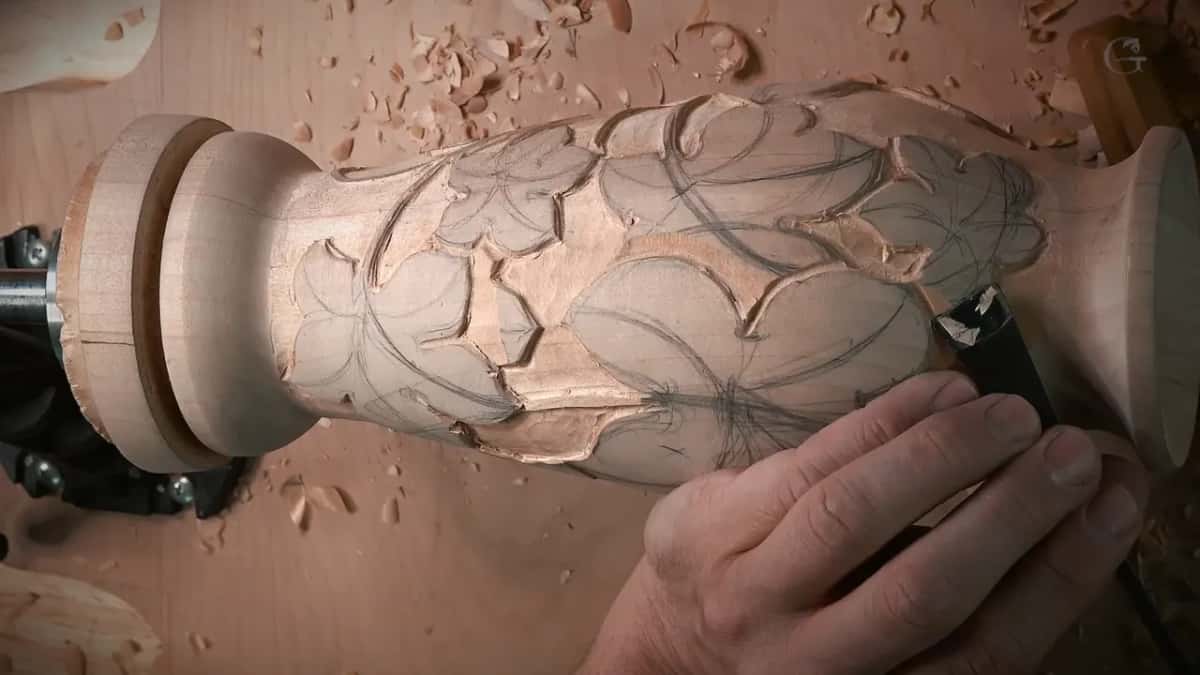
Then the small #11, flute out at about 45 degrees, took off the fuzz. No undercutting yet, I said, and those passes were not final. At one point I looked again and said, you know what, I could knock this section out.
A part of a leaf that grows from underneath and lowering a section so it still flows both have pages from the Venice Room.
Which gouge carves the concaves on a vase leaf?
A number 11 veiner, 10 mm, three-eighths of an inch. The #7 could do it, but it would not give me nice movement close to the point.
I like the #11 since it is shaped like a U. The reason is that I can exaggerate one side over the other, and that lets me play with the shadows.
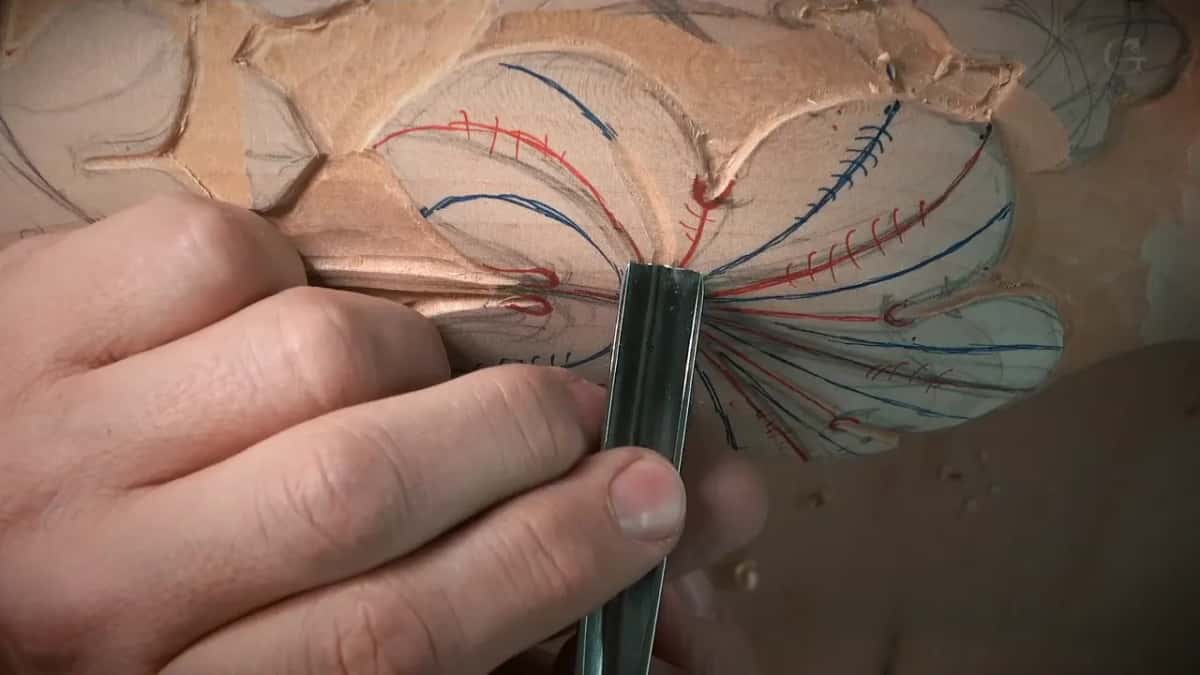
The concaves go in first, so the convexes can be exaggerated later. The tool goes right on the golden spot in the middle, little by little, without pushing too hard. I go to about a sixteenth, and sometimes deeper, three thirty-seconds, a couple of millimeters.
At the edge it runs right on to the escape. What I don't want is a spooning effect, where people near the edge try to escape upward and the shape stops looking natural.
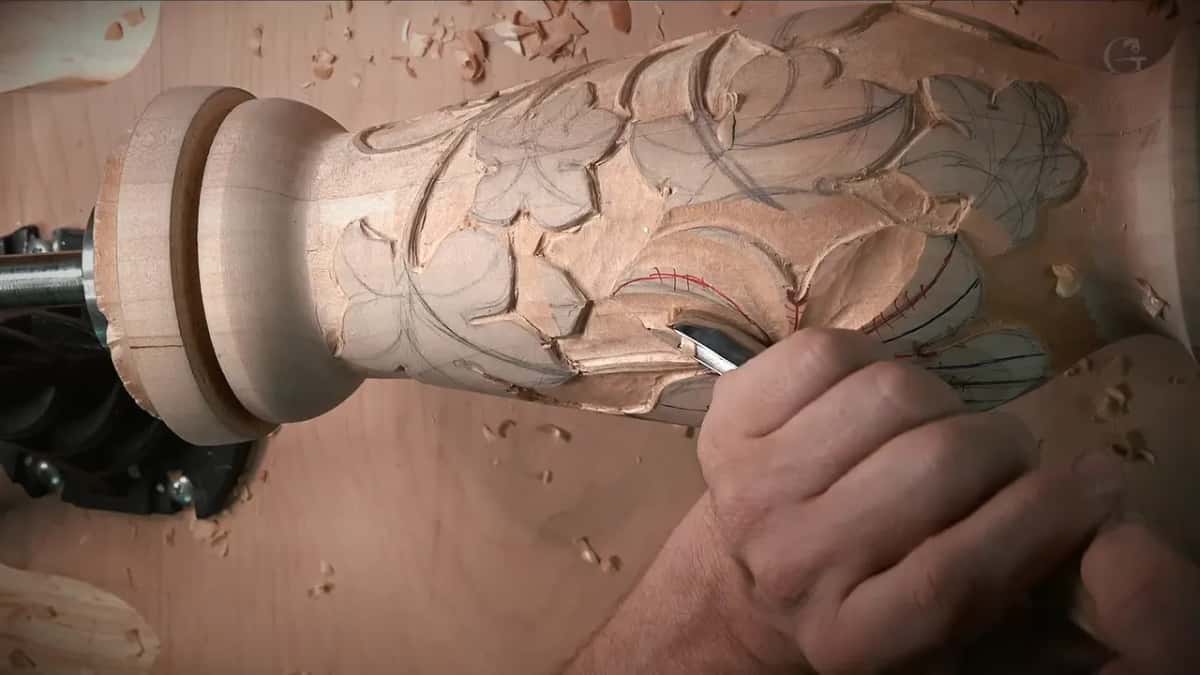
A second pass leans a little to the left and blends, then the same to the right. With just the wing working, this tool becomes almost a number 3. A multi-tool in one.
On one hollow I looked and said I didn't really like how it looked, and that I can deepen that side a little. The goal is as much 3D as possible without digging too deep.
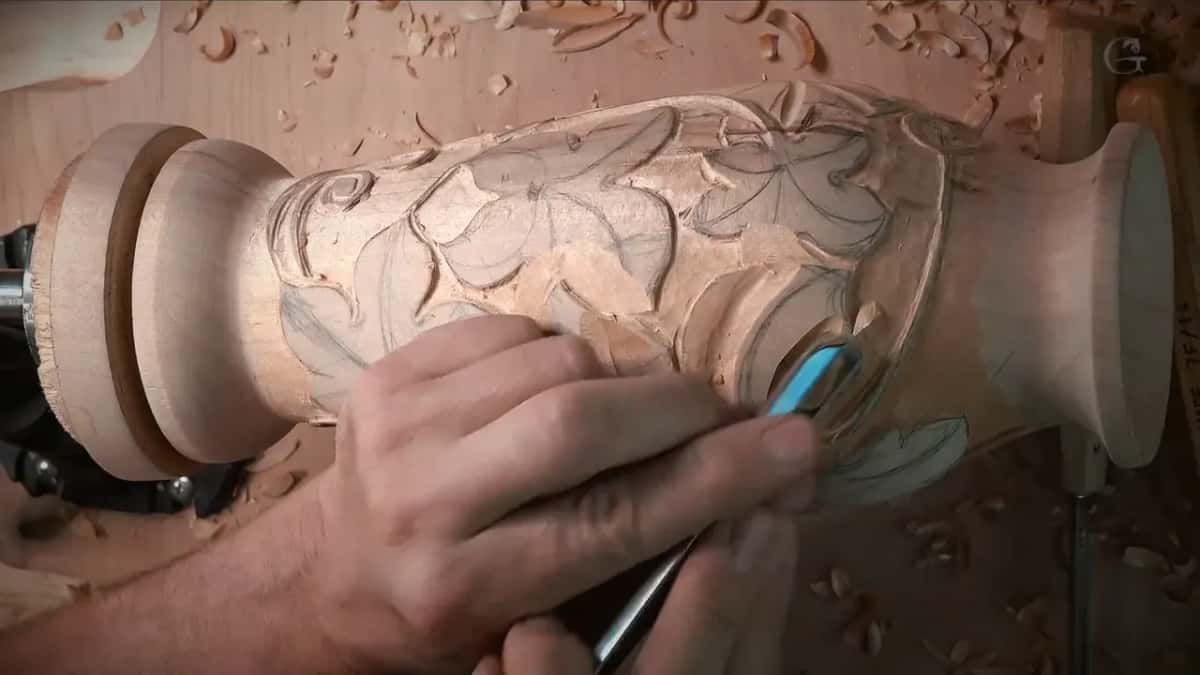
For the rounds I thought about a #7 upside down and passed on it, because these hollows are not deep. I did the blending with a number 3 and kept the middle line, since I still needed it for the next step.
Across one leaf you get a high ridge, a convex out to the edge, a concave in the middle, convex again, concave again, and one more convex running to the edge.
Here are the gouges that did most of the work on the leaves in lesson 2.
Tool | Job | Where |
|---|---|---|
Fishtail #7, 14 mm | took the whole background down, around a sixteenth of an inch | the first three parts, mostly silent |
Four #3s, turned over | cleaned the ridges near the curve, sizes from 19 to 3 mm | around the curvature in part 2.2 |
Wide #11, 10 mm | dug the concaves from the golden spot, leaning it to make shadows | parts 2.6 through 2.8, all divisions |
One #3, flipped over | shaved each middle ridge back to the red line so it shows | every division, parts 2.8 and 2.9 |
Narrow #11, 4 mm | deepened the hollow beside every pipe until it started casting a shadow | right next to the eyes, 2.9 |
Small #11, 3 mm | sank both sides of the stem and dug out the two eyes | part 2.10, just before any undercutting |
Tiny #11, half millimeter | went under the stem with the flute turned to about 11 o'clock | one of my go-to tools, 2.11 |
How do you bring the middle ridge back after the hollows?
I turn a number 3 over. In part 2.8 I took the 10 mm, three-eighths of an inch, and shaved the hollows to the red line, on every one of the five divisions.
We really need to see that middle ridge, otherwise we are going to lose the movement. Or take a #5, that will work too.
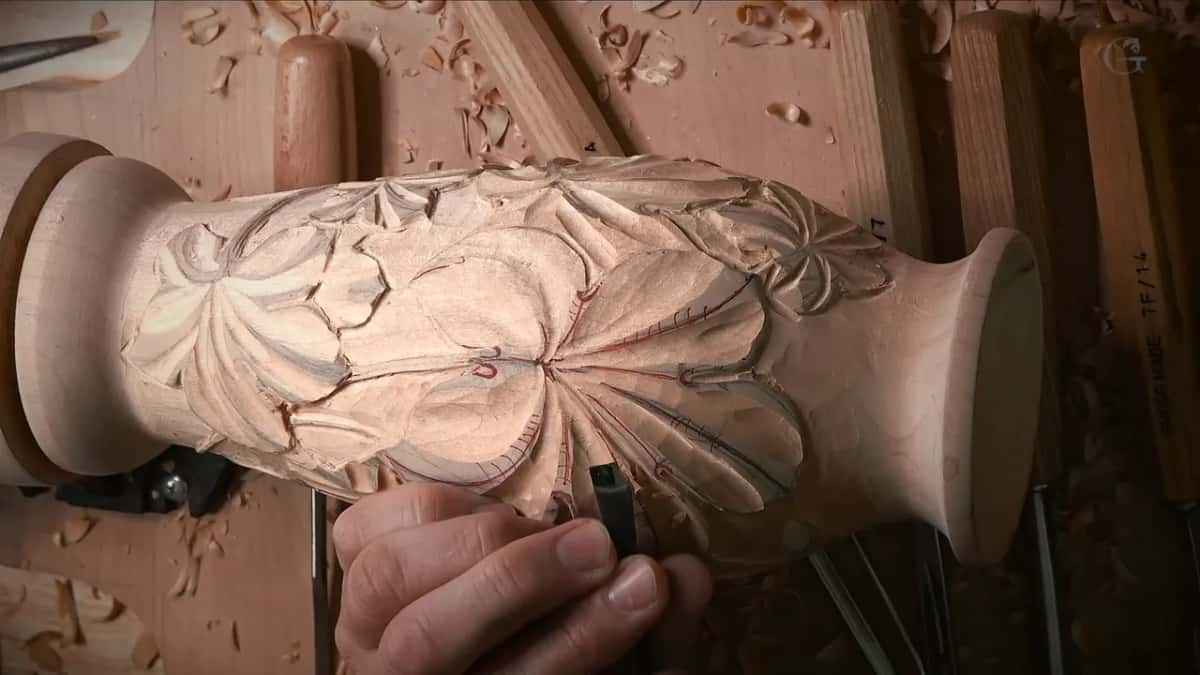
If I dig a little into my earlier pass, that is okay. It is not the final destination. I check the grain direction first, since I don't want to make a mistake.
The pipes come next, the ridges that run out of each eye toward the center, and an eye is where two leaves come together, like a human eye. I would rather have more sweep on the pipes, a #5 or even a #7, since they need to be more round.

Beside the pipe I went a little deeper with a 4 mm #11, one side and then the other, and close to the eye it became more of a blending pass. See, it's already casting a shadow.
Then a 4 mm #7 upside down. The grain ran crosswise there and I had to be really careful, and after one pass I said, that's no bueno, and reached for the number 5.
Most of this I did off camera, and in part 2.8 I also stopped to set the vase a little better in my vise.
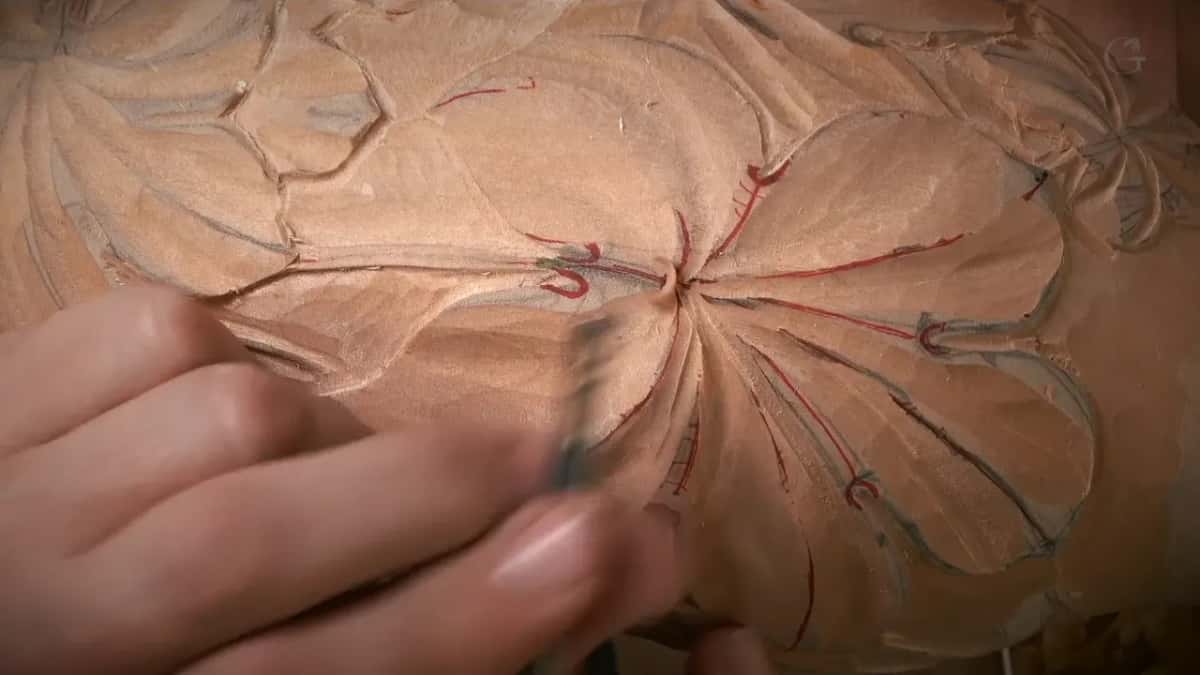
Can a stem stand above the leaf on a vase?
You lower the leaf on both sides of it and keep the stem at full height.
That stem runs to the golden ratio point. I want it to look as if it goes above the leaf and then dives in, so a 3 mm #11 makes a hollow on one side, then the other, about one sixteenth deep.

Next come the eyes beside it. I excavate each one with the same 3 mm, straight down and then out to the escape, and a flatter gouge blends the leaf so it seems to slip beneath it. Drawn in red, each eye looks almost like a water drop.
I can't go too deep here. This vase is hollow inside, and at that spot I have only a quarter inch, maybe 10 mm to the highest point. The wall itself is covered on the course overview.

Still, I need some kind of shadow spot. Then a 1 mm #11 digs it out, and with the same tool I said I can undercut inside, under the golden point, for a really good shadow.
The stem itself is only about a sixteenth wide, and that width has to hold all the way along. A pencil line marks its middle. The same 3 mm veiner makes the first pass beside it.
To undercut the stem, I place the tool straight down, then rotate it counterclockwise to about 10 or 11 o'clock, a move I also told on the page on European size tools. Not too deep. But I really need that shadow.
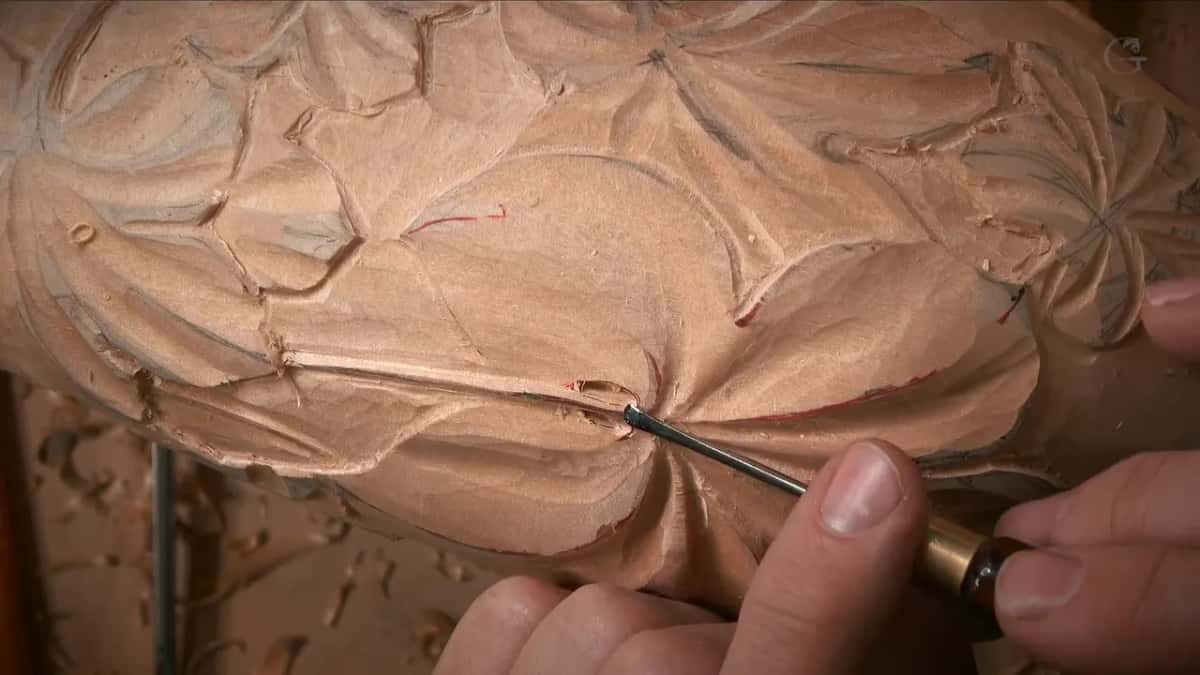
The other side gets the flute turned the other way, to about 2 o'clock. A #3 shaves the stem to its final width. It does not have to be exactly a millimeter and a half, it could be a little bigger.
Then I chamfer it from both sides until it rounds over, a fillet more than a chamfer in the end. I kept that stem at its original height, so the overall shape is not lost.
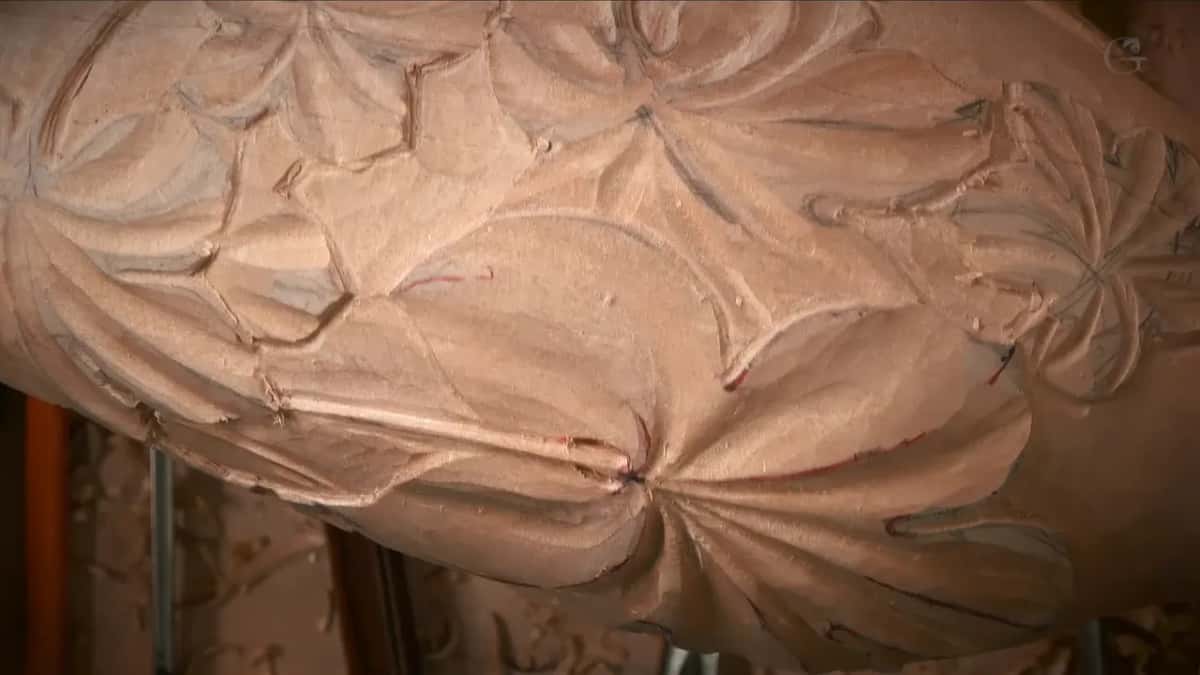
A half millimeter #11 is one of my go-to tools, and here it undercuts again, flute facing out, at about 11 o'clock. I said I can make that stem airborne if I want to, carving at it on both sides, and that I was not sure I would. It would still be strong, I said, because of the way the grain direction runs there.
A flat leaf built around its stem and ribs and how thick a carved branch should be are both told on other lesson pages. By the end of that part I said I had got too many tools on my table.
What do the notches add at the end of lesson 2?
Each of the five divisions gets three subdivisions inside it, and three is a Fibonacci number too. From the middle point you measure between two marks and take six parts out of 10, and that line is like a vein, the center line of a subdivision.
Then each subdivision gets a notch. A letter S movement is a good idea for it, so it keeps drawing attention to the eye.

The notch is a relief cut with a #11. Four millimeters or three will work, and since I used the 3 mm before, I took it again, followed the outline I had just drawn and went maybe straight down.
By then you can see a grape leaf almost revealed, and the same rule goes onto the medium leaves and the smallest ones.
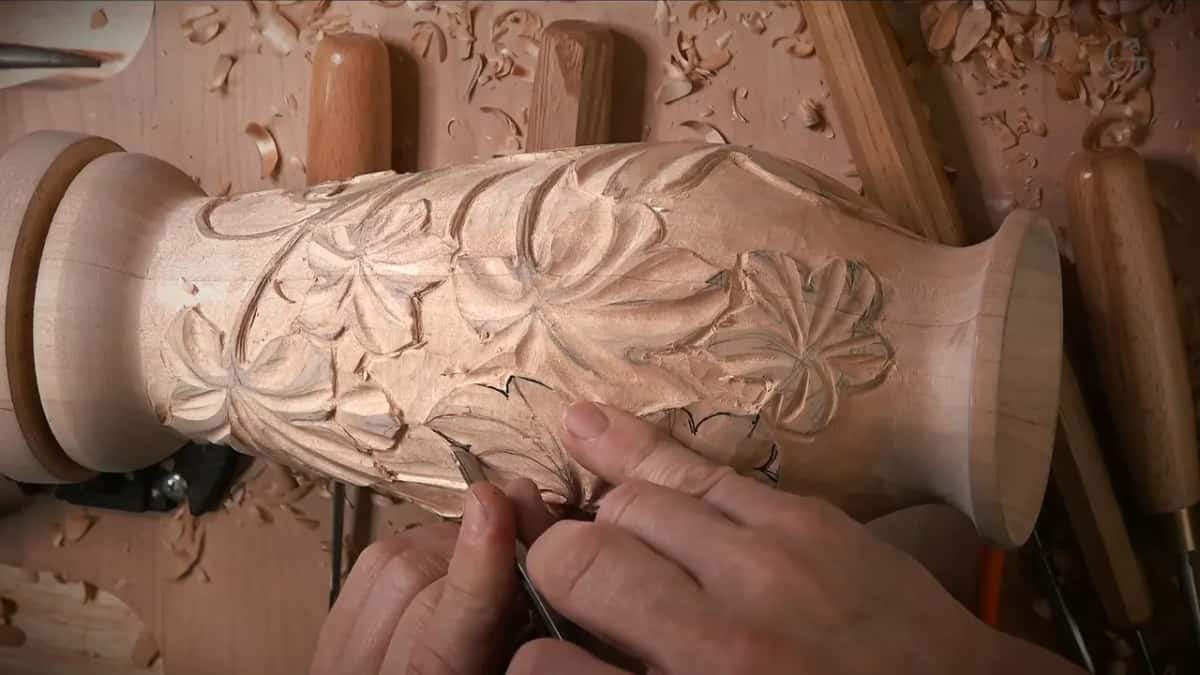
Undercutting, I said, comes later on. For now the main divisions are there, five of them, with three subdivisions in each, and more subdivisions still to come. Sub-sub, you could call it. I don't know if there is such a thing as a sub-sub.
Can you take a sliver off with a gouge and stop at a pencil line? Then this vase is within your reach, one shallow pass at a time.
The full lesson runs twelve parts, and the course is five lessons on one small vase, with the turning already done on a lathe. Tuition and Access are on the plan page. If a round feels like too much at once, the same grape vine sits on a flat surface in The Tray of Blessing, and grapes have their own course in Carving Grape Onlay.
How it's done
- Lower the background with a #7. Work crosswise to the grain and stay shallow, a sixteenth at most, going a little deeper only at the overlaps.
- Ease off at the curvature. Near the curve, thin the depth toward a thirty-second and switch to a smaller #3, leaning it toward the design so its edge stays off the curvature.
- Slice the overlaps lower. Wherever one part passes beneath another, slice it lower using a number 3.
- Hollow each concave from the golden spot. A wide #11, 10 mm, starts in the middle and runs on to the escape, roughly a sixteenth deep, leaned left and then right to blend.
- Bring each middle line back up. Turn a #3 upside down and blend the hollows up to the middle line, leaving the center of every division untouched.
- Raise and round the stem. Sink both sides with a 3 mm veiner, keep the stem narrow, near a sixteenth, go under it, flute near 11 o'clock and then near 2, then chamfer it round.
Frequently asked questions
How deep should the ground go around leaves carved into a vase?
In lesson 2 I kept it to roughly a sixteenth. At the overlaps the ground drops a little more, and right beside the curvature it thins to about a thirty-second, blending in out of nothing. I worked crosswise to the grain the whole way.
What size number 7 gouge removes the background?
Mine was a 14 mm fishtail, a little over half an inch, picked because that size is common in sets. Any number 7 will work, I said, and a 12 mm or a 10 mm will do the same job on the ground.
Should you mark the high and low spots on a carving?
For the camera I marked one leaf, red on the high convexes and blue on the deep concaves. On the rest I skipped the marker, since there was not much material to remove and those high spots had to stay almost untouched.
What to carve next