

Alexander Grabovetskiy, woodcarver, School of Woodcarving · Published 2020
How do you blend two stain colors on a wood carving?
Quick answer: Running one stain color into another on a carving is a job for a clean brush and plain denatured alcohol. On this vase the colorant was mixed in alcohol so it dries fast, black near the foot ran into a deep lavender, and the lavender faded out to almost bare wood.
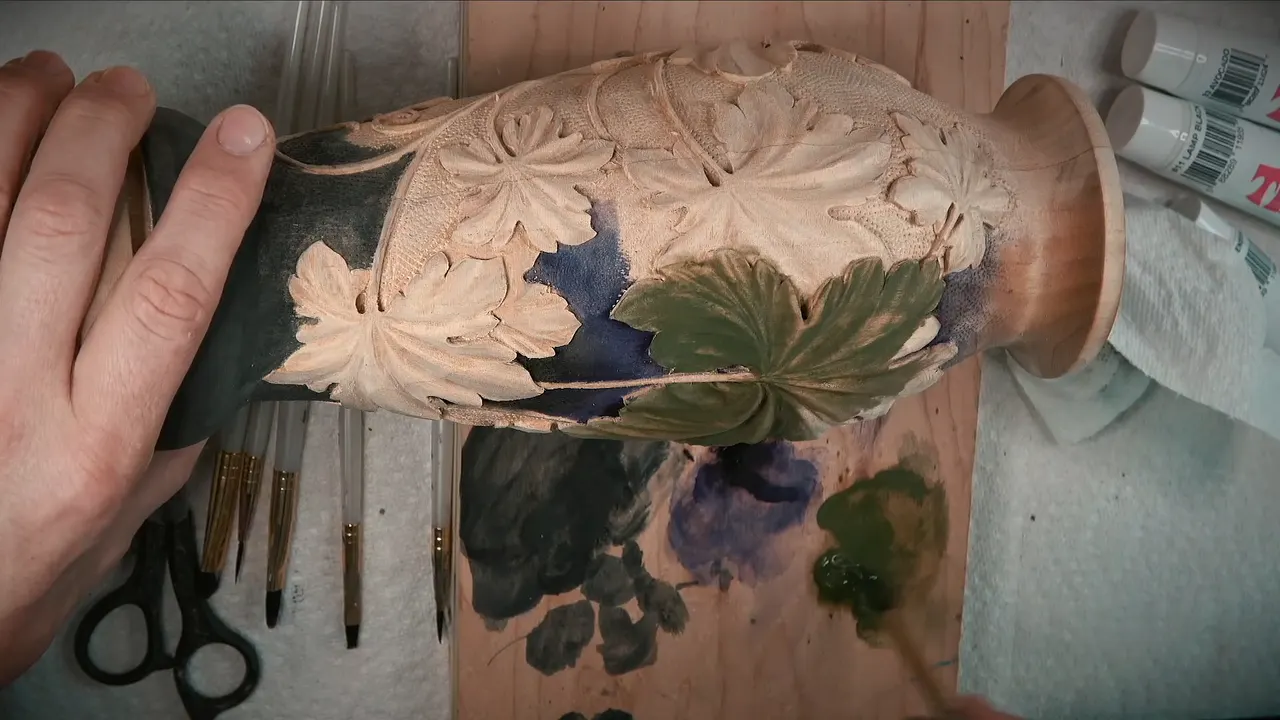
Blending two stain colors on a wood carving is working the border between them with a clean brush and plain alcohol until no line shows. This is the part of the vase course where I stain a wood carving in more than one color and have to blend it nicely. Black went on first, down near the foot. A deep lavender came in above it, and out on the background the lavender faded to almost bare wood. I mixed the colorant with denatured alcohol so it dries fast.
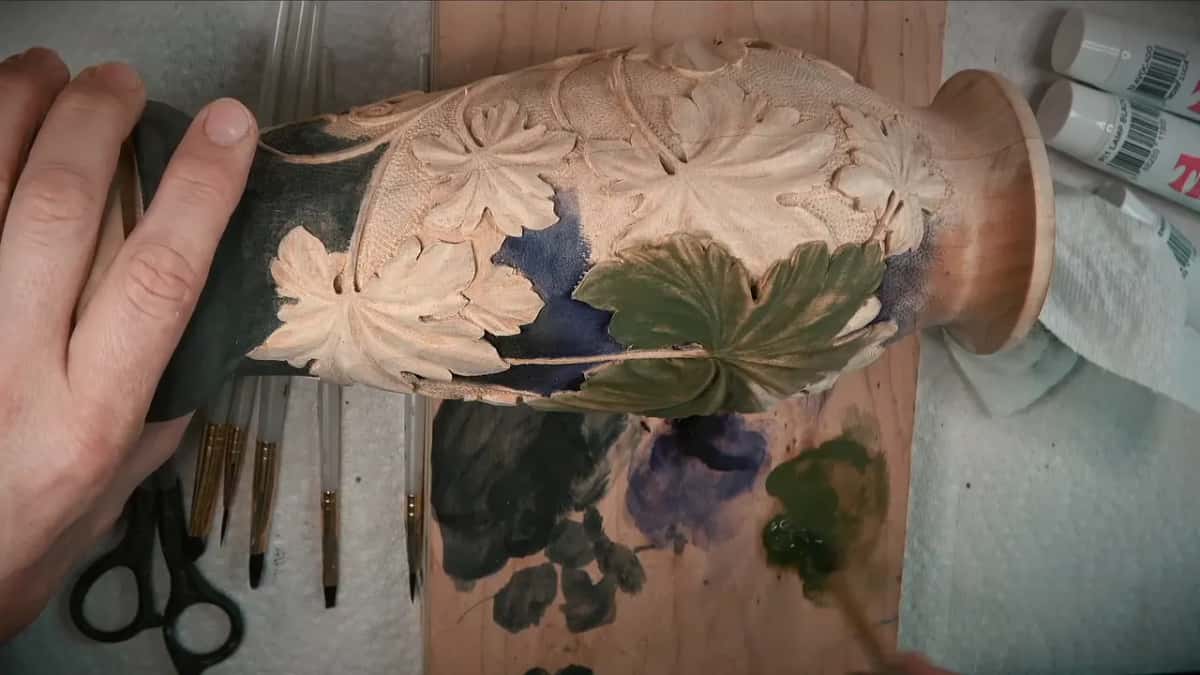
Have you ever watched the sky after sunset, dark down low and pale up high, with no line anywhere? Or grape juice in a glass, nearly black where it's deep? That fade is what this lesson puts on a carved vase, with brushes, some alcohol and patience.
I'm going to be honest with you. Personally, I prefer the natural color of wood. The color on this vase was a request, so I really had to do it, and here is what the camera caught, mistakes and all.
The blend on this vase, in six lines
The colorant is Tints-All, a paste, mixed into a little denatured alcohol in a plastic cup.
Alcohol, because it dries fast.
First comes black, low on the body, and the blotches of a first coat get ignored.
A deep lavender, close to grape color, sits above it.
Where they meet, a clean brush carrying nothing but alcohol works the line until the two colors run together into one fade.
Out on the background the lavender thins to almost nothing, and the leaves get avocado green.
What did I mix the stain with?
Tints-All, a paste colorant for paints and stains, thinned with a little denatured alcohol. I'm not the biggest fan of acrylic colors or other artificial colors. I really like tints. It leaves a see-through color, so you still see all the grain of the wood, and I don't want to lose the feel of the wood. It's not ceramic or plastic.
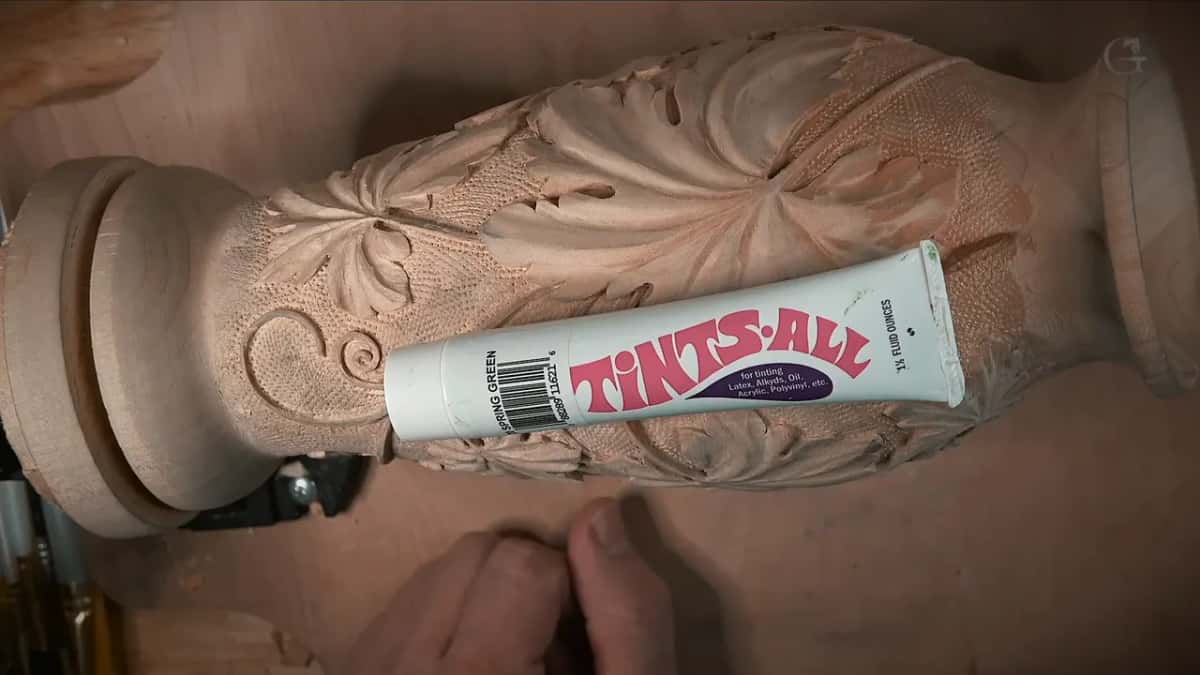
The tube lying on the vase in that picture is Spring Green, one and a half fluid ounces. I have about 36 colors, the full line, I believe, and I use mainly a few of them. Maybe I'd add something to the lavender, I said. That paste mixes with different solvents. Plain water is fine if you wish, and I've done that many times. Lacquer base or oil base will work with it, too. Here I took denatured alcohol, because it's fast drying, and for me that's really important. Water would work. I didn't really need it.
Pour a little alcohol into a plastic cup. Not much. Then add the black paste and mix it in, until it comes out as an absolutely black stain. So we're going to ebonize it, I said. Then I checked how black we'd got, and it was pretty black.
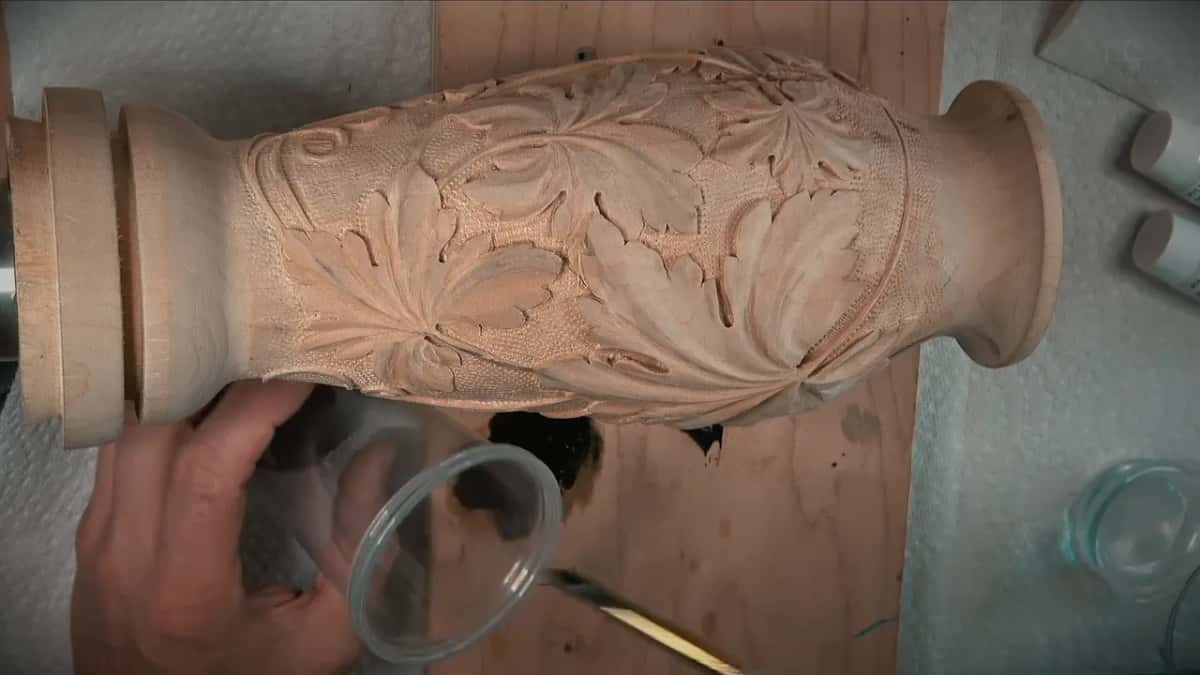
What I like about this brand is that it's a paste, so I can use it almost the same as acrylic. Powders and other things for mixing stains are out there too, but I really like the idea of paste.
Water and denatured alcohol are probably among the safest ways to go, by the way. I just don't encourage you to drink it. It's still chemical based.
Why lavender on a vase with no grapes?
The color says grape, even though no grape is carved anywhere on this vase. I chose my colors before the first brush went in. There's going to be a transition from a completely lamp black, I said, true black at the base, and then lavender, close to grape color.
The tube says lavender, but it's much deeper. It's more like a real grape color, almost the color of Concord grapes, and I said I should call it grape color instead.
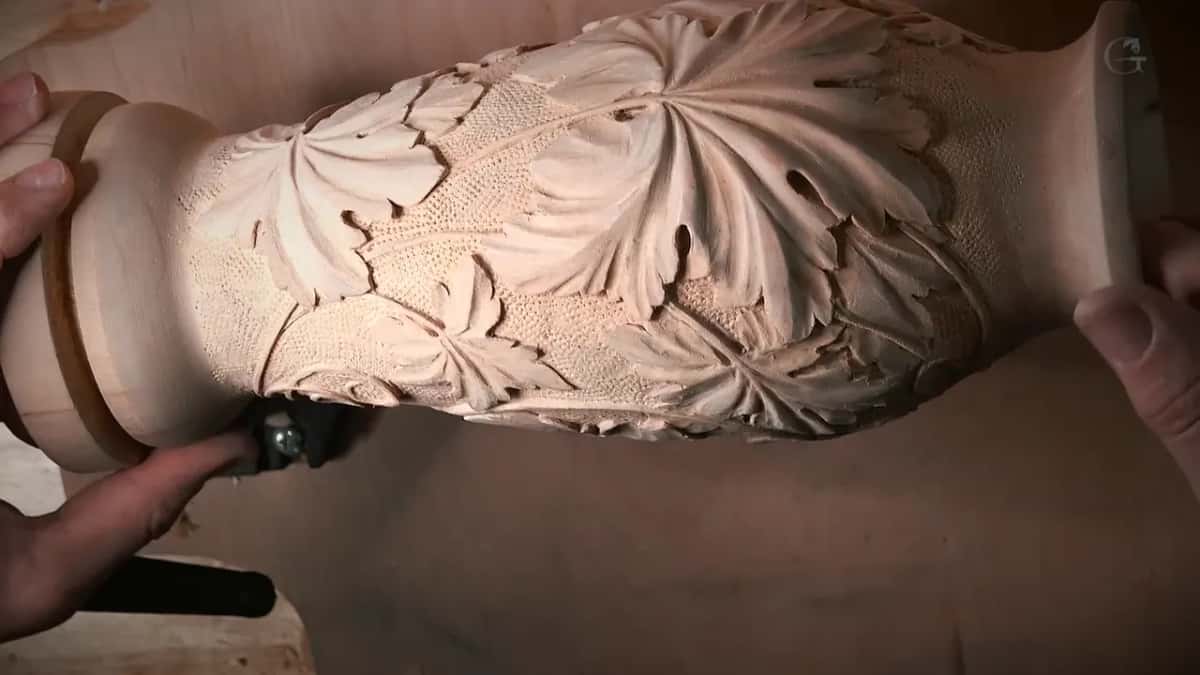
Lamp black is a pure black, and it goes on at the very beginning. Avocado is the base color for the leaves themselves. A spring green was in the lineup too, really bright and fresh looking. Raw umber, gold and white were there as well, and they wait for the next lesson.
Some of you would probably say, why would you do that, I like it without any stains. I like it too. But sometimes it's a good idea to add some color, especially on a wood turning project, because wood turners really love that stuff for unique finishes.
Whether a carving needs stain at all is its own question, and so is whether to paint one. If your piece is headed for paint, paint grade and stain grade are two different jobs, and a painted carving starts in the hollows.
What happens before the first coat?
The carving gets a light sanding, the dust comes off, and the bench gets ready for drips. There's a lot more I could carve, but I'm happy with what I see. The screws need a little better connection, too.
I used Abranet at 400 grit, only to knock down the high spots. Really, I don't have to do it. But on a turning, I know it's sometimes a good idea to knock down sharp points, and turners really like to sand everything. Before any color, the background also got punched, with a set of four background punches and a normal hammer, not a mallet.
Sanding leaves some sawdust behind. I wiped the vase with a paper towel and denatured alcohol, the same stuff I use for mixing the stain. Not much came off, because I didn't sand it with a really high grit, only 400 or so. Keep an eye on the towel, though. It can catch on sharp corners and leave stuff behind.
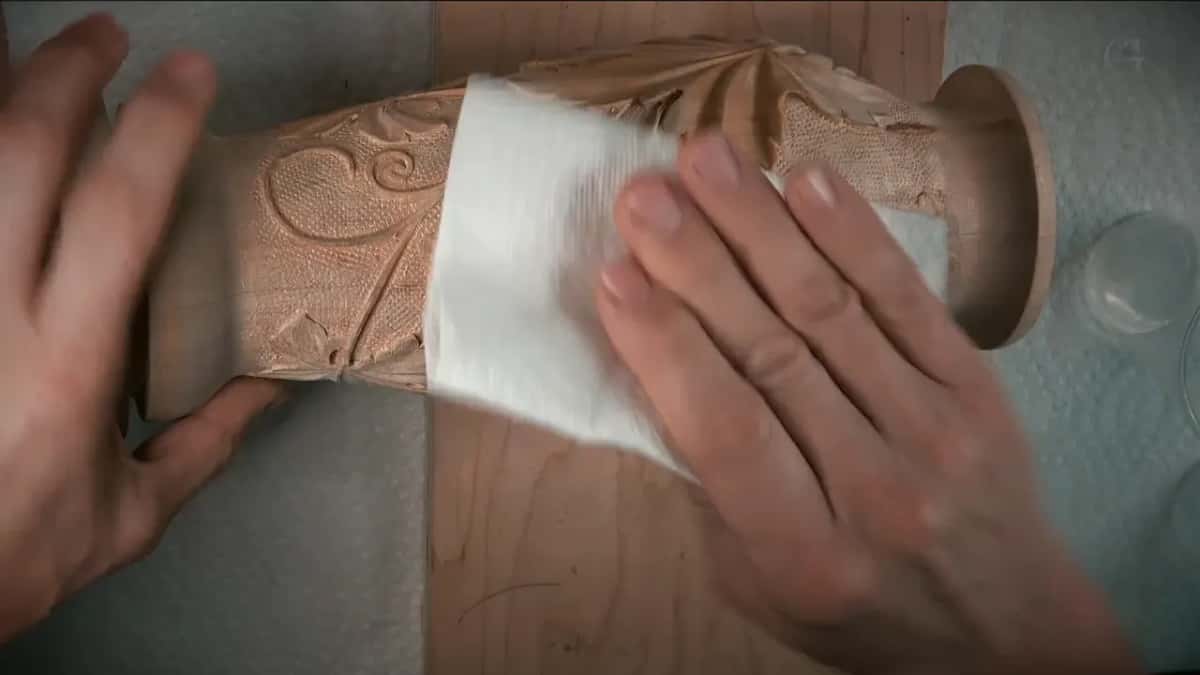
Before the wipe came the setup. Paper towels go down under the piece, just in case it drips. Several plastic cups, one for cleaning brushes and others for different colors. Plain artistic brushes, and one more paper towel ready for myself, to blend and mix. And a mixing board of maple plywood, which is really close in color, so I can see what color I'm making. Simple process, but I believe we can get a really beautiful result.
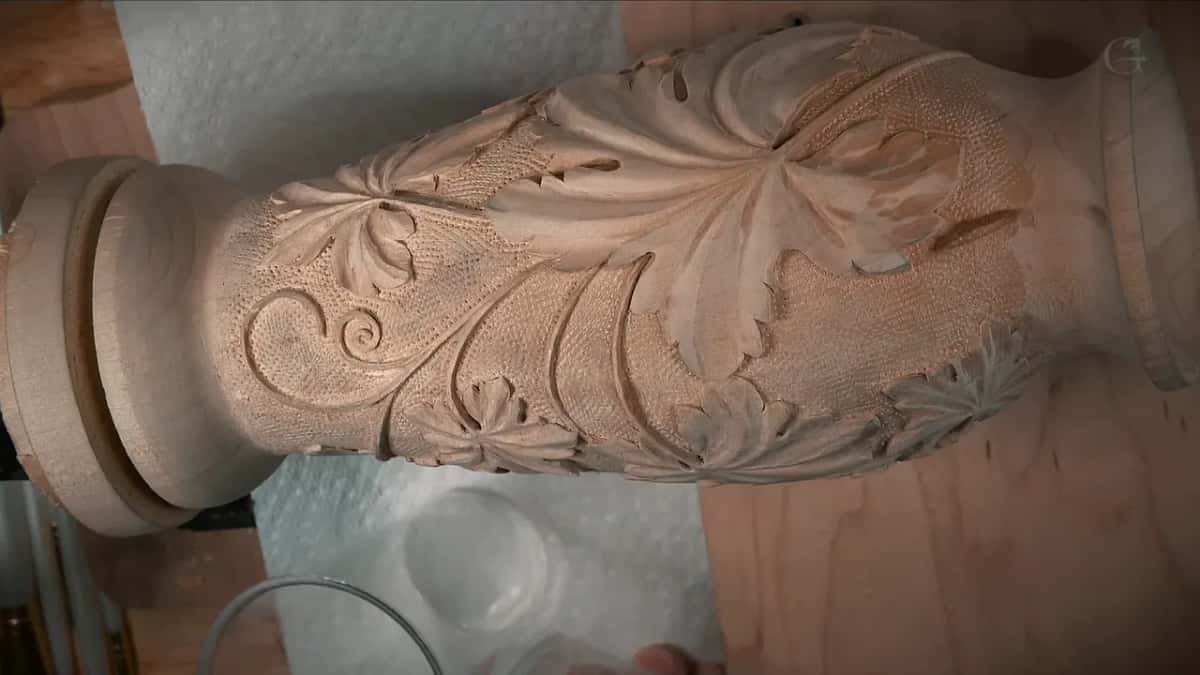
How does the black go on?
Slowly, and sometimes over wood I've wet with alcohol first. Application is really simple. Brush it on and don't pay attention to blotchiness yet, because it's just a first coat.

Wherever you see end grain, the stain takes a little differently. On the downhill end grain it sucks in a lot more and goes blacker, which is a really good thing here.
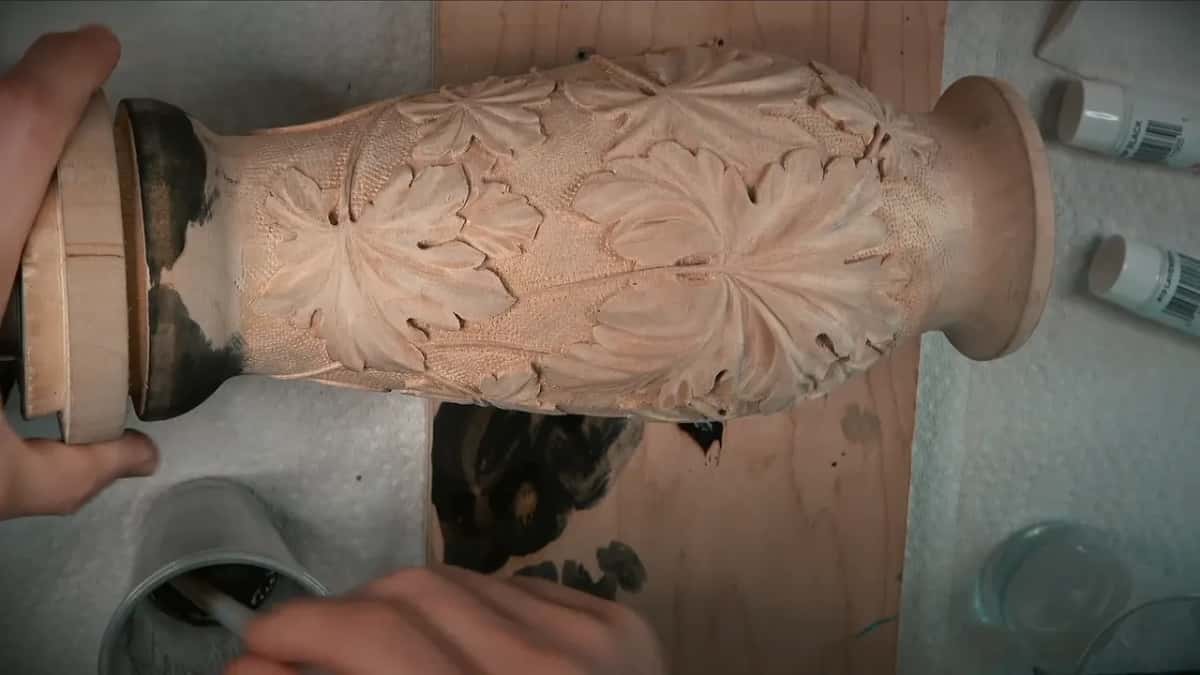
I also keep the black off my movements, the shapes I carved, and I try not to go too quick and mess up. Take your time. It dries fast, and I like that about it. It's almost an artistic approach.
And you still see all the grain. That's what I want. Acrylic would cover it, and an oil based stain already has some color in it and dries slowly, which is why I kept both off this project.
In the eyes of the leaves I switched to a different brush and went little by little. Still careful. Let me tell you a story. At some point I said I'd probably have to change the brush I was using. Seconds later I got a little messed up, which is okay. I should have changed the brush, I said, and I wouldn't have messed up. It was easy to fix.
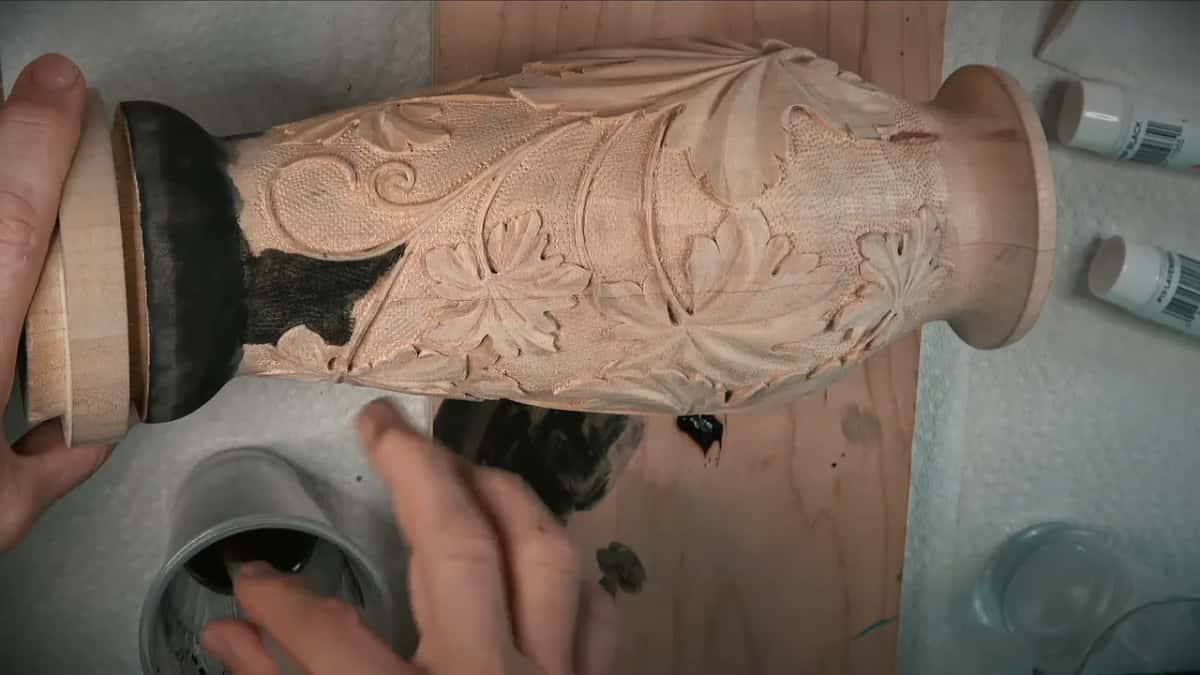
In the first lesson I said the whole background would be black, ebonized, and maybe I'd change my mind. The black stayed down low. Above it, the lavender took over.
Why does this stain blend when a dye leaves a line?
This stain goes in deep, and unlike a dye you can still mix it on the wood. Whatever border the last brush mark left, you can blend it into the next one. With a dye you'd get a really nasty looking border right there. Here it doesn't happen. It just blends in.
So blend each stroke into the one before, if you'd rather not see a line. That brand blends perfectly without sharp transitions, and I really like that.

What brings black and lavender together?
A clean, smaller brush with nothing on it but denatured alcohol.
First the lavender has to be on. The deep lavender sits on the golden ratio again, six parts out of 10, the opposite direction. I'd left some areas undone on purpose, as a blending spot.
You don't have to mix the lavender in a cup, I said, and you can just dip the brush in the colorant, the way an artist would. I took a different brush for it, and while it went on I said I hoped it was going to look awesome.

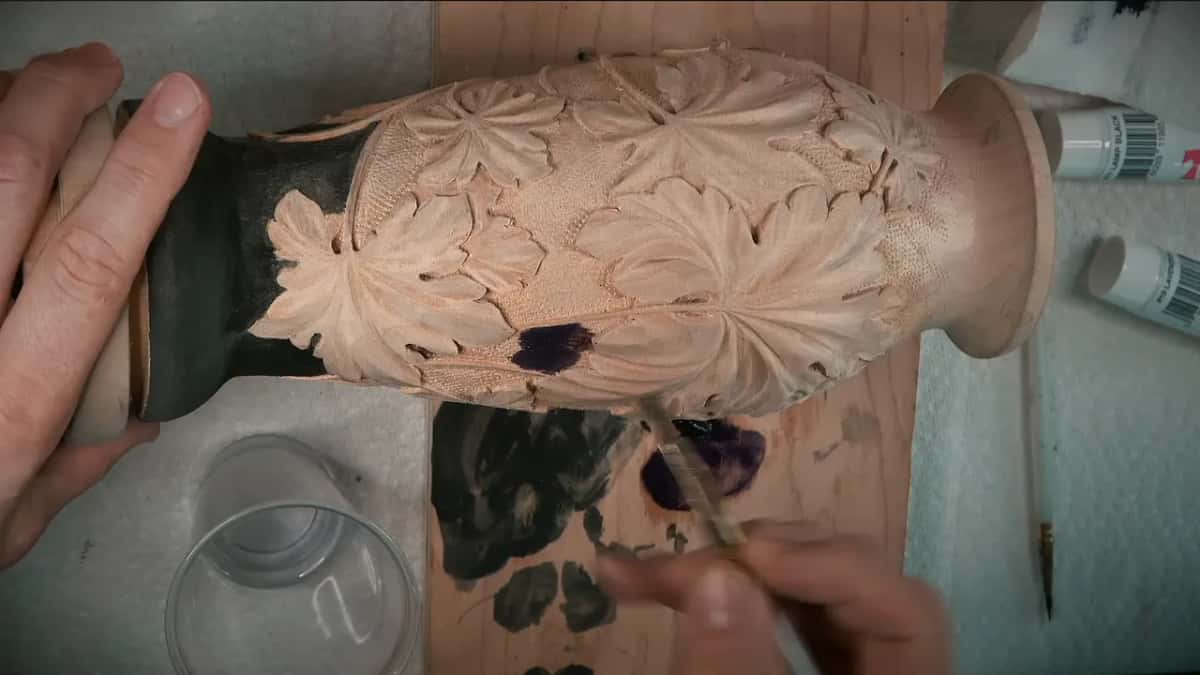
Then the clean brush goes right where the two colors meet, and you just bring them together. The alcohol soaks into the fibers. Once I had too much of it there, and it was okay. It'll be a really invisible transition, I said.
If the black needs to come back, dip the same brush in the black stain and work a little more in. I did exactly the same in a second spot so you could see what was going on. One area looked a little too light, and I said it needed a more intense lavender.
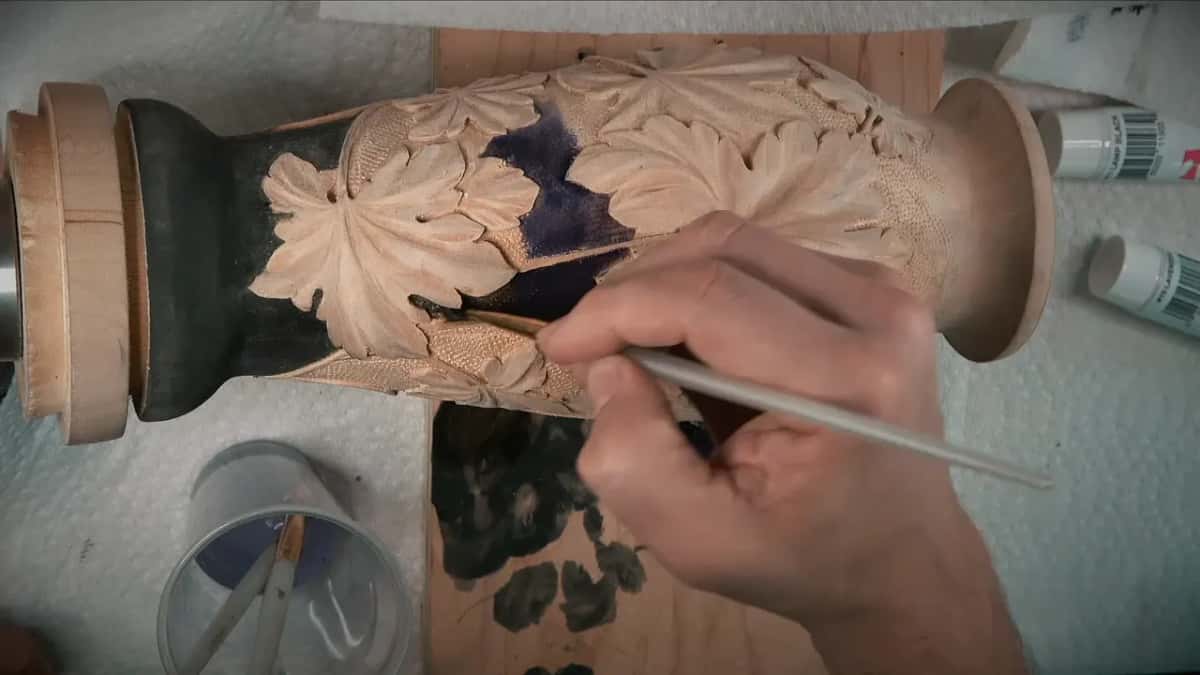
Can you see that transition? I know on a camera it probably doesn't show as nice. Where a leaf was undercut, the brush could get really underneath, and the eye sections took a really deep lavender.
Can a color fade out to nothing?
Lavender did, on this background, with a lot of alcohol in the grain first. I'm only showing part of it on camera, because the rest repeats, and I did the rest off camera, like I did the carving.
Wet it. Make it really, really wet. Then a little lavender goes on with the brush, and it blends to almost nothing.
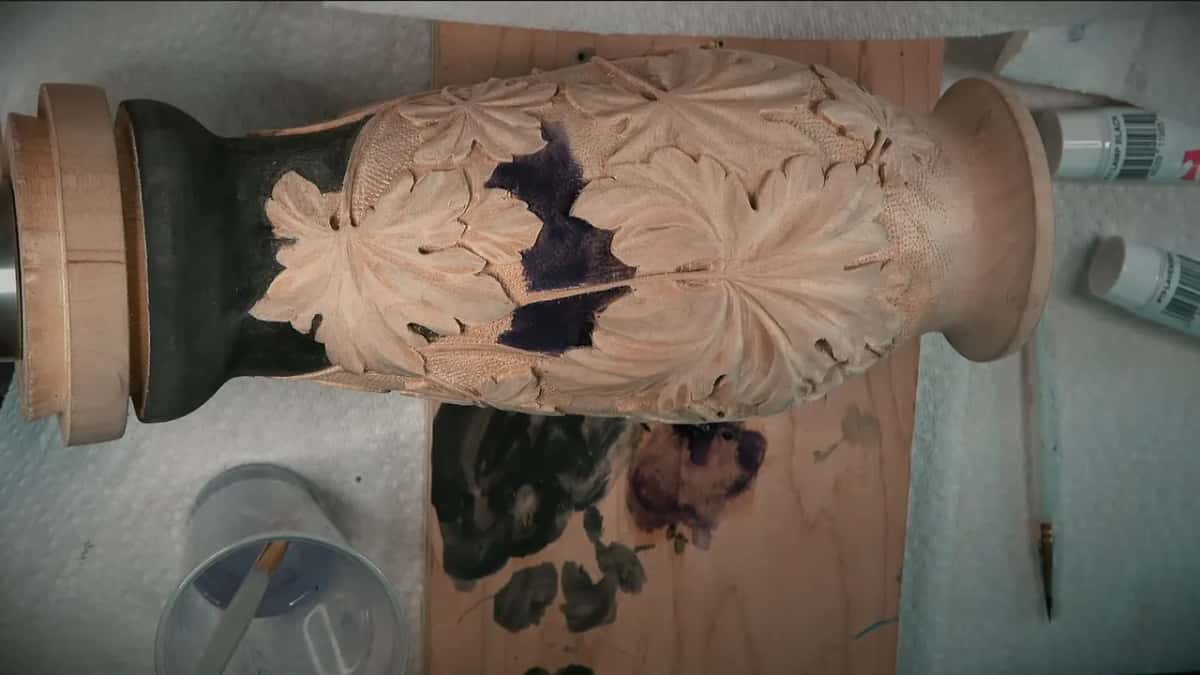
The closer to the leaves I got, the darker I could go. Darker, but not as dark as the section I'd done before, and really not much color out there.
Plain alcohol on the brush blends it in. A paper towel rubbed over it blends it too, and I should have grabbed a clean one. I didn't, so then I had to clean up that stuff. My hands were dirty as well, and I touched a leaf with them.
That's the good thing about this method. I can clean it, blend it again, and it's still going to look really nice.
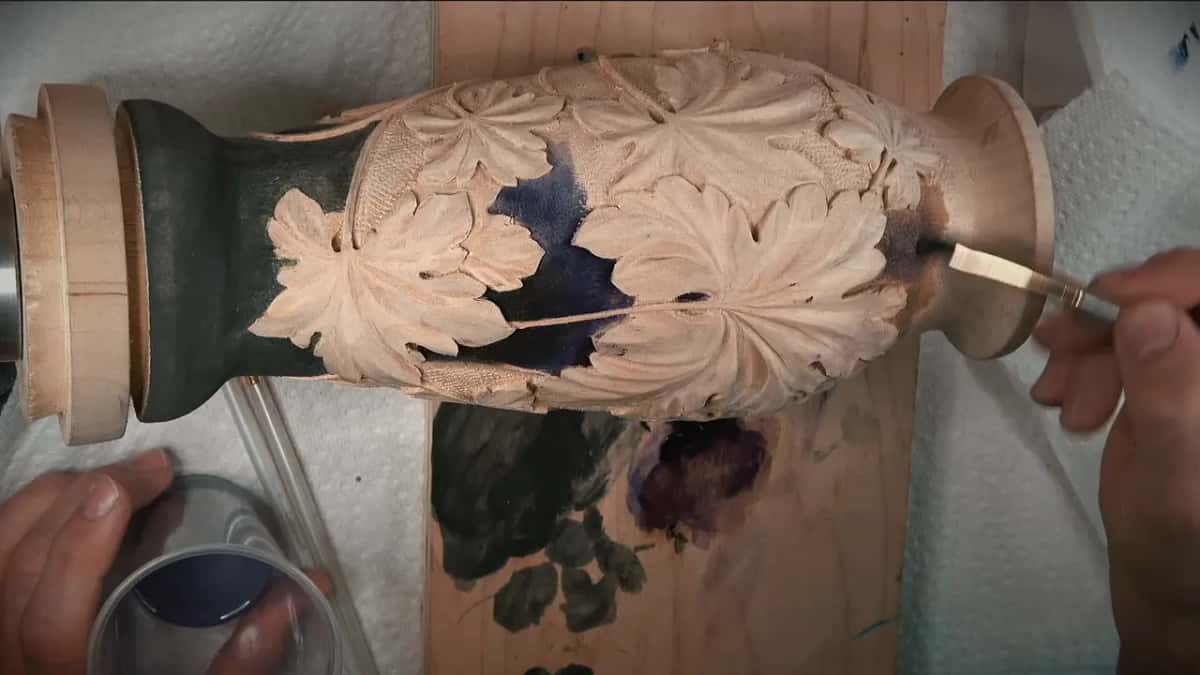
Around the leaves I went a little darker, for some kind of shadow effect. A dry brush would do it too, I said.
Whether to oil wood before carving is another question, and it has its own article.
What color goes on the leaves?
Avocado, as the base color. Avocado is just green, a more natural color if you wish.
It got a new cup, because some pigment was still in the old one and I didn't want to mix them. Not a big deal, but still.

A little darker inside the leaf and a little lighter outside. Then some more alcohol right on top of the leaves, so the color goes in a lot deeper and more even. Not too even, though. Some spots came out too dense, and in this case that was okay, I guess. It should have some variations, and I like a deeper color down in the concaves I started in the lesson before.
My brushes aren't the most expensive ones. They don't want to stay together. I don't want expensive brushes for this anyway, because sometimes I'm just rubbing with them.
I took the color from one spot and used it everywhere else. We're still going to antique it, and oil and a high gloss go on later, and that's when it'll pop really nicely.
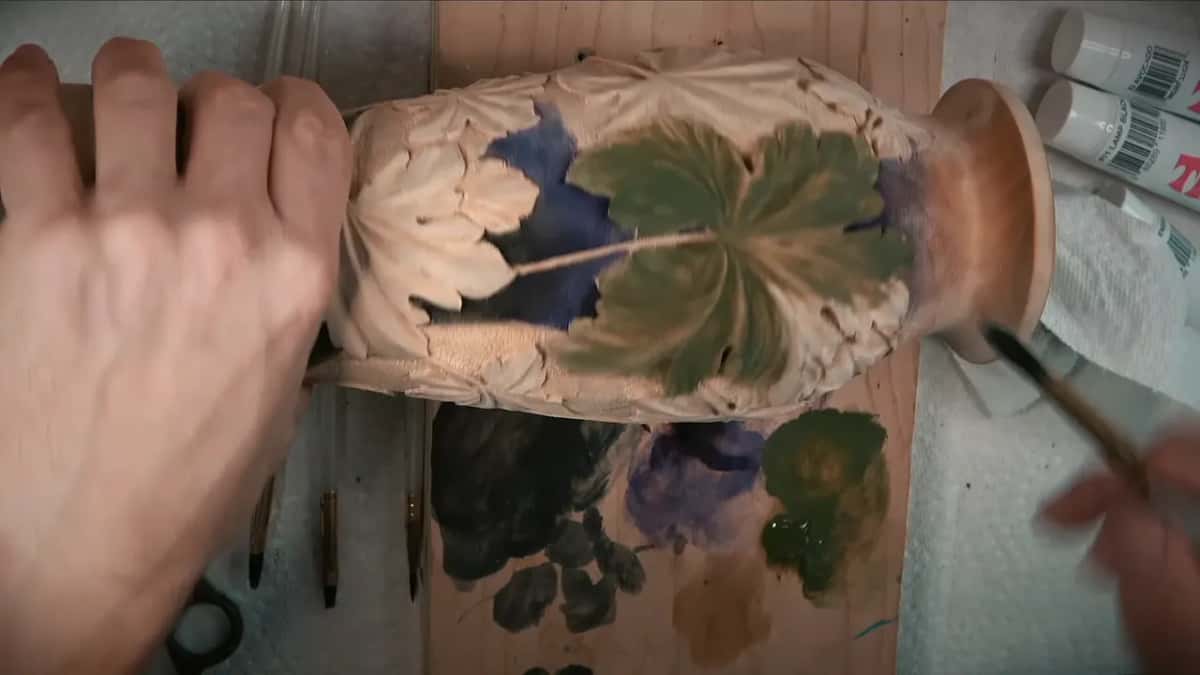
Here's the whole order on one table.
Color | Job | When |
|---|---|---|
Lamp black, pure | sits at the bottom, blackest on the downhill end grain | first, over the wiped wood |
Lavender, nearly grape | says grape on a vase that has no grapes carved | second, straight from the colorant |
Plain denatured alcohol | wets the wood and blends every border between two colors | before and between the colors |
Lavender, thinned out | fades across the background toward the neck to almost nothing | third, on really wet wood |
Avocado, plain green | base color on every leaf, darker inside and lighter outside | last, from a fresh cup |
The full lesson runs twelve parts, and the whole course is five lessons on this one small vase. Every lesson sits on the lessons map, and Tuition and Access are on the plan page.
If a round piece feels like too much, the same grape vine lies flat in The Tray of Blessing, and Carving Grape Onlay carves the grapes this vase never got.
How it's done
- Wipe off the sanding dust. Rub the carving down with a paper towel and denatured alcohol. Sharp corners can snag the towel.
- Mix the black. A little alcohol in a plastic cup, then black paste colorant, mixed until it comes out pretty black.
- Lay black low on the body. Wet the wood with alcohol when it helps, brush the black on, ignore first coat blotches and blend each stroke into the last one.
- Place the lavender. Use another brush and set the deep lavender on its golden ratio spot. Leave an area bare for blending.
- Blend the two with alcohol. Clean, smaller brush, alcohol only, worked along the meeting line until black and lavender become one fade.
- Fade the background. Soak the wood really wet with alcohol, brush on a little lavender and let it run to almost nothing, darker only near the leaves.
- Base the leaves in avocado. Fresh cup. Darker inside each leaf, lighter outside, deeper in the concaves, and never perfectly even.
Frequently asked questions
Is a blotchy first coat of stain a problem?
Blotches on a first coat are nothing to worry about yet, so I paid them no attention and kept brushing. By the time the black band at the bottom was finished it looked solid, and more coats and the blending came after that.
Do expensive brushes matter for staining a carving?
Mine are cheap artist's brushes, and the bristles won't stay together. I rub with them sometimes, which is why I'd rather not use good ones for this. Denatured alcohol is still safe on an expensive brush, I said, so either kind will survive the job.
Should you wipe a carving before you stain it?
A wipe with alcohol on a paper towel lifts the sawdust that sanding leaves. Only a little came off this vase after 400 grit. Corners are where a towel snags, so go easy around the sharp ones.
What to carve next