

Alexander Grabovetskiy, woodcarver, School of Woodcarving · Published 2020
How do you antique a wood carving?
Quick answer: Antiquing a wood carving is darkening the low places and lightening the high ones after the base color is on. On my grape leaf vase the high spots were wiped back with a paper towel and denatured alcohol, raw umber went into the shadows, then a little gold and white.
Antiquing a wood carving is putting a little raw umber into the hollows over the stain, once the high spots have been wiped back with a paper towel and denatured alcohol. After that, a touch of gold goes on the stems and a bit of white on edges, pipes and leaf ends.
That is lesson 4 of Carving Vase with grape leaves, on the turned vase I carved in the lessons before. When I antique a wood carving like this vase, the grain has to stay in sight, and I repeated myself about it on camera. All the grain, I said. Which is the idea.

The base color on these leaves is avocado, a green I named in the lesson before, and early in lesson 4 I was still brushing it onto one leaf that tucks underneath a bigger one. That leaf got picked for the antiquing.
Have you seen an old carving where every hollow has gone dark and the ridges look pale? Would you like a piece of yours to look that way? Then color can do it, a little at a time, in the order my vase got it.
Antiquing wood on my vase, in six lines
Base color first, and the grain still shows through it.
While it is wet, a paper towel rubs pigment off the high spots, and a second pass with denatured alcohol on the towel exposes the wood.
An earth color, raw umber, goes into the hollows on a smaller brush, instead of black.
A finger or a dry brush blends the dark spots into the green beside them.
Gold for the stems, and a little on the pipes.
White after the gold, washed on thin and blended out.

Why raw umber and not black?
I wouldn't use black, because it would look unnatural. That is what I said on camera while the raw umber was going on. I call raw umber almost a black earth color. Earthy.
Before it went on, I gave it a really good shake. I took very little. Just a little bit, on a smaller brush, and I blended a touch of it with the green that was already on the leaves. It blends with pretty much every color, I said, whatever you can think of.

Some of my carvings carry no color at all, and on those the dark spots come from carving alone, which is the point of my page on whether a carving needs stain. This vase is different, and the dark in its hollows went on with a brush.
Does the dark start with the base color?
In a small way it does. While the base color was still going on, I put deeper color in some areas, and then in spots inside of the concaves, and I said I was going to exaggerate that shadow, if you wish. Near the end of that stretch I went back for a little deeper color again, right on the side of the concaves.
See how fast this is drying? I asked that out loud, and it gives a beautiful look as it dries. After one more wipe of the high spots, it was drying really, really nice, I said, and only then did the raw umber come out.
Where does the dark go on a carved leaf?
Deep in, first, where two pieces meet. I get inside with the raw umber and make really deep shadow spots, and that pops. It separates two pieces from each other, and it gives me one more dimension.

Next come the places where a leaf runs downhill. A twist that turns down gets a darker spot, and so does the leaf I picked for the antiquing, where it goes under a bigger one. The edges get some too, and my finger blends it in.
I get the brush right inside, and I said I wanted no white spots left in there. We're just pretty much faking shadow, I said. The main color stays the main color.
Sometimes I use raw umber in the concaves too, blending a little bit, not much, and I said I probably would here as well.
Once it's dry, I told the camera, you'll see the effect on that downhill spot, and I'm really able to make some kind of dark spot there. The last minutes of that stretch were small touches. Deeper shadow in this area, a little shadow right here, a little more.
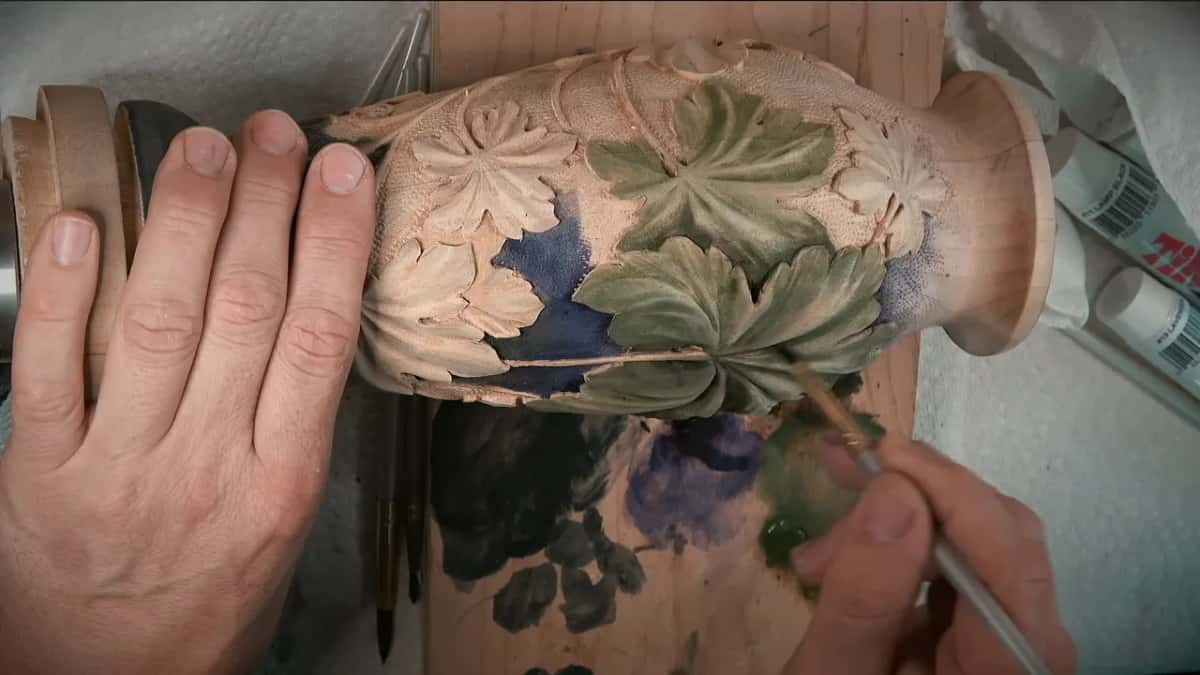
If you remember, that is only 1/16 of an inch carving, about 1.6 mm, the depth the background got in lesson 2 of the vase course. But you can see it developing really beautiful color.
What blends the raw umber in?
A finger. The dark goes on a spot, and then I can actually use a finger to blend it together with whatever is around it. At one point I took a dry brush and blended with that instead.
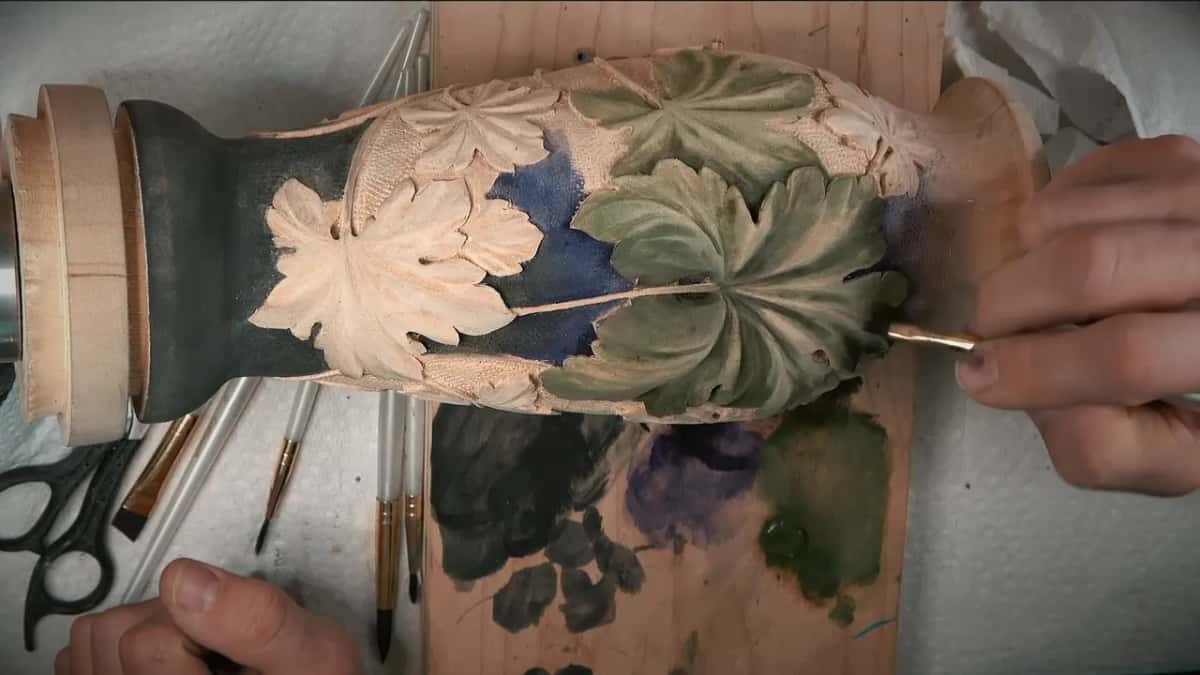
At the edge of a spot I cast a little more shadow and blend the edge a little bit, so the dark runs out into the light. All I'm doing, I said, is creating a 3D effect, like a shadow is deeper in some spots. Here and there I went much darker, and it gave even more dimension.
You can always overdo it. You really don't want to, I said. What I am after is the antiquing effect, like the piece was done a long time ago.
Right after the darker color went on one twist, I said oops, let me wipe it.
How do you take color back off the high spots?
I wiped them while the color was still wet. Before any umber went on, I rubbed a paper towel right on top of the leaves, just wiping a little. That takes some pigment out of the high spots. All of those facets and tool marks show again.

Then I put some denatured alcohol on my paper towel to do it one more time. It exposes wood. It gives a really beautiful look, and once the oil goes on later, all of that turns more amber.

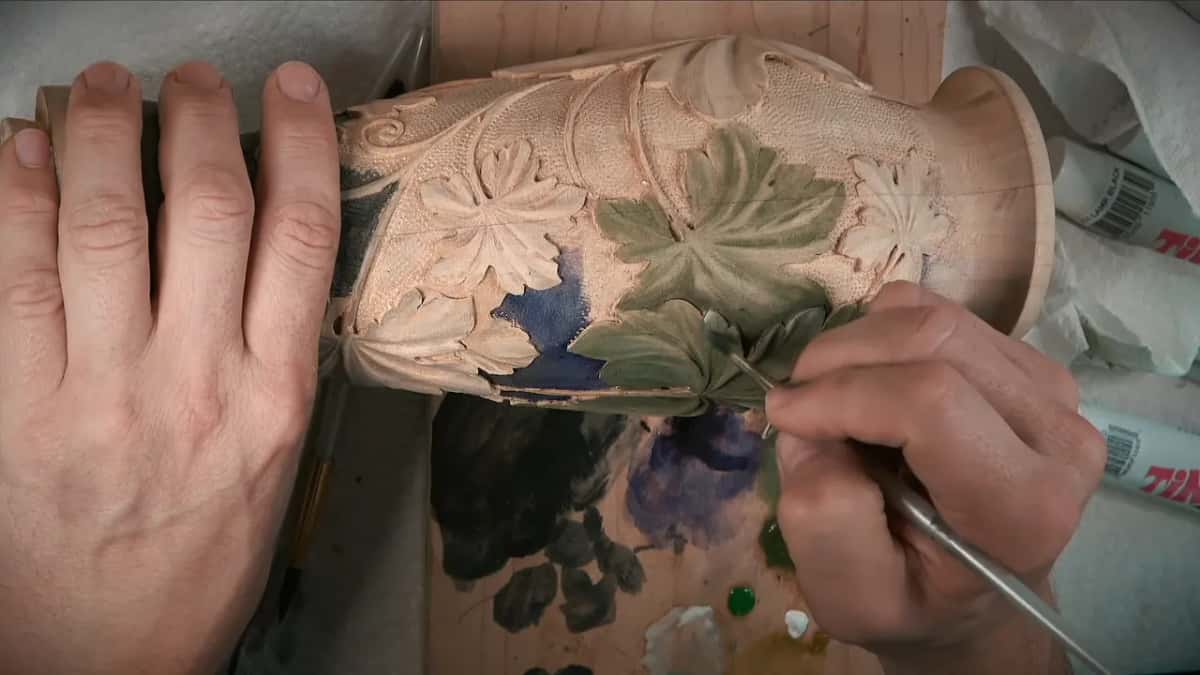
A small scraper is the second method, if you have one, and I scraped out some areas to show it, though it was a little too early with the color still too wet. You see the effect on the high ridges, I said. Right before the raw umber I wiped the high spots once more, the same way.
What does gold add to an antique look?
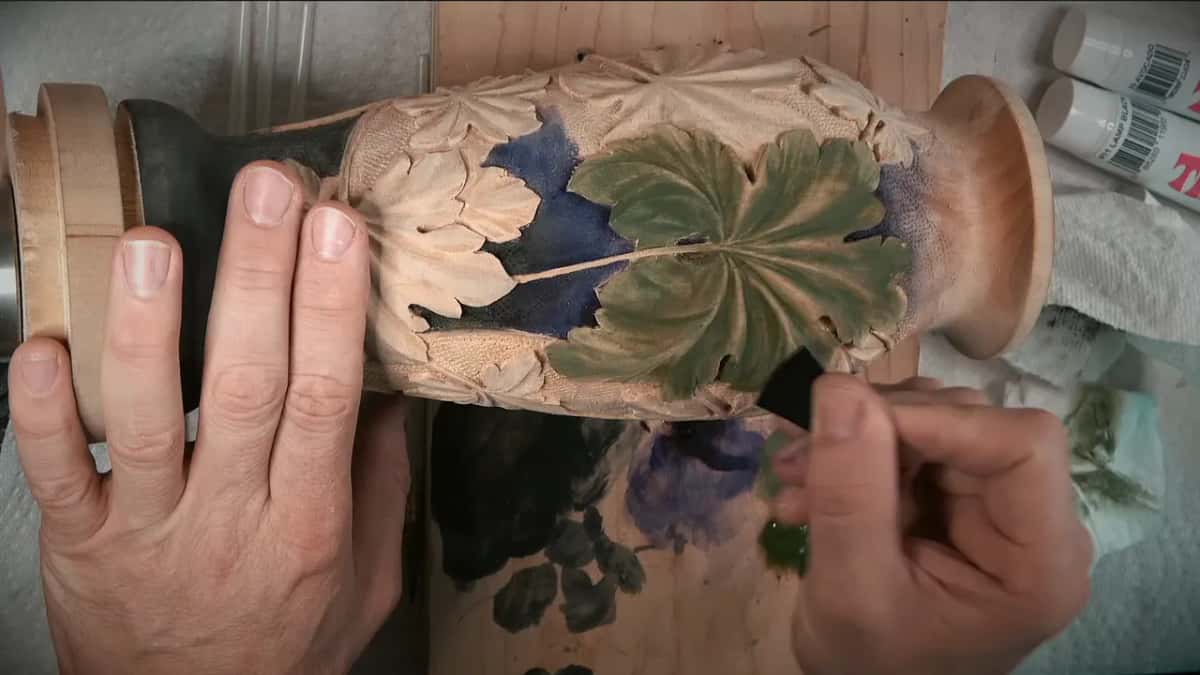
Gold makes the stems pop out a little more, and that is the reason I put it there. I had three more colors ready, gold, spring green and flake white, and I mixed each one well just by shaking it before I squeezed some out.
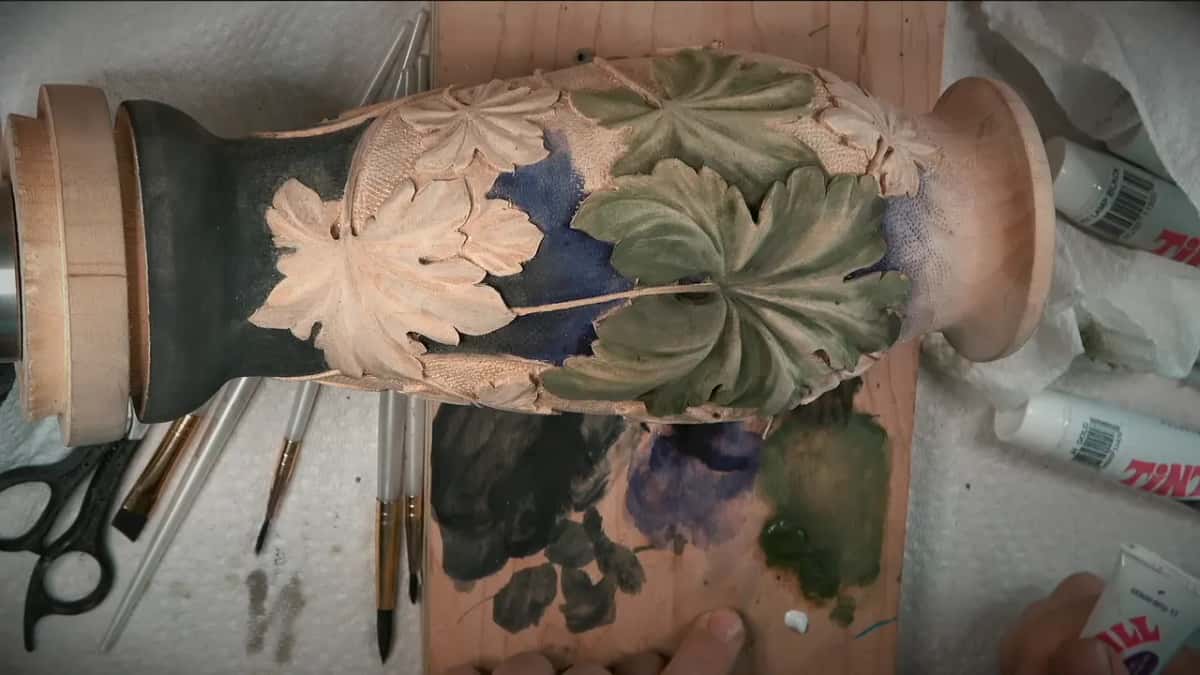
The spring green looked too bright the second it came out. Not natural, I said, so I left it out. Gold was okay.
Some gold also went on the sides of the pipes, in some spots. I called them the ice first and had to correct myself. It makes the leaves look more like California grapes, I said, summer color, golden hills, though probably it's the same color everywhere else. Some spots, some spots, I kept saying, to make that leaf a little more natural color. The oil adds some yellow and amber of its own later, but some gold right now helps a lot.

It's really about being artistic right now, and I said that out loud too.
How much white does an antiqued carving need?
Very little. I said the white is probably the most important color, so please do not overdo it. All we need is just the highlights.
When I squeezed it out, it was not much, just a little bit, and I said I wasn't sure the camera could even see it. I was only showing the idea on one leaf. The same thing would happen on all of them.
On top of the pipes it went on as a white wash, a little at a time, and then along some of the edges. I blended it with my fingers. Still the same green underneath, just washed a little, and we still want to see the grain of the wood. It's easy to overdo it with any color, but the white especially.
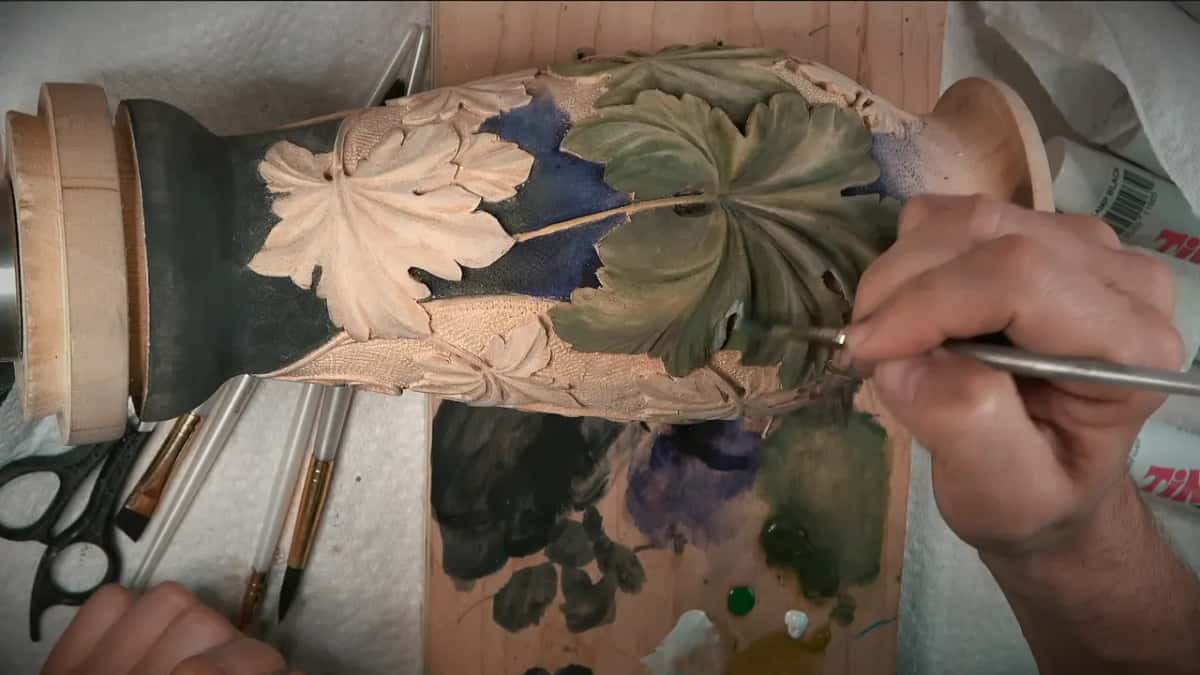
White also went where the middle line, the stem, comes to the center of a leaf. Nice and washed, I said. Isn't that beautiful? Then I went to some of the leaf ends. Some ends had already had raw umber, I said, but this one got white, to make even more separation between this leaf and the leaf above.
I said I could use some gray as well, maybe later, to make a dusting effect. After the white, a little more raw umber went into a few areas so the shadow would pop a little more.
Layer | Where | Words |
|---|---|---|
Paper towel wipe | Over the high spots, color still wet | wipe it |
Denatured alcohol pass | Same high spots, alcohol on the towel | exposes wood |
Umber in shadows | Into hollows, along edges, down a twist | faking shadow |
Gold for stems | On stems and the sides of pipes | pop them |
Spring green tried | Squeezed out once, then left it off | too bright |
Flake white wash | Pipes, edges, leaf ends, where stems meet | not much |
More umber later | A few shadows that wanted more pop | deeper color |
Can a painted carving be antiqued too?
I talked about exactly that on a rosette I planned to paint. In lesson 6 of the Venetian Flowers Rosette I said that once I paint it, most likely it will be white, a pure white, or maybe slightly off-white with a tint of gray.
And I told anyone who makes a project like that one that they can play with darker colors, or even antiquing, on the inside. Darker closer to the flowers. Darker, maybe, to bring out the shadow near the border. On the vase the dark sat in the leaves' hollows, and on that rosette I named the inside and the border.
The vase never got a white ground like that. Its ground is purple, and the white stayed on the leaves, a little on each.
Whether to paint a carving at all, and in what color, is a question I took on in Acanthus over Moldings 7.
When is an antique finish done?
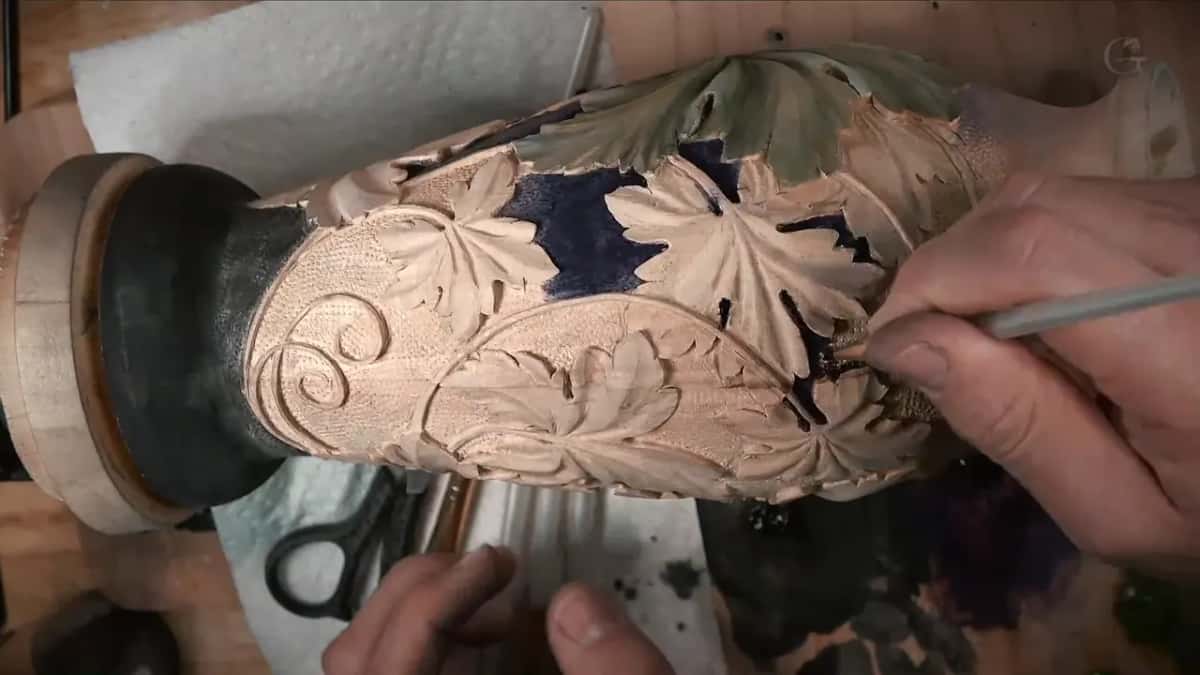
I stopped while there were still places I could have touched. It's easy to overdo it, I said. I really don't want to overdo it. Let me do exactly the same to all of them, I said, and I'll catch you later once we get done. Then every leaf got the same treatment, one after another. On another side of the vase, where the leaves were still bare wood, the dark went into the deep gaps between them.

When the color work was done I took 240 grit sandpaper lightly over the ridges, and that pass, with the one spot I was afraid of, is in my article on oiling wood before carving. I could spend a lot longer, of course, and just make it to perfection. Now I'm going to let it dry a few minutes, I said at the end, and then oil. It needs to be dry.
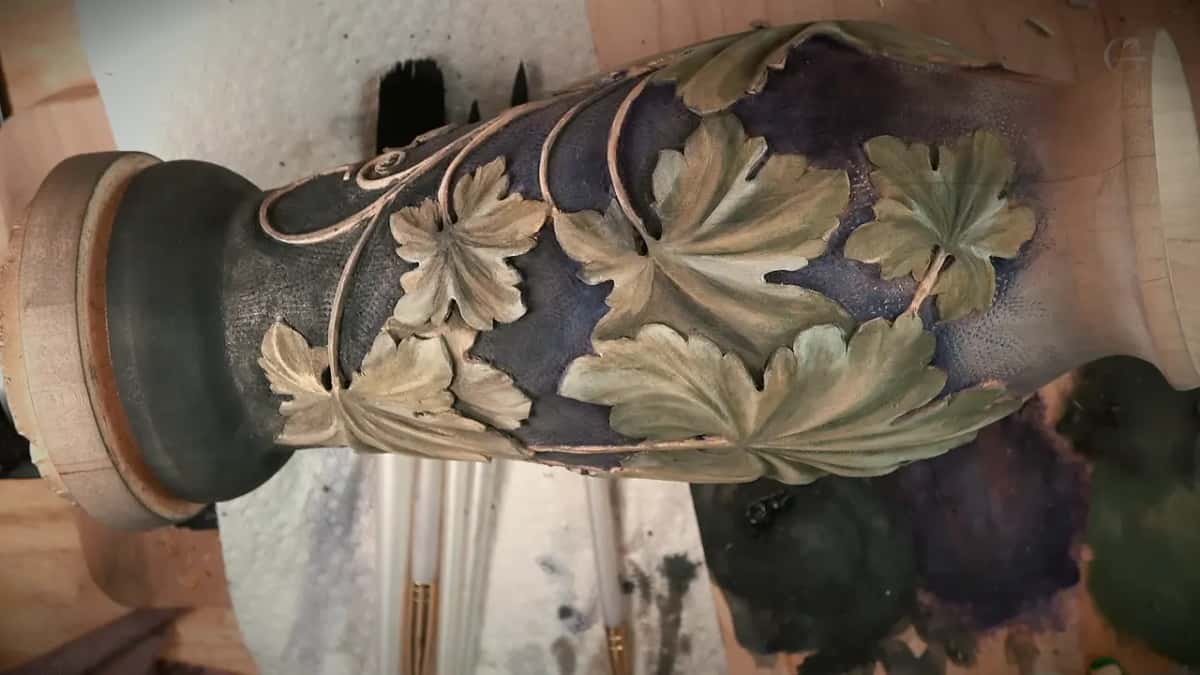
How does the vase look once the color is on?
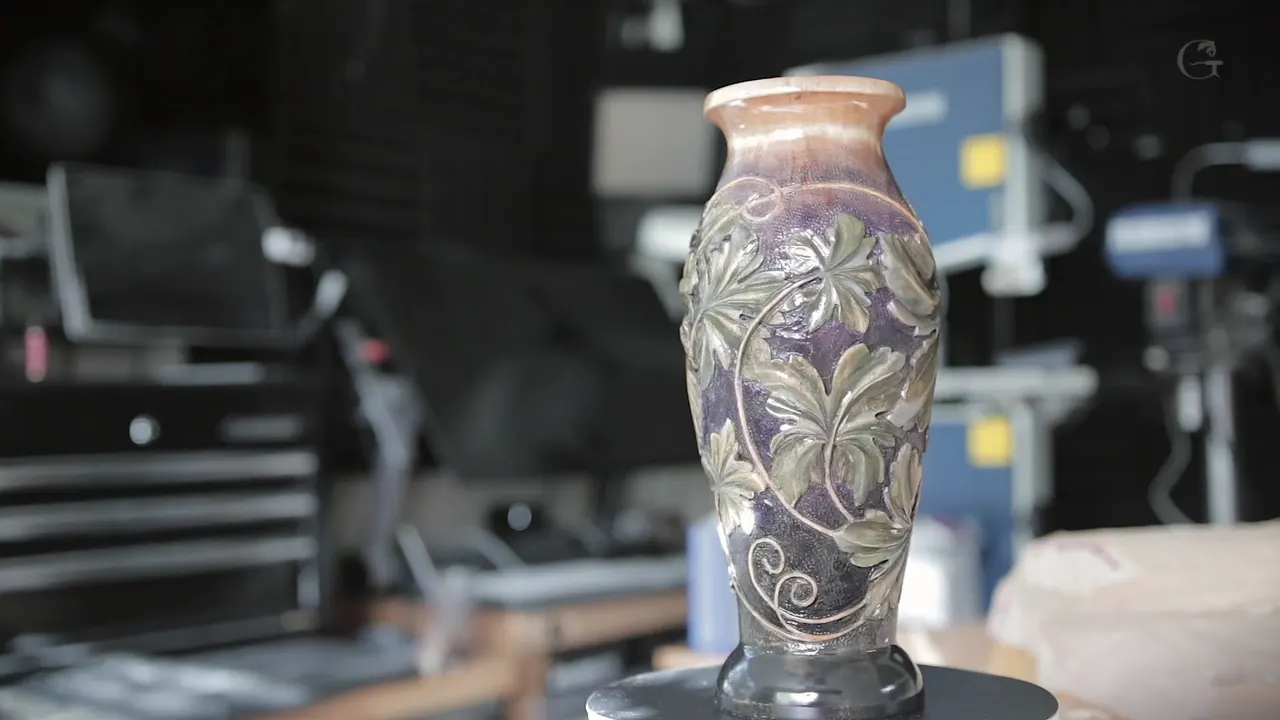
Gray green leaves over a purple ground, with pale vines running between them. The foot is black and the rim stays light. In the last short part of the lesson the vase stands upright on its own, after all those minutes lying on its side under my hands.
It is already looking really good, I said near the end, but we can make it even better. One, two, three, I counted after the quiet stretch, and I said I was pretty much done with all the process.
What goes on the bench to antique a carving?
Everything I used shows up in this lesson. For the wiping there is a paper towel, then the alcohol for the second pass. The colors are raw umber, gold and flake white. One smaller brush did the dark, a dry brush and my fingers did the blending, and a small scraper helps anyone who owns one. Spring green was out as well, and I left it off the vase. Then the oil, once the color is dry.
The course ends with its own final assessment. The same grape vine on a flat surface is the Tray of Blessing, and grapes on their own are in Carving Grape Onlay.
Would a little dark in the hollows make your next piece look older? Would you like to watch each color go on before you try it? Then come to my bench for lesson 4. If you have never held a gouge, start with First Cuts for Beginners and come back, and every lesson is on the lessons map. Tuition and Access are on one plan page, monthly or yearly, and the plan renews automatically each period until you stop it from your account.
How it's done
- Finish the base color. Brush the base color onto every leaf, a little deeper in the concaves, and check that every bit of grain still shows.
- Rub the high spots. While it is wet, rub a paper towel lightly over the top so pigment lifts from the high spots.
- Go over with alcohol. Wet the towel with some denatured alcohol and work across those same spots one more time, and wood shows through.
- Shade with raw umber. Shake the color well. Take a little on a smaller brush and work it into hollows, along edges and down any twist that turns downhill.
- Blend each spot. Soften every dark spot into the color around it with a finger or a dry brush.
- Add gold, then white. Touch gold onto the stems and along the pipes. Then wash a little white onto pipes, some edges and a few leaf ends, and blend it with your fingers.
- Let it dry. Give the color a few minutes, because it needs to be dry before any oil.
Frequently asked questions
What color makes a carving look antique?
On my vase it was raw umber, a color I call almost a black earth color. Black stayed out of it, because it would look unnatural. A smaller brush took the umber into hollows and along edges, and a finger softened the spots.
Do you wipe the color back before or after the dark goes in?
Before. The high spots got a paper towel while the green was wet, then a towel dampened with denatured alcohol. Right before the umber I wiped once more, the same way, and only then did the dark go into the low places.
Should the leaves or the background get color first?
Either can go first on a piece like this, because the leaves and the background are not touching each other. You could even paint the background later if you want. I see much better when I start with the background, so that is the order I like.
What to carve next