
Alexander Grabovetskiy, woodcarver, School of Woodcarving · Published 2020
How do you use the golden ratio in wood carving?
Quick answer: The golden ratio is where you put things, not a shape you draw. Call it sixty out of a hundred. Measure a piece with three leg calipers, find that point, and the biggest element of the ornament goes on it. Subdivisions repeat the same split, and so can the color.
The golden ratio in wood carving is a placement rule, not a formula. Call it a sixty to forty split. Measure a piece end to end, mark that point, and the largest thing in your design belongs there. Then the divisions inside it follow the same rule, and so does the color.
Have you ever laid an ornament out by eye and known something was off without being able to name it? Do you own a set of dividers you have never actually used on a design? Somebody emailed me asking to see carving and turning together, and this little vase is the answer I sent back.
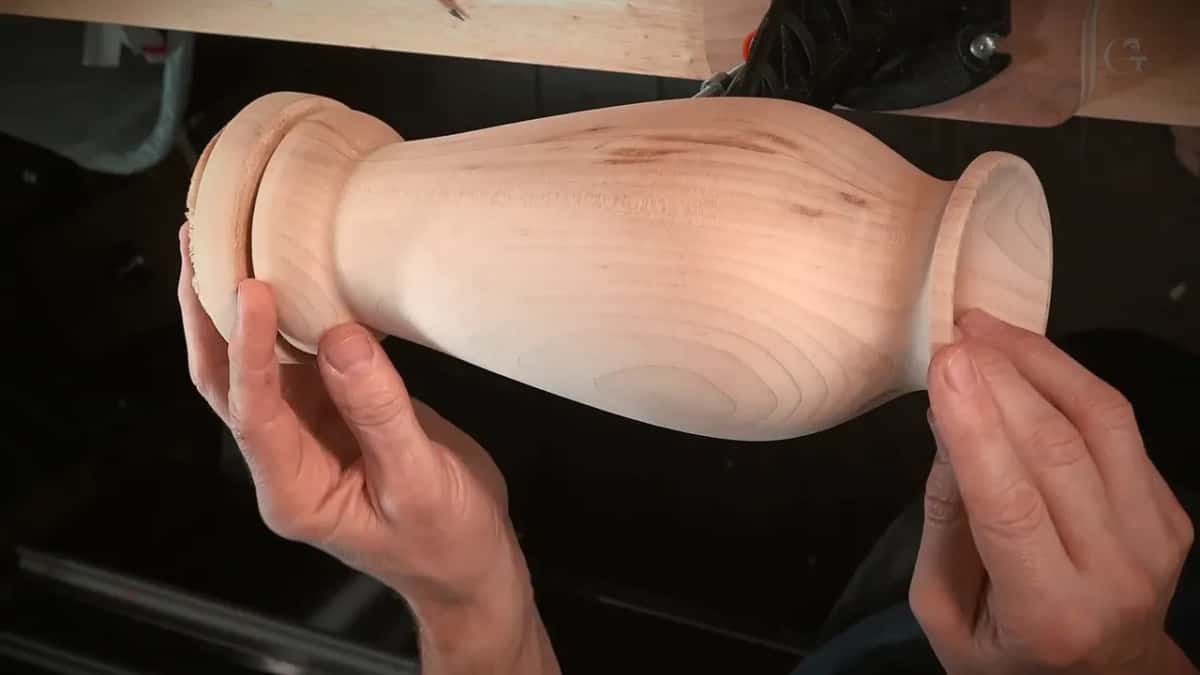
The vase stands 10 and a half inches tall, about 267 mm, and four and a half inches across at the widest, about 114 mm. Hollow. I turned it, and I am not going to teach turning here. What I will do is show you where every leaf went and why, and prove the proportion on camera with the calipers that find the ratio for you, instead of asking you to take my word for it.
What the calipers actually decide
- A 60 to 40 split, nothing harder than that. The whole rule fits in one line, and it beats any equation for staying in your head.
- The widest point of the vase sits right on the golden ratio of its height, and the calipers show it.
- Five divisions in every grape leaf, three subdivisions inside each. Both numbers come out of Fibonacci.
- The subdivision line turns into a vein.
- Even the deep lavender lands on a golden ratio point, measured from the other end.
- Wall thickness decides how deep you can go, and on this vase that is 6 mm.
What does the golden ratio mean in plain numbers?
Sixty percent. Anybody who knows a little about Fibonacci already knows the golden ratio. The easy version is a 60 to 40 rule. Sixty out of a hundred, and that is probably the simplest way to understand it at a bench.
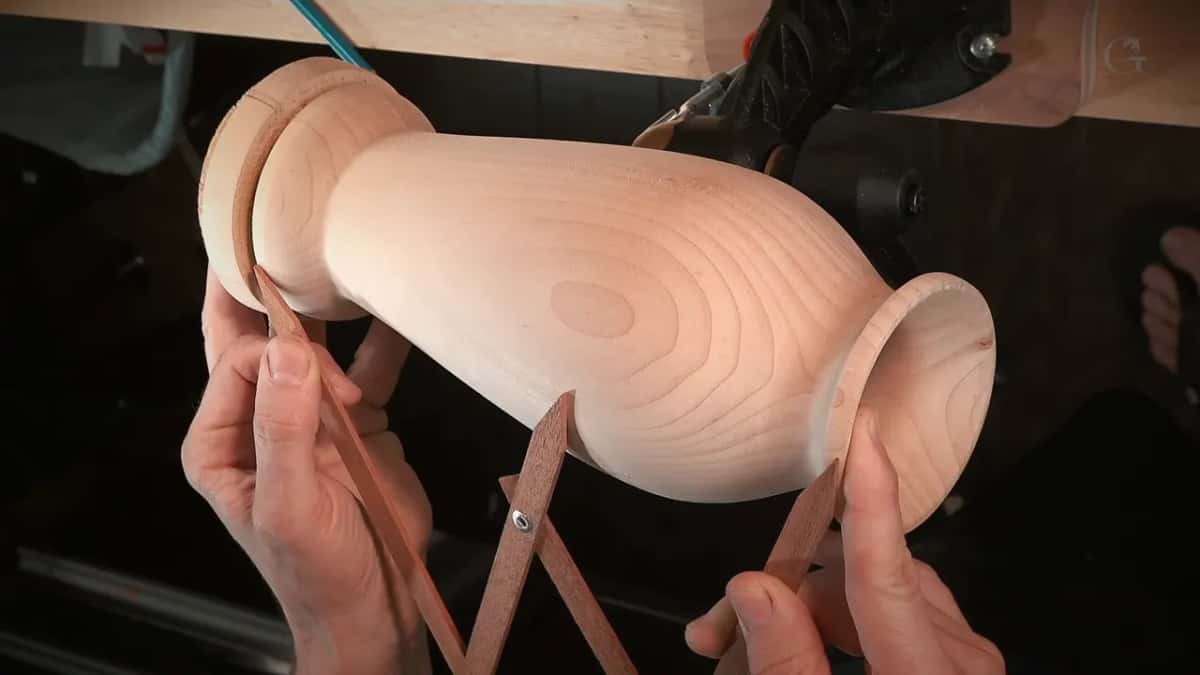
Then I take my calipers, the golden ratio kind with three legs, and I measure the foot against the rim. The middle leg lands exactly on the widest part of the vase. Measure the inside cavity the same way and it falls in the same place. That is where the largest boundary circle of the design has to go, and I did not choose that spot. The proportion chose it and I read the answer off the tool.
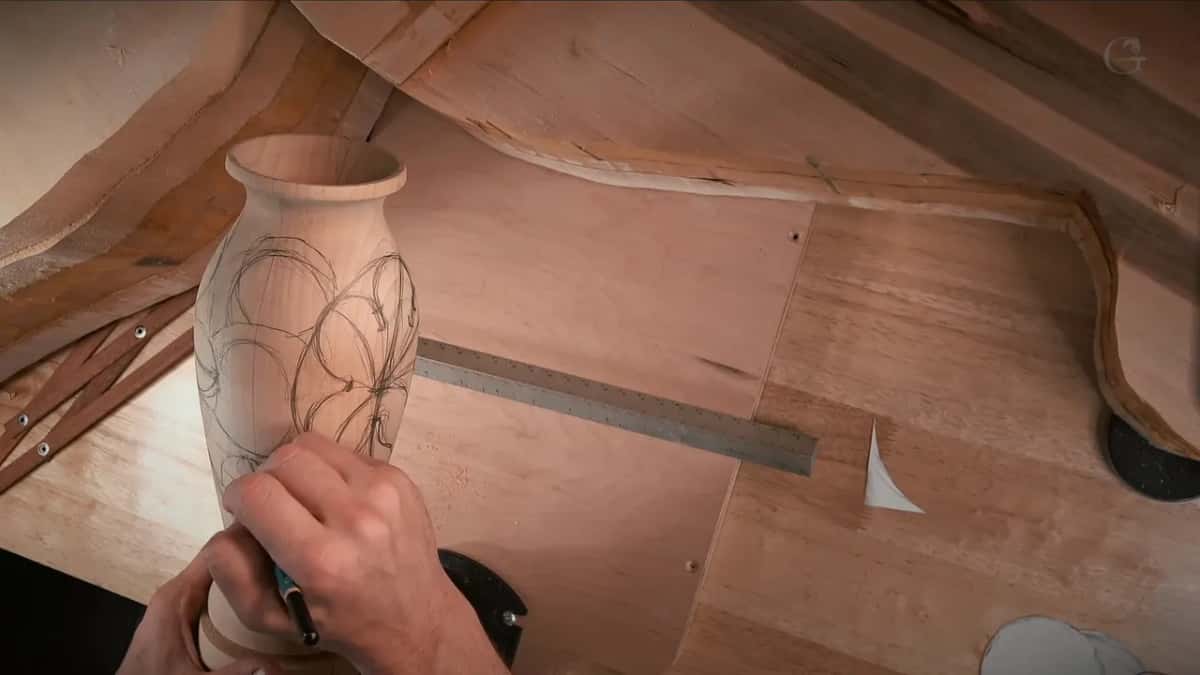
Luca Pacioli published a book about it in 1509 and called it the divine proportion, and cabinetmakers have been stepping it off with dividers ever since. My old master taught me at 16 that design is not drawing on paper. He meant the laws of space and repetition, and this is one of those laws you can measure.
Why five divisions in each leaf, and three inside each?
Both are Fibonacci numbers. Grape leaves come with three divisions or five, and the five division leaf is the one I like the most. I made circle patterns in three sizes, big, medium and small, and kept adding leaves until I had 13, because 13 keeps me true to the Fibonacci sequence. Each leaf got five divisions. The three inside each of those came much later, once the concave cuts were in.
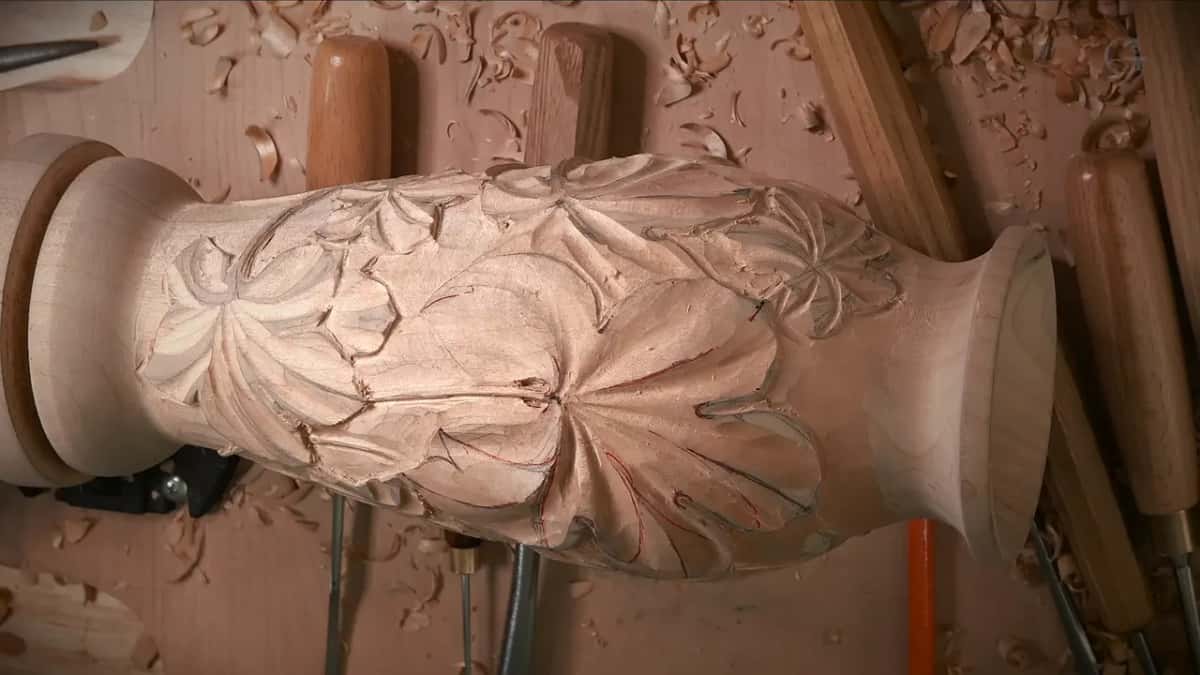
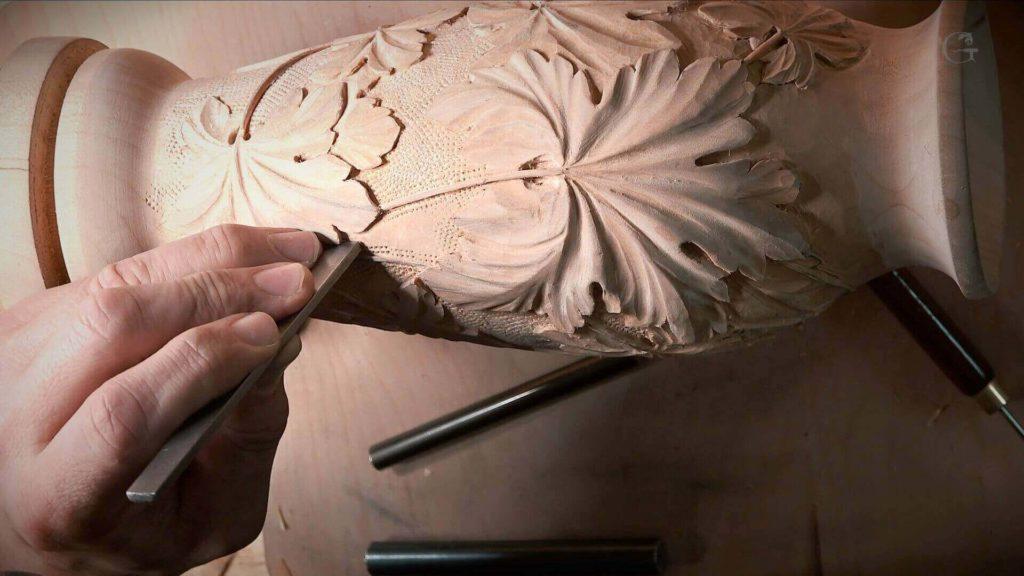
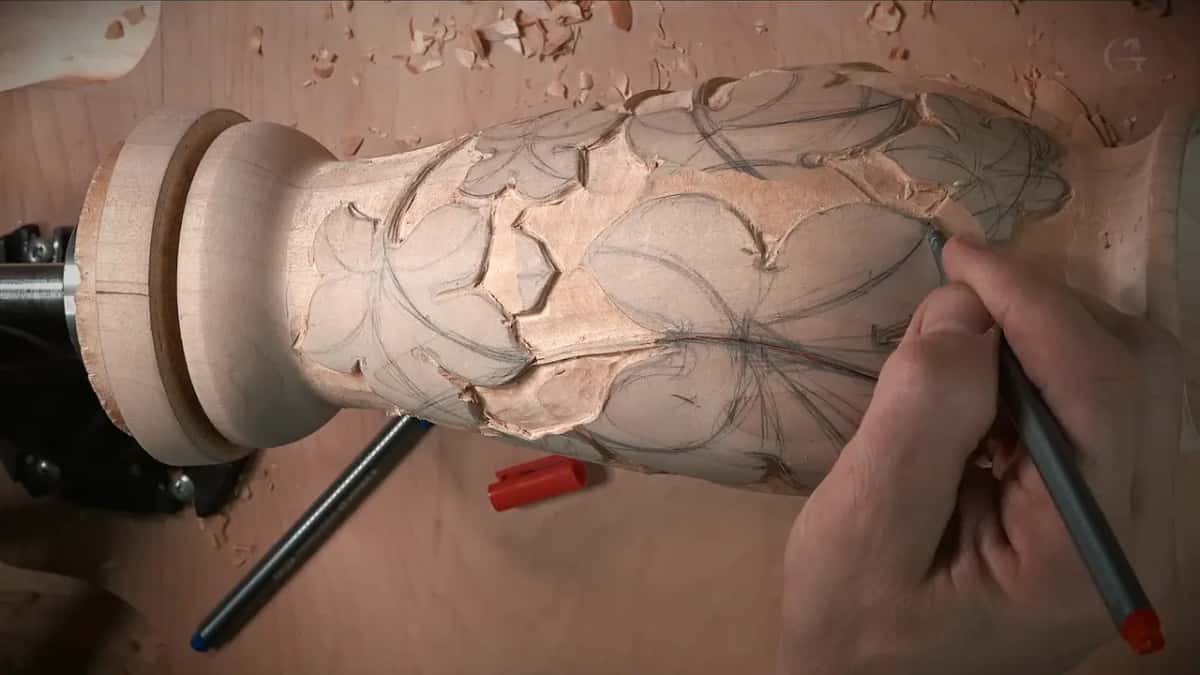
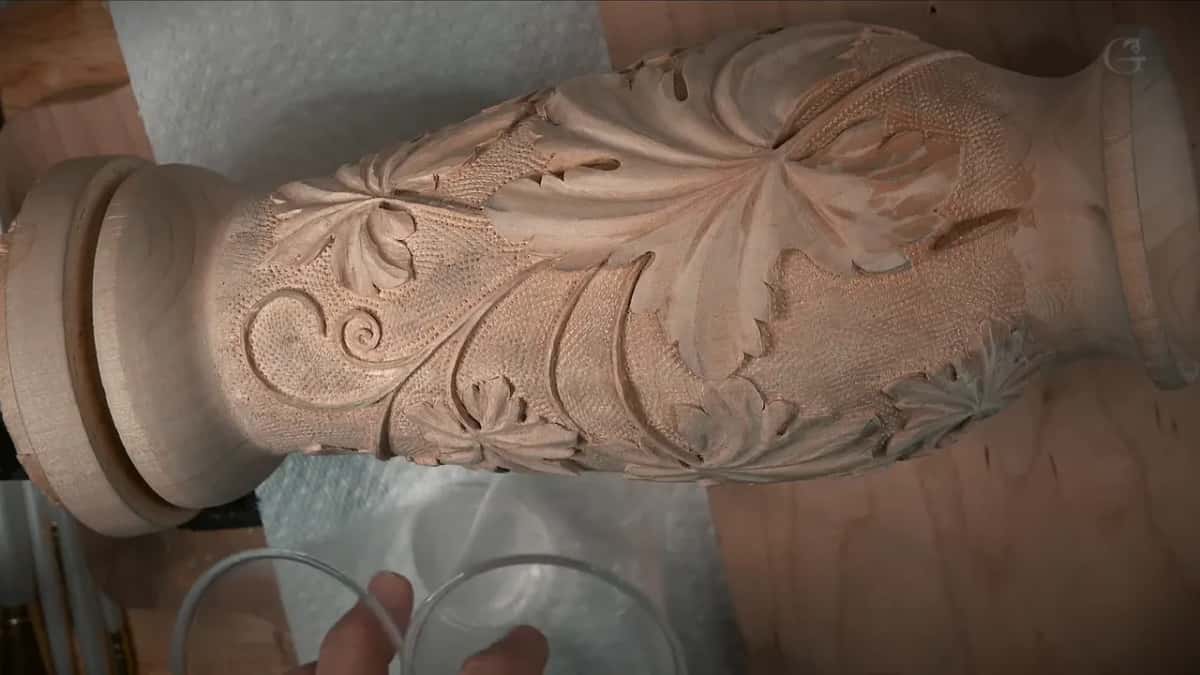
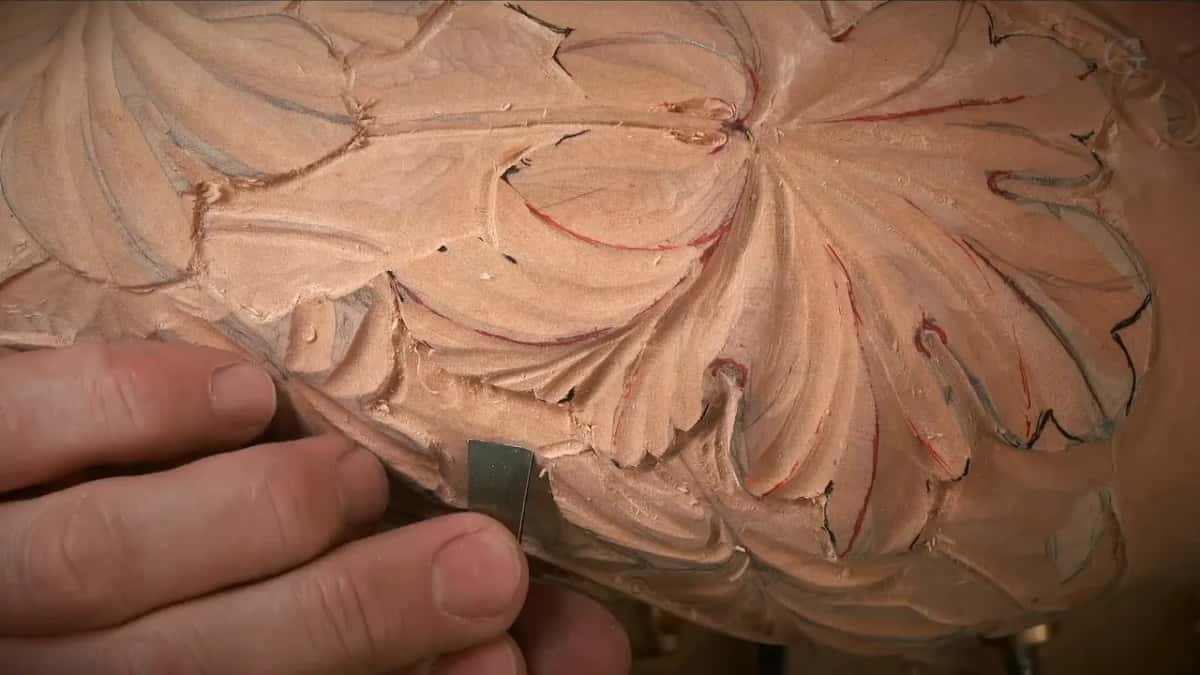
Here is where the rule does real work. Take the middle point of a division and the edge of it, run six parts out of ten between them, and that is your line. That line becomes a vein, the center line of the subdivision. Do the same going the other way and you have a second one. What you end up with is three high spots in every division, one of them the highest, and the other two only somewhat high.
I marked those points with a red marker to exaggerate them for the camera, then went over with black so you could actually see them. I don't really want marker on it, but you get the idea. The shape between the points is what I want you looking at, and the front of a fisherman's boat has about the right curve to it.
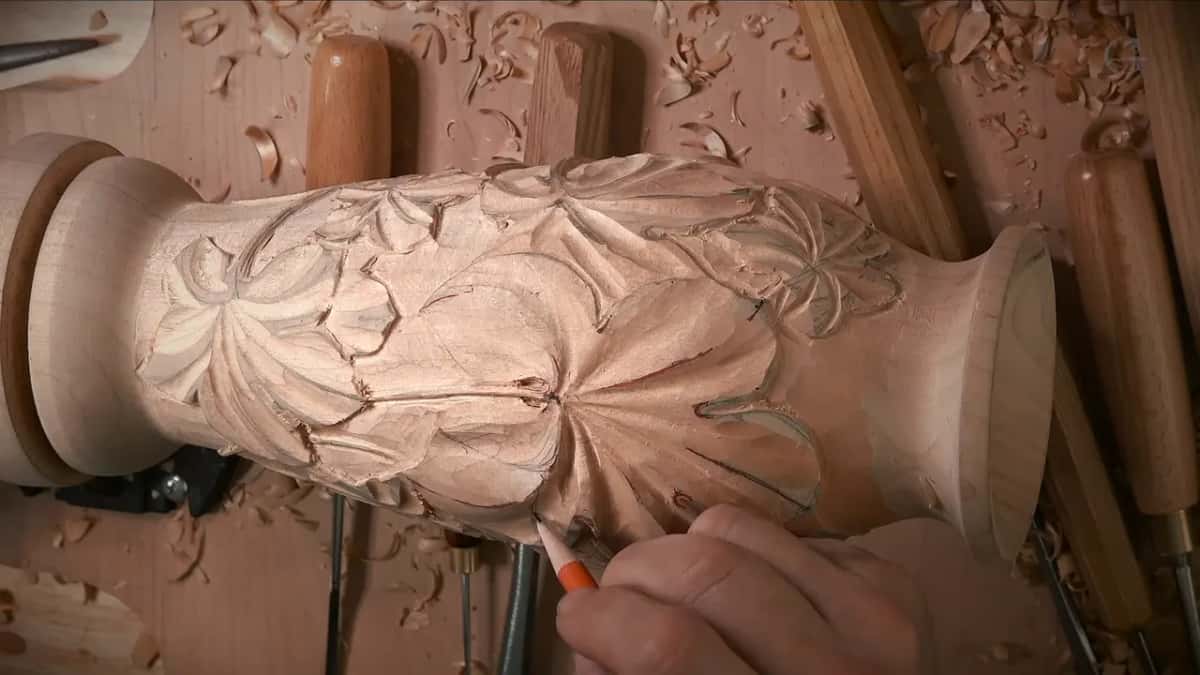
None of this is unique to a vase. You can apply the same rules of design to a flat panel, and they work exactly the same, and the whole argument of Principles of Design in Wood Carving rests on exactly that. I deliberately kept the design simple enough for you to repeat.
How deep can you carve a hollow vase?
Six millimeters of wall decides it. When I turned the vase I left the wall about 6 mm, a quarter of an inch, in places, and about 10 mm, three eighths, in others, a little thicker where I needed a more solid body for carving. Nothing more than that exists to work with.
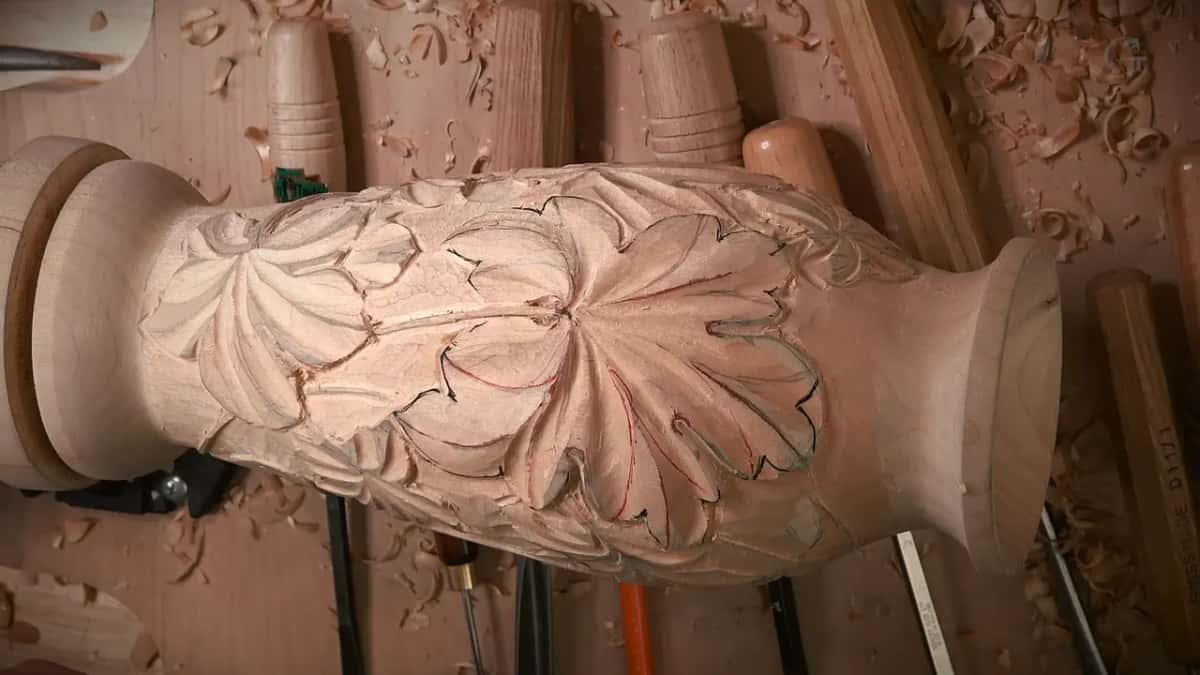
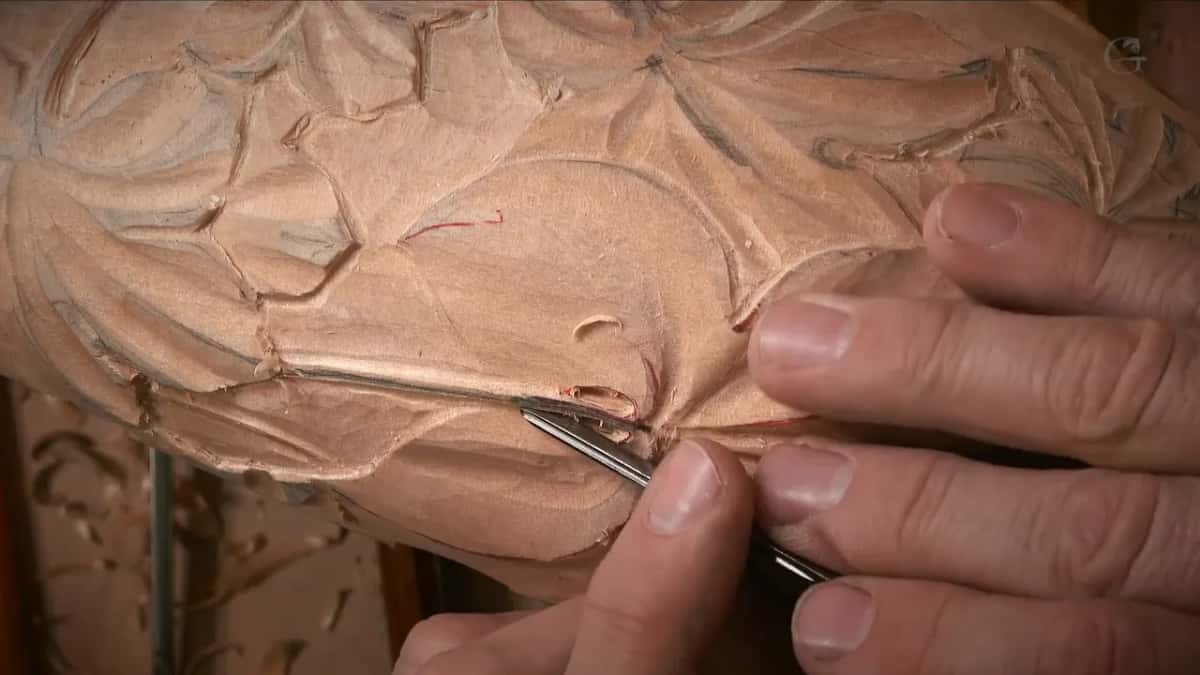
Which means the sentence I repeat most in these four lessons is that I do not want to go too deep. Not out of caution for its own sake. Go through a 6 mm wall on a hollow turning and there is no repair that anybody will fail to notice. So the relief has to read as deep without being deep, and that is done with undercutting rather than excavation. I don't undercut while the background comes out, that is too early. It comes after the concave cuts, and then I exaggerate it almost everywhere, because an undercut edge throws a shadow and a shadow is what your eye reads as depth.
The concave cuts in each leaf go in with a number 11 at 10 mm, three eighths of an inch, because I can exaggerate one side over the other and play with the shadows. Vein movements I did using a number 8. A number 11 works there too, and the undercuts go in with a number 11 veiner at 1 mm, or half a millimeter. Six millimeters of wall and a 1 mm veiner is the whole tension of the piece. None of it works dull, and that is why sharpening gets its own course.
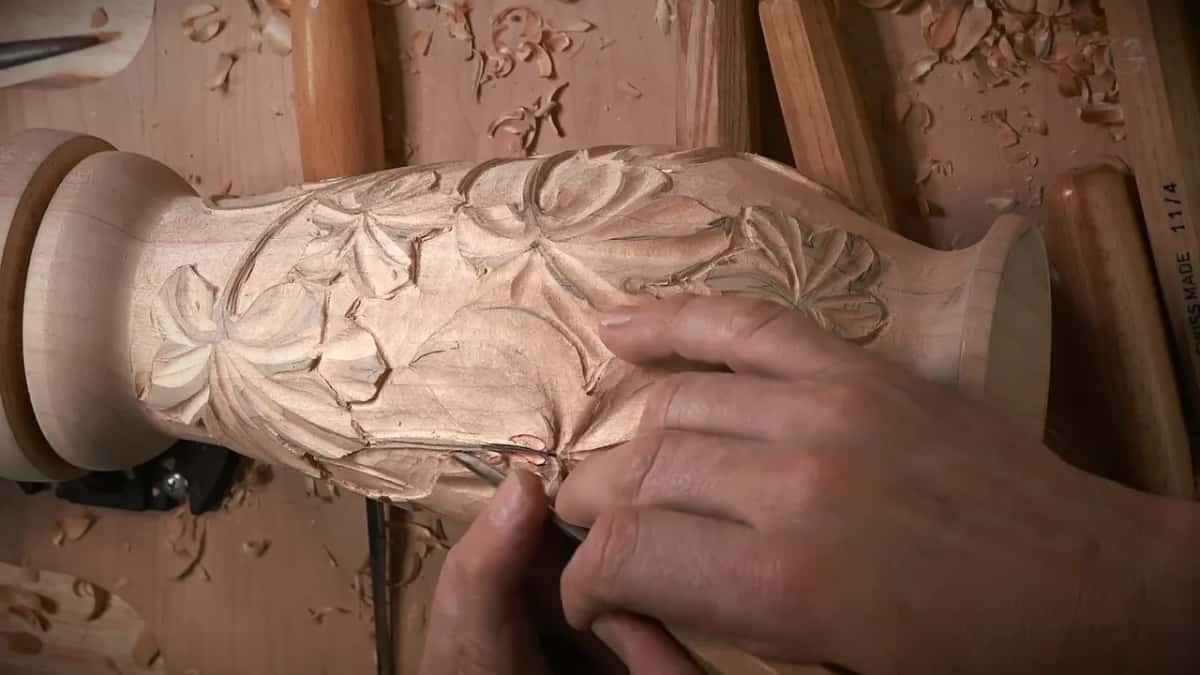
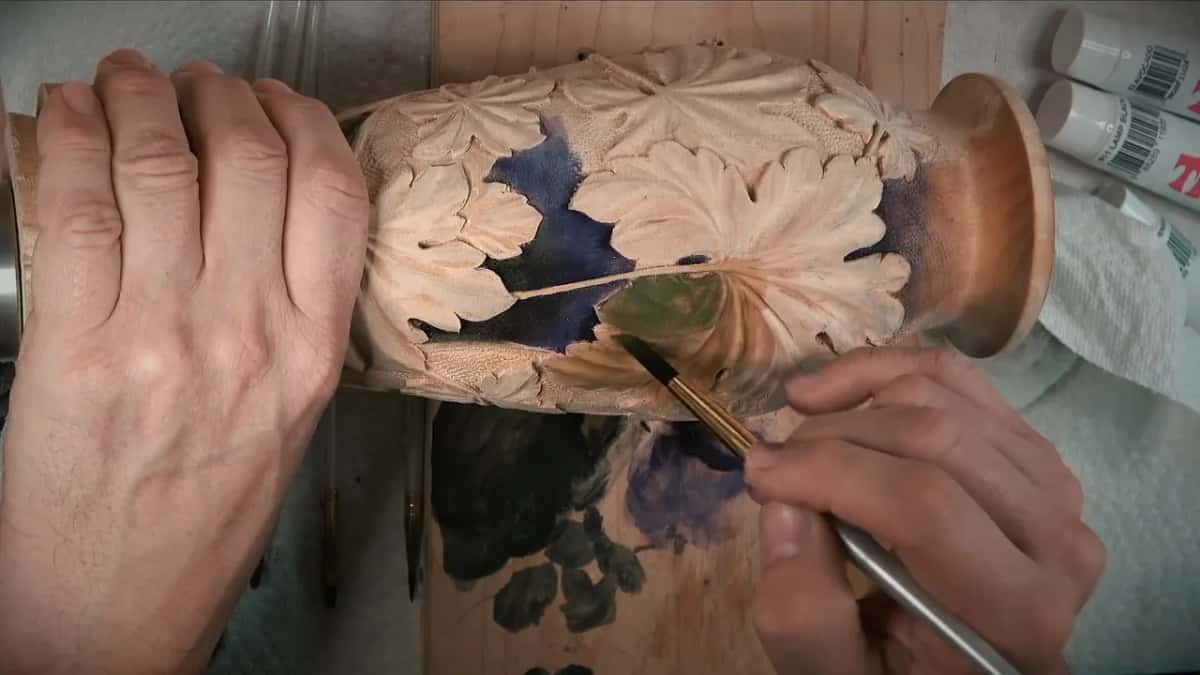
End grain shows up later, in the color. Whatever end grain you see takes the stain a little differently, and on the downhill end grain it soaks up a lot more and goes more black, which is a really good thing. While carving I keep checking the grain direction and go from the high spot downhill, and where two high spots run into one concave, I come in from both sides. This vase has grape leaves and no grapes at all, so for the grapes themselves, look at the grape onlay.
How do you hold a hollow vase while you carve it?
From the inside. I left a tenon when I turned it, so the vase can go back on the lathe later, and I left one extra thick spot so a carver's vise plate could be screwed to it. The plate goes down inside the hollow body. Two inch plate, about 50 mm, and screws about an inch and a quarter, roughly 32 mm.
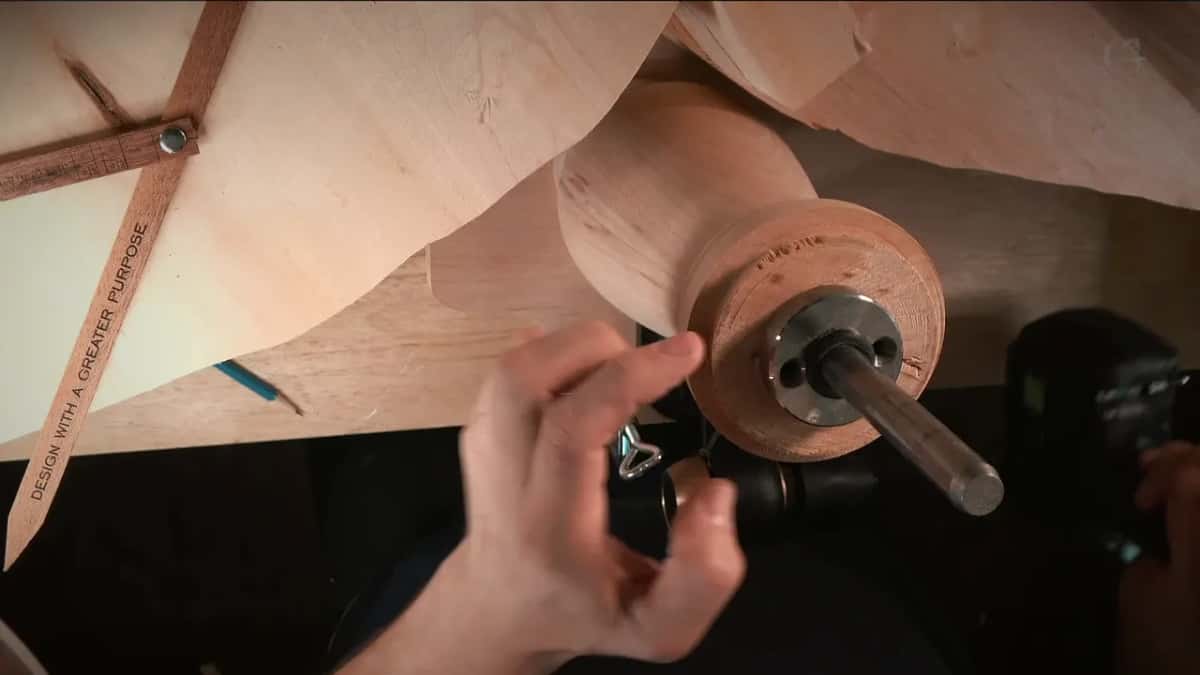
One warning that costs nothing to take. Please do not use drywall screws for this. They are too brittle, and one of them snapping off inside a hollow vase is a bad afternoon. The vise itself is a Veritas from Lee Valley in Canada, and the reason I like it is that I can buy plates in two inch and three inch sizes and keep several jobs mounted at once. While this vase was on the bench there was also a big corbel from a paying commission sitting next to it.
The block the plate screws into gets cut out afterwards. That block is waste from the start, which is why I could use longer screws than the piece really needed. And once it is mounted I can spin the vase to any angle and come at a leaf from the side instead of fighting for the reach. Yes, I could have carved it on the lathe. My lathes live in the garage and it was too hot out there.
Which wood sits under the color?
Basswood, which is limewood, the same tree. I forgot to say so until the fifth part of the first lesson, so let me say it properly here. Basswood is a lot nicer to carve, and there is a second reason. Less grain movement means less destruction to the eye. There is still grain in it, just not as much.
Personally, I prefer the natural color of wood, but this vase was made on request, so it had to be colored. The olive wood lily box left its wood bare. The numbers on basswood are one click away, if you want them.
Why not oil based stain?
Clean colors are impossible to mix with it. This piece was never going to be one flat stain. The man who asked for it wanted shades running out of pure black into the lightest tones, so I had to blend my own, and that ruled two products out.
| What you could reach for | What it does on a carving | Verdict here |
|---|---|---|
| Acrylic paint | covers the wood and you lose all the grain underneath | no |
| Oil based wood stain | mixable, but every one already carries its own color, and it dries slowly | not for blending |
| Tint thinned with denatured alcohol | the figure of the wood is still visible underneath it all | yes, on this vase |
| Test board first | a scrap of maple plywood shows the real color before the vase does | yes |
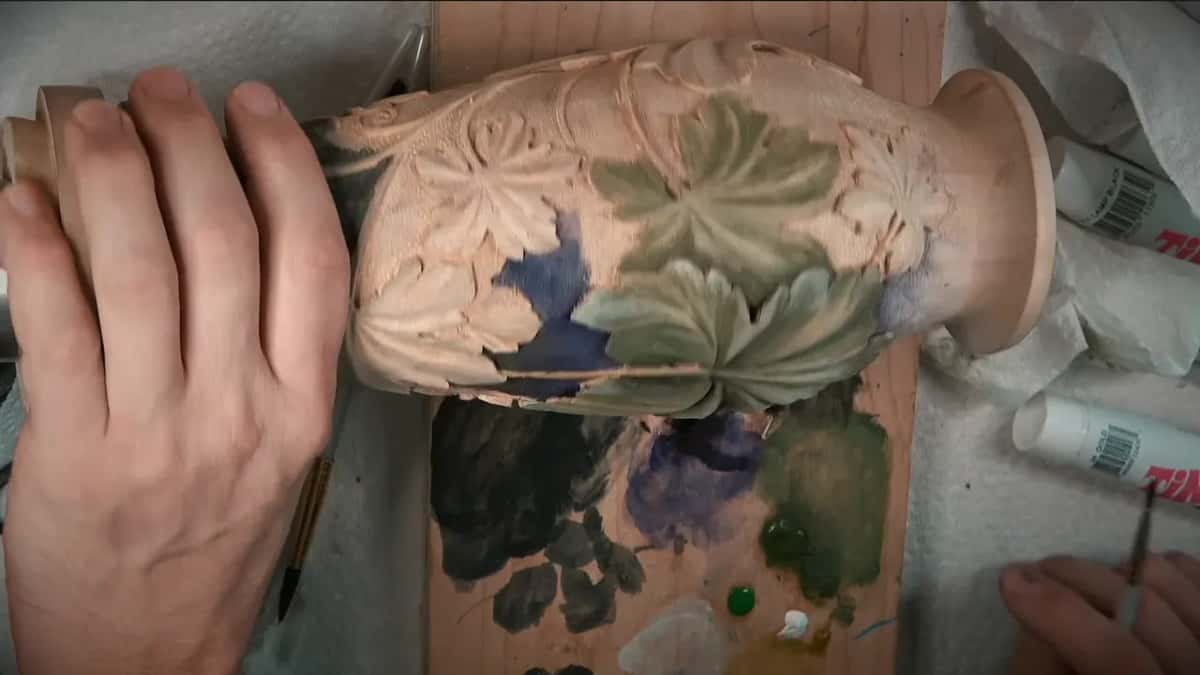
An oil stain will mix, so that is not the problem. The problem is that each one arrives with color already in it, so blending two gives you a muddier version of both instead of the shade you wanted. Add the slow drying and it is the wrong tool for a piece with transitions on it. Alcohol thinned tint goes on almost like an artist works, a little at a time, and you take your time. You can see all the grain right through it, and that is exactly what I want.
Where does the deep lavender go?
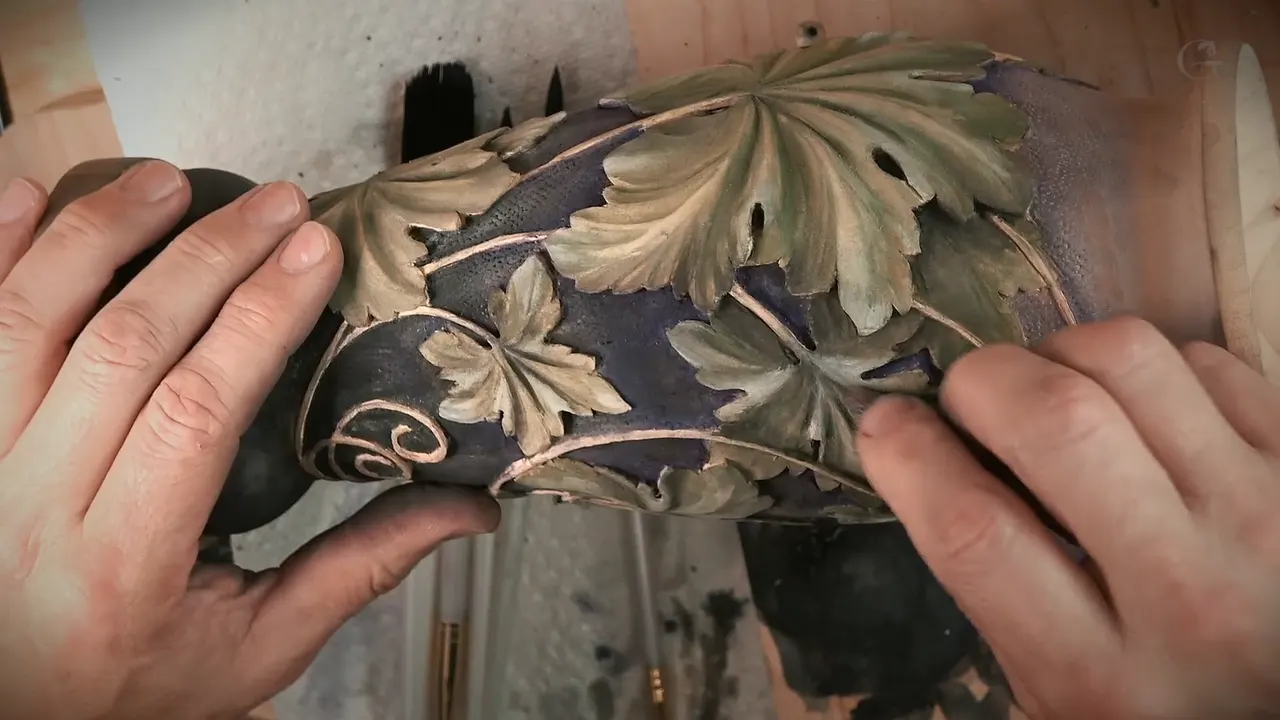
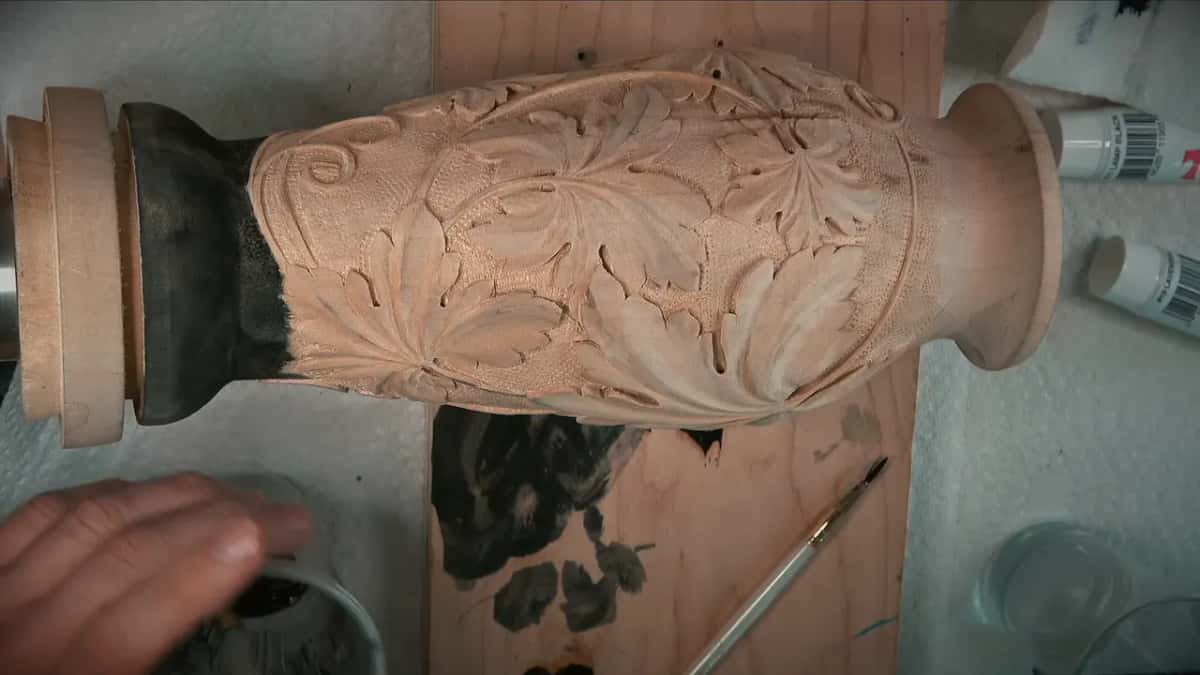
On a golden ratio point, measured from the other end. My scheme runs black into a deep lavender and lavender out into nothing, and the deep lavender needed a place to sit. So I went to the golden ratio again, six parts out of ten from the opposite direction this time, and it landed where the strongest color belongs. The same rule that placed the leaves placed the color.
On this vase the rule came back again and again, and the color was the last time. A lot of it I just eyeballed. My eye already sees where the point is supposed to be, and if you measure it, I know I'm right on the money.
George Walker and Jim Tolpin, in By Hand and Eye, put the tool at the center of the whole tradition.
dividers were, in fact, the most ubiquitous tool of the artisan age
Mine are golden ratio calipers rather than plain dividers, but the habit is the one they are describing. You reach for the tool, you read the point off it, and you stop arguing with yourself. Dividers are how I was taught to set out a Greek acanthus, and after forty years I have not found a better way to place an acanthus leaf.
Is this course only for turners?
It helps to turn, and it is not required. Four lessons, 42 video parts, one small vase, a bare turning at the start and ready for oil at the end. If you already own a lathe this will show you what to do with the shapes coming off it. Without one, watch it for the layout, because the proportion work is the actual content and it transfers to anything with a surface.
The finish is light sanding with the grain, careful on the small details, a small scraper on a few high spots, then oil. Danish oil or tung oil, I had not decided which. I sanded one spot further than I meant to and said so out loud on camera. I think it's a nice project even for a beginner, because it is not that complicated once you understand the logic. If you have never held a gouge, First Cuts for Beginners and a flower rosette are there too. The Tray of Blessing carries the same grape vine on a flat surface if a round one feels like too much at once.
Tuition here pays for orphans and widows, and it sends children to art lessons their families cannot afford, which is the situation I was in as a boy. Every lesson is listed on the lessons map, and the in person workshops are there if you would rather stand at a bench beside me. Access runs monthly or yearly, renews automatically each period until you stop it, and you stop it from your own account. Both plans are on the Access page.
So how long have you been guessing where to put things?
How it's done
- Turn the form first. Mine has its widest point on the golden ratio of its height, and the biggest leaf goes there. I left a tenon so it can go back on the lathe.
- Keep one thick spot for the vise. One extra thick patch inside the hollow body takes a carver's plate, and that block gets cut out later.
- Screw the plate in from inside. Two inch plate, screws about an inch and a quarter. Drywall screws snap, so keep those well out of it.
- Find the golden point with calipers. Measure foot against rim. Where the middle leg lands is where the largest circle of the ornament belongs.
- Draw the boundary circles on the wood. Three sizes, big, medium and small, cut out as patterns. I kept adding leaves until there were 13.
- Give each leaf five divisions. Grape leaves come in three or five divisions. I like the five division ones the most, and five is Fibonacci too.
- Rough the leaves. A number 7 takes the background out, then a 10 mm number 11 does the concave cuts. Each middle line stays high.
- Put three subdivisions in each. Sixty percent between the middle and the edge gives the line, and it turns into a vein.
- Undercut with a 1 mm number 11. This waits until the concave cuts are in. The wall is only 6 mm, so the carving stays near a sixteenth of an inch and the undercut makes it look deep.
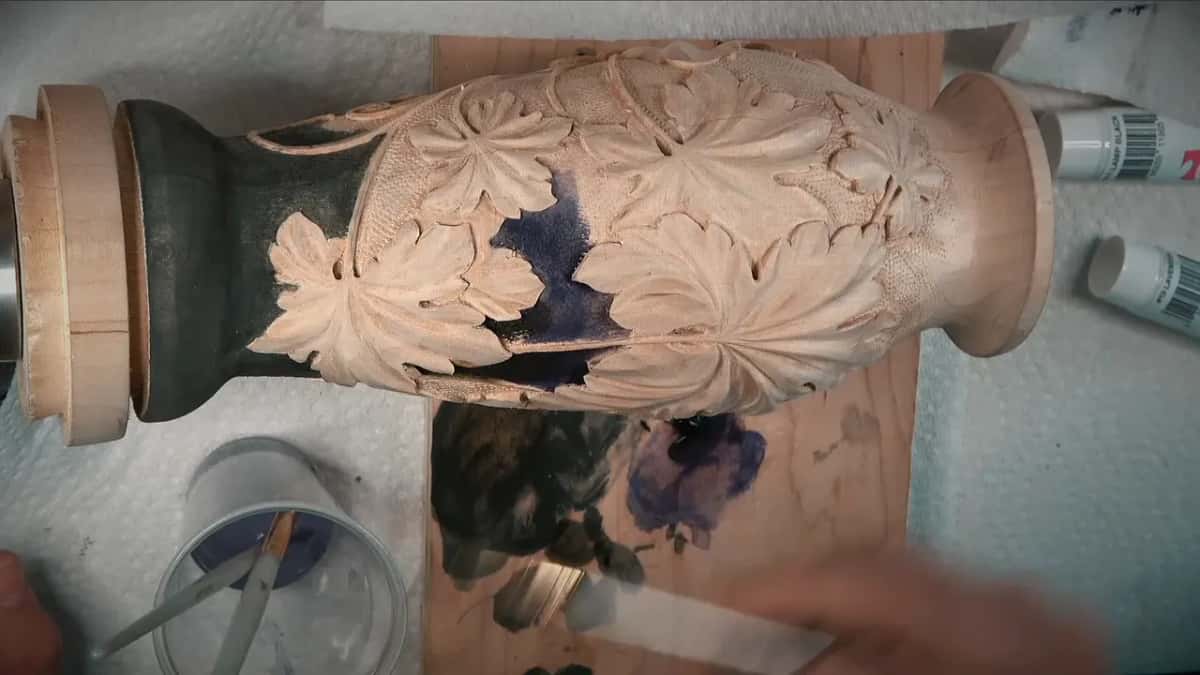
- Test the color on scrap, then build it up. A maple plywood board shows the shade you are mixing. Black goes on the background first, then lavender, then avocado on the leaves.
Frequently asked questions
What does the golden ratio mean for woodworking?
Roughly sixty to forty, or 62 percent if you want it exact. Six tenths is the easy way to remember it. Divide any length that way, and the point you land on is supposed to be really good to the human eye.
Do you need special proportion calipers?
You don't have to use them, you can just eyeball it. I eyeballed a lot of the leaf lines on this vase. Mine have three legs, so when the outer two span a length, the middle one sits on the point.
Can you carve a hollow turning without going through the wall?
Wall thickness is the whole limit. Mine was about 6 mm in places and about 10 mm in others, so most of the carving stays about a sixteenth of an inch deep. The deep undercuts are what make it look like a full three dimensional piece.
What to carve next