

Alexander Grabovetskiy, woodcarver, School of Woodcarving · Published 2020
How do you carve an acanthus leaf that wraps around a corbel?
Quick answer: A wrapped acanthus leaf is one leaf carved over the settled form of the block, running round its turn and dropping back onto the main body. In workshop 84 I kept one point of the main shape, rolled the end back past my drawing, and never let a hollow sink under the main body.
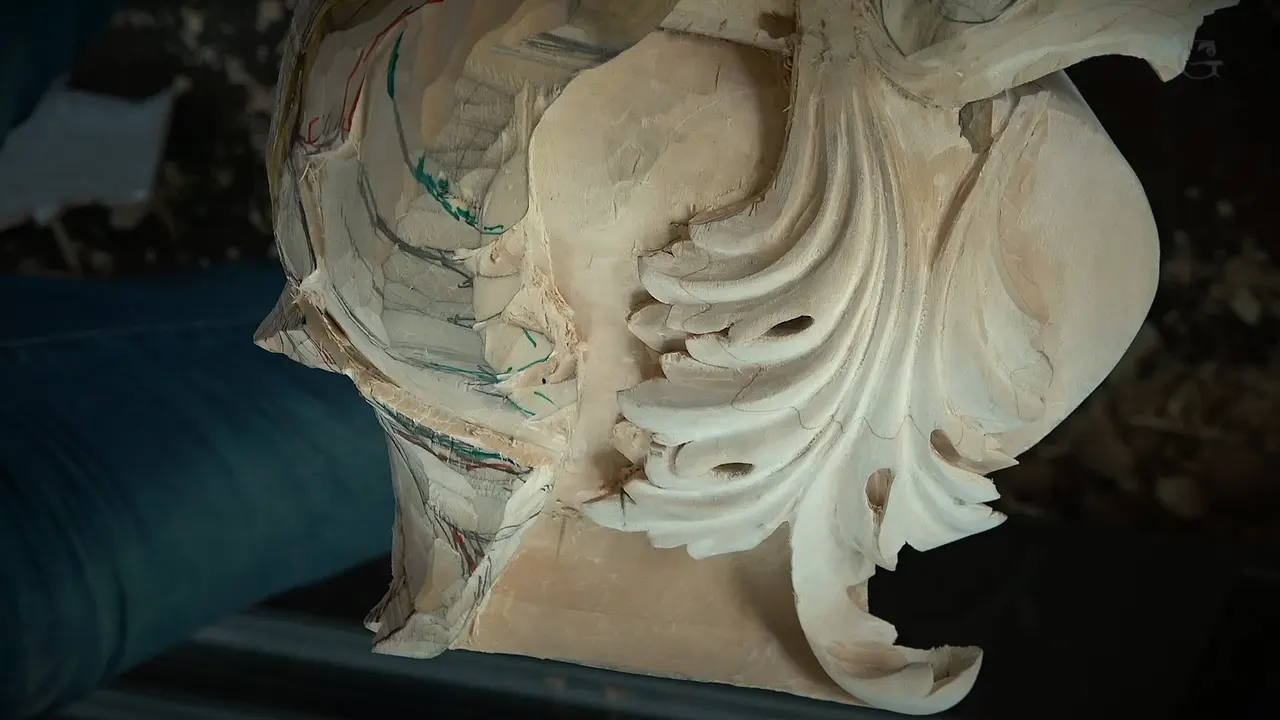
An acanthus leaf round a corbel is one movement carved across the turn of the block, lying on the main form and coming to rest on the main body behind it. On an acanthus corbel the form gets settled first, and the leaf rides on it.
In workshop 84 of the Venice Room I carved that kind of leaf on the big corbel, the one I called a huge corbel at the start of workshop 79. My camera sat above me. The leaf kept going round to places the lens could not follow.
Have you ever looked at a carved bracket and wondered how the leaf gets round the corner? Would you like to watch one get there, decision by decision? Then come through this one workshop with me, because I said my choices out loud, the wrong turns too, and your own acanthus leaf carving can borrow all of them.

Six things this leaf needed
The main form comes first.
About an inch of spare wood on that side let me round it a lot.
Then the leaf wraps around and ends on the main body.
A single spot on the main shape, what I called the main architectural part, has to stay, so I rolled the leaf rather than lose it.
It rolls back more than my drawing did.
No hollow sinks below the main body's outline, even where nobody will see it.
Why does the main form come before the leaf?
The leaf needs something to lie on. Right at the start of workshop 84 I told my students this side had to go down more toward the main body, but not now. First I needed to establish the main form.
I had approximately one inch of wood to that form, right there. With that much I could round the side tremendously, and the leaf would lay on it. It's an illusion, I said, that it is laying right there.

That side was a hard place for me to reach. I tried a skew first, and then I said I could probably take a #9 with a mallet and work from the back side. I also changed how the piece was fastened. The system lets me relocate it as many times as I need, until the position suits me.

How does an acanthus corbel leaf travel around the block?
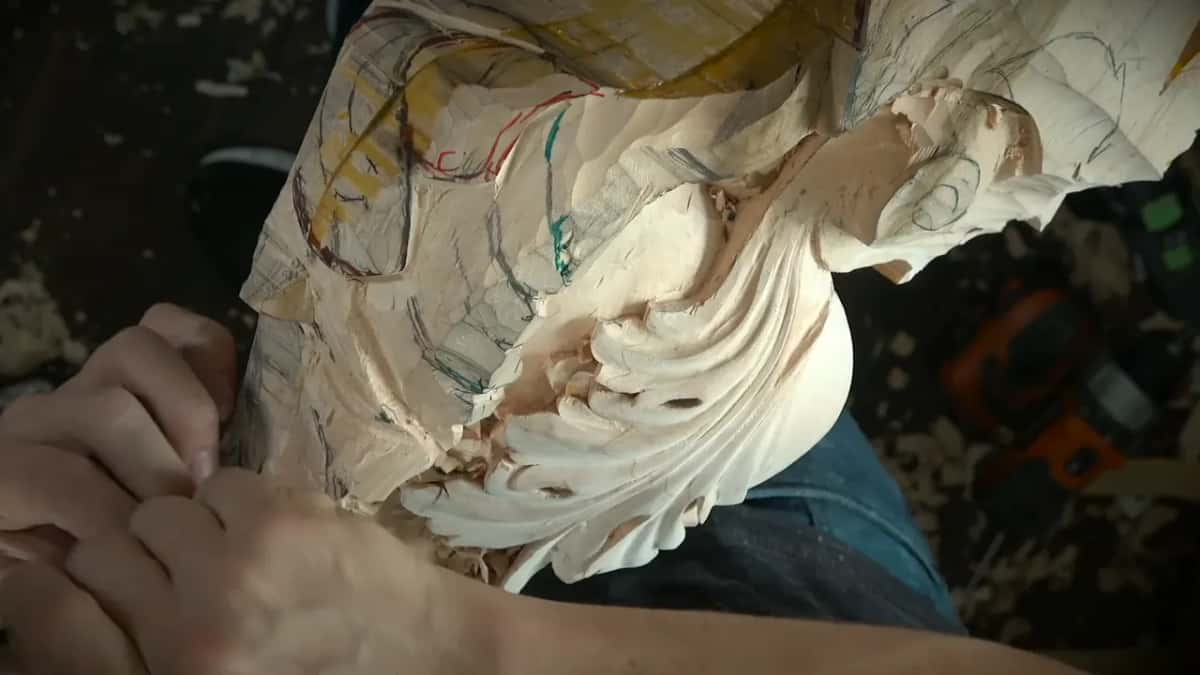
It travels round and falls back to the main body. When I showed my students different angles, I said it is actually wrapping around, going this direction, and then showed how it is supposed to look at the front.
The lens sat a little away, so the video does not show the true look. Later on, I promised, I'd make a picture and you would see it.
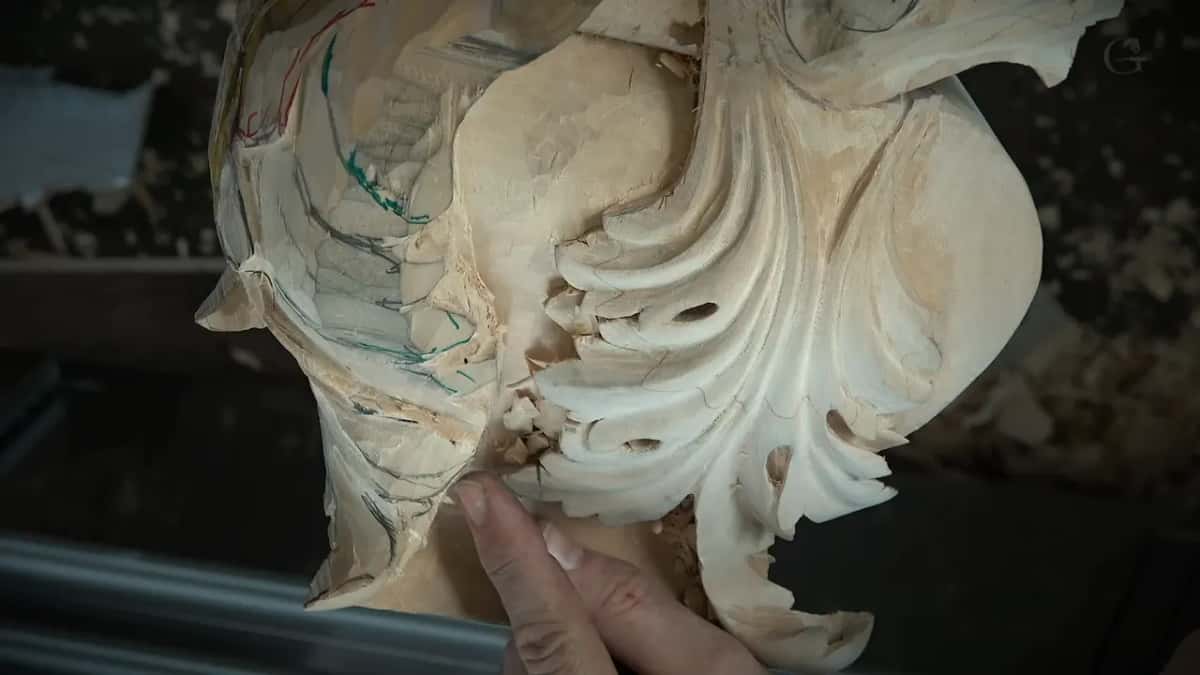
Part of the movement goes underneath, too. During the second video I pointed at stuff going in another direction and said, unfortunately, you don't see it. I changed the camera position and lost time doing it. For me it is a really slow process, and I said so.
One section after another turned out to be part of that same movement, the one wrapping this way. It's going to go all the way, wrapping like that, I said in the third video.
Which point on the block does the leaf have to keep?
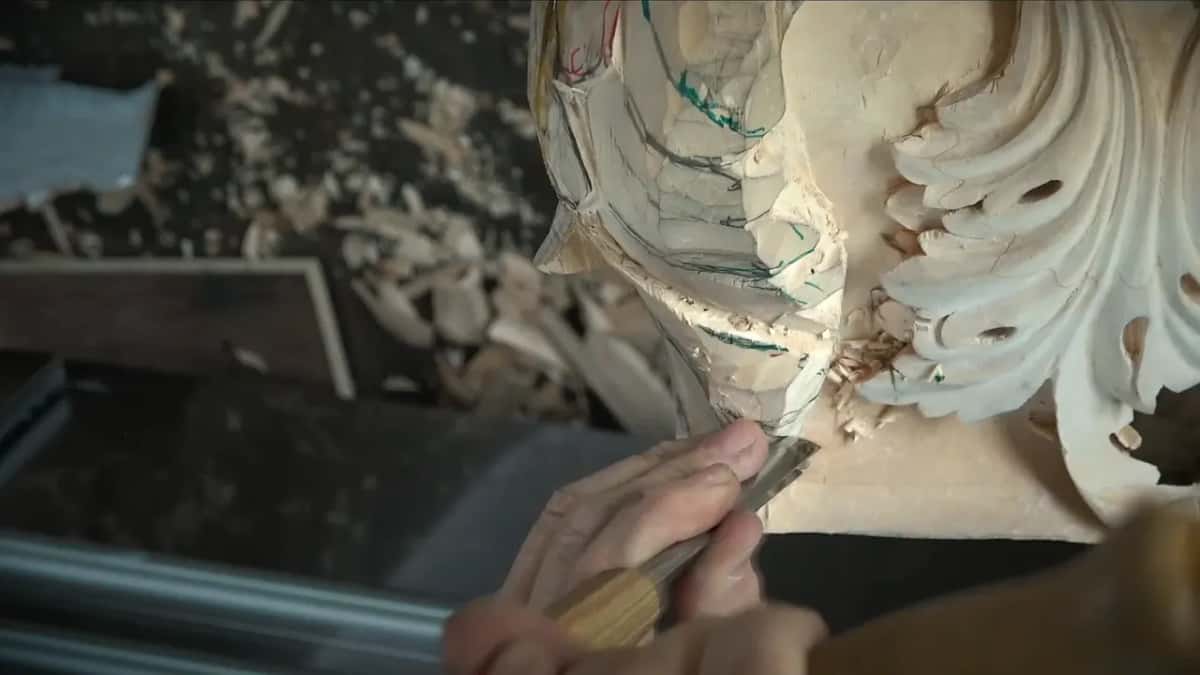
The point of the main shape. I called it the main architectural part, and in the fourth video I had to decide how that whole section should look. I could copy a flip I already had, one you do not really see, or I could roll it and get underneath.
I really want to keep that point, I said, twice. Rolling was the way to keep it. I took a small #3, about three-eighths of an inch, 10 mm, and started shaping the form, and I reminded myself not to lose that point.
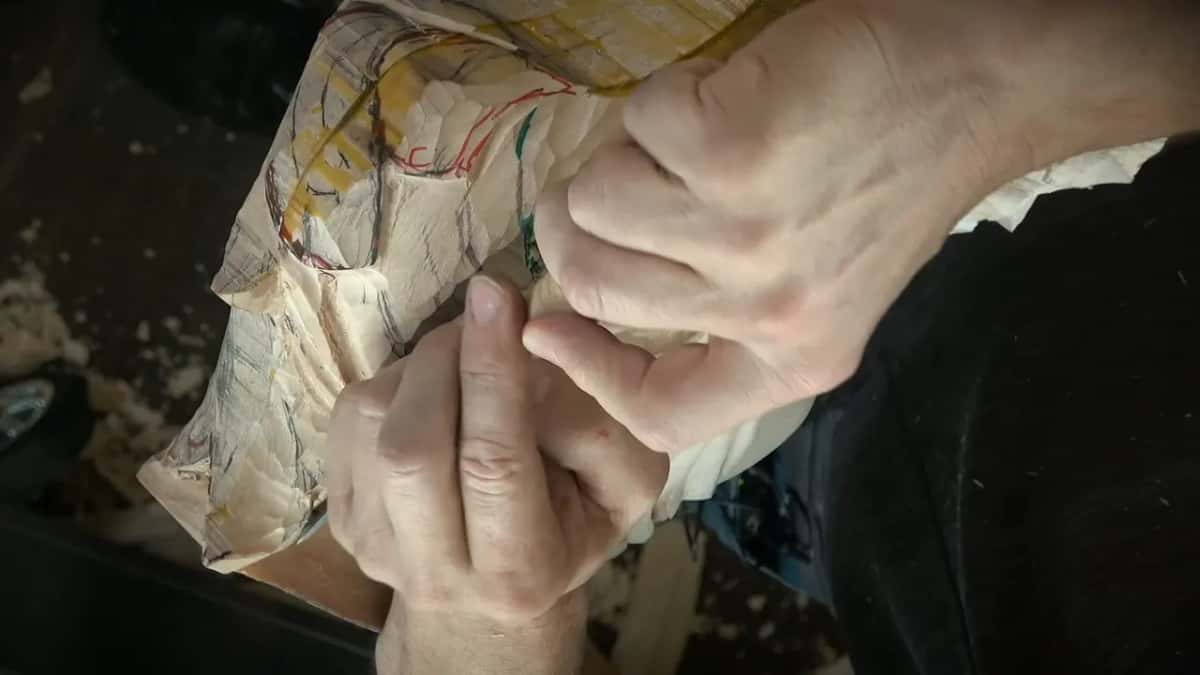
By the start of the next video the leaf was just laying right in the corner. It's touching right at the corner, I said, on that rectangle. I was happy with that.
There was the second piece, too. I did not want to remeasure everything on it, and I told the camera I probably still would, only not as much.
Why roll the leaf back further than the drawing?
Rolled back, it looks more organic to the movement. Before that I had a choice. Lower this section, so the flip reads stronger and makes a more beautiful movement, or repeat what I already had on this side? I don't know if I should or not, I said. Maybe I shouldn't.
I lowered that side next with a #7 of 14 mm, a little over half an inch. It gave a really smooth transition between the two sides.
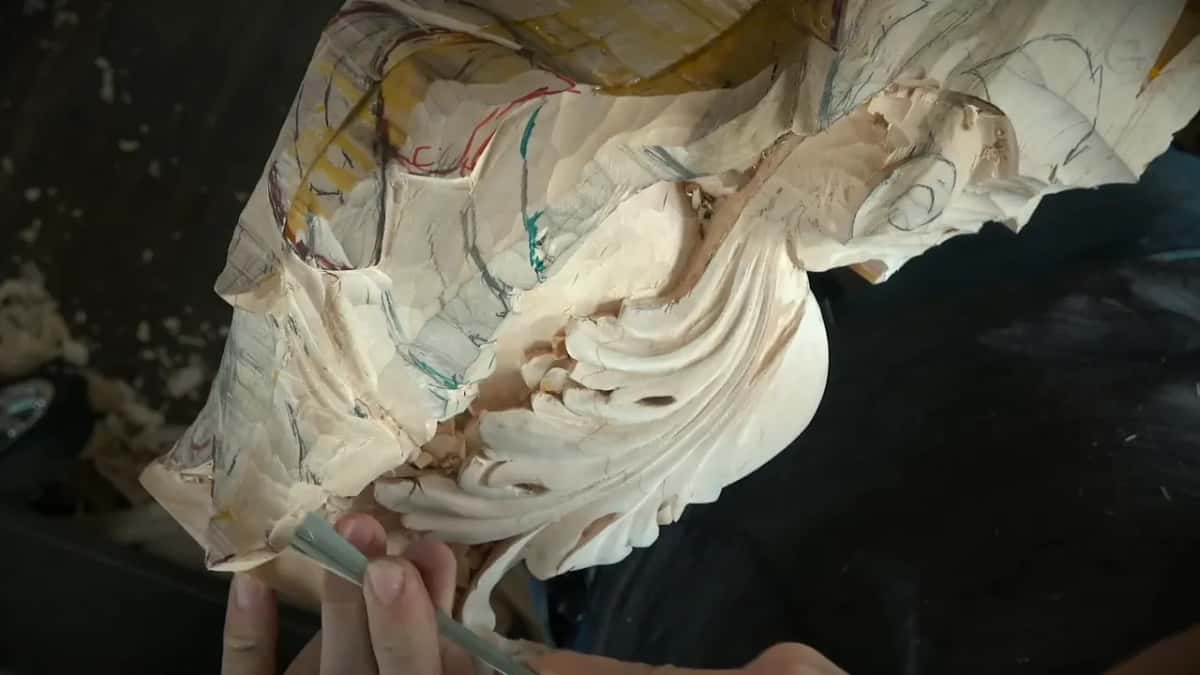
Where the movement ended I had a point, and the plan did not look good there. I rolled it backward instead. Then I double-checked against my original. In the original it was not rolling back as much, but I thought it would look much better, and I outlined it that way.
The same kind of thing had happened earlier, in the third video. After carving one area I saw I could go the opposite direction, lower that side and let the other part flip a little above it. Not the right way at first, I admitted, but I still had plenty of material. A concave was still going there, so it was not a huge mistake, and the movement got a lot more logical.
By the last video I mentioned it once more, almost in passing. I changed the design a little bit.
How deep can a hollow go on this leaf?
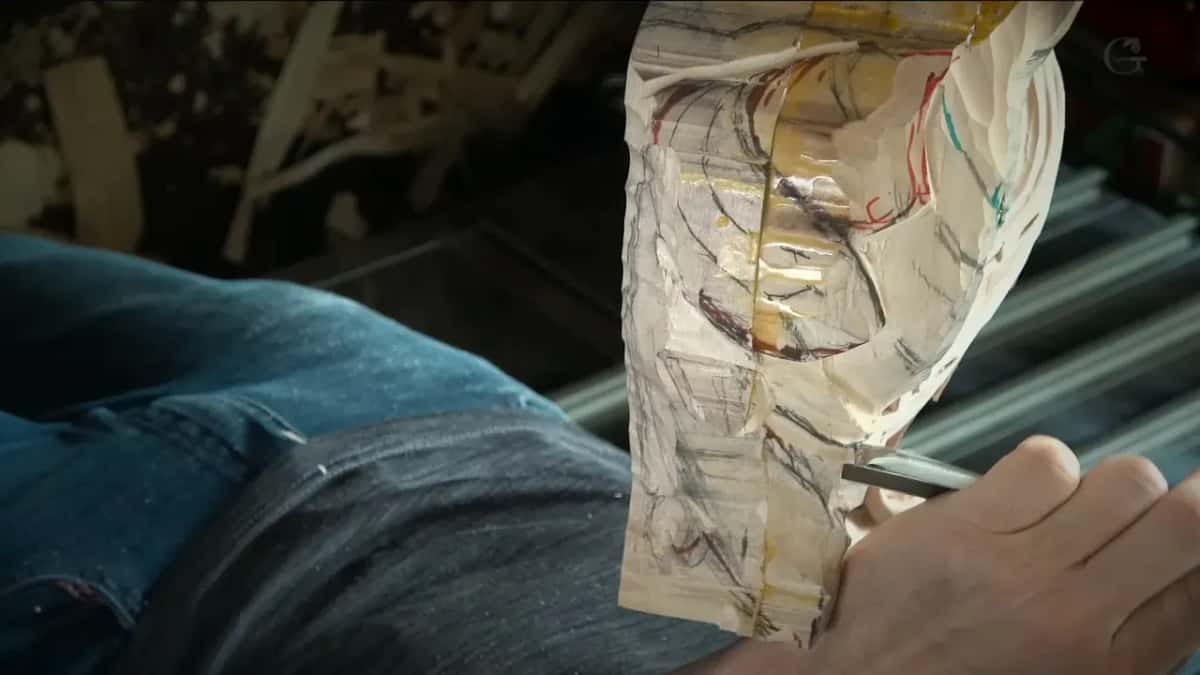
As far as the main body. I wanted a deeper concave in one spot so the part beside it could rise, and I said out loud that I cannot go deeper than my outline of the main body. Logically, you are not going to see it. You will still feel it, and you will feel that something is wrong.
A little deeper was fine, so I took that much, then raised that part with a #3. One section earlier had gone down about six millimeters, about a quarter inch.
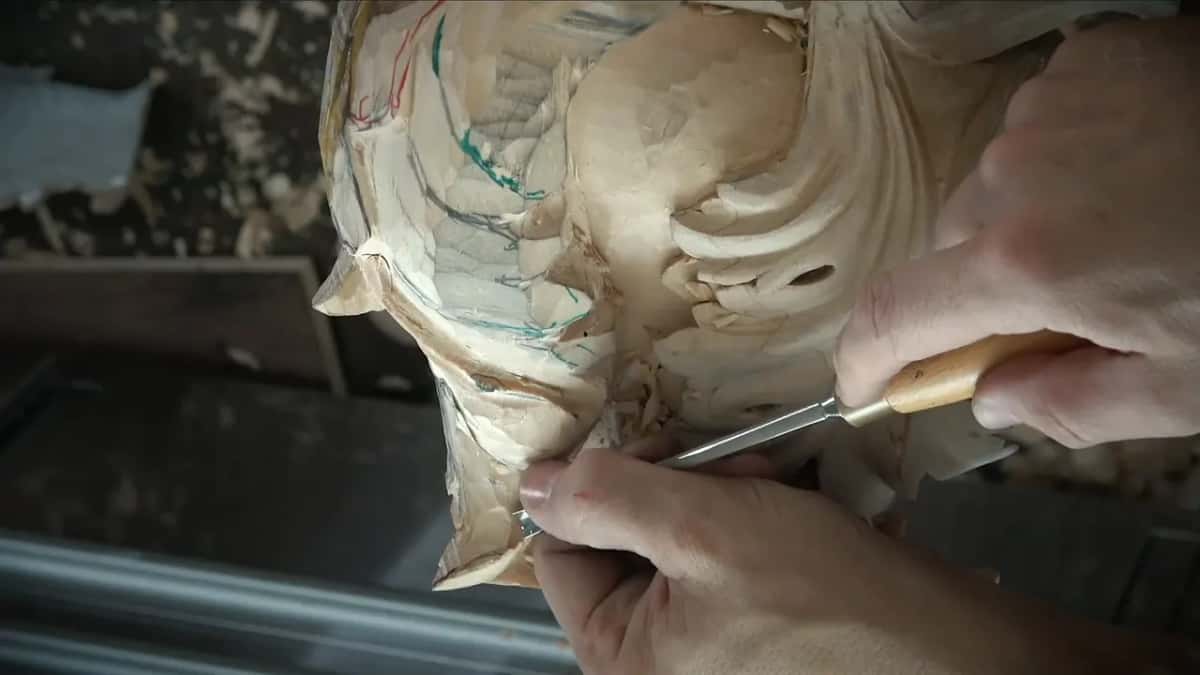
One thin part stopped at about five millimeters, 3/16 of an inch. Can't do any more, I said. Of course I could, but it would be a really bad idea. The grain on this leaf runs upright, which made parts of it easy to break while carving, but I said they will be strong once done, because the grain goes that direction.
Near the end of video five I made one pass a little too deep. That is okay, I said as the next video started, and I kept going.
Where do the eyes go when the leaf turns a corner?
On this leaf they went where the movement asked for them. Early on I said the positions of the eyes were not as critical in this case, but I still like to see some eyes.
If this part and that part are one movement, I said, I need to make an eye somewhere underneath. Another eye went into another section, with the 7 mm again. Usually I am kind of afraid of going deeper right away, in case the eye sits in the wrong place. On one of them I went deeper at once.
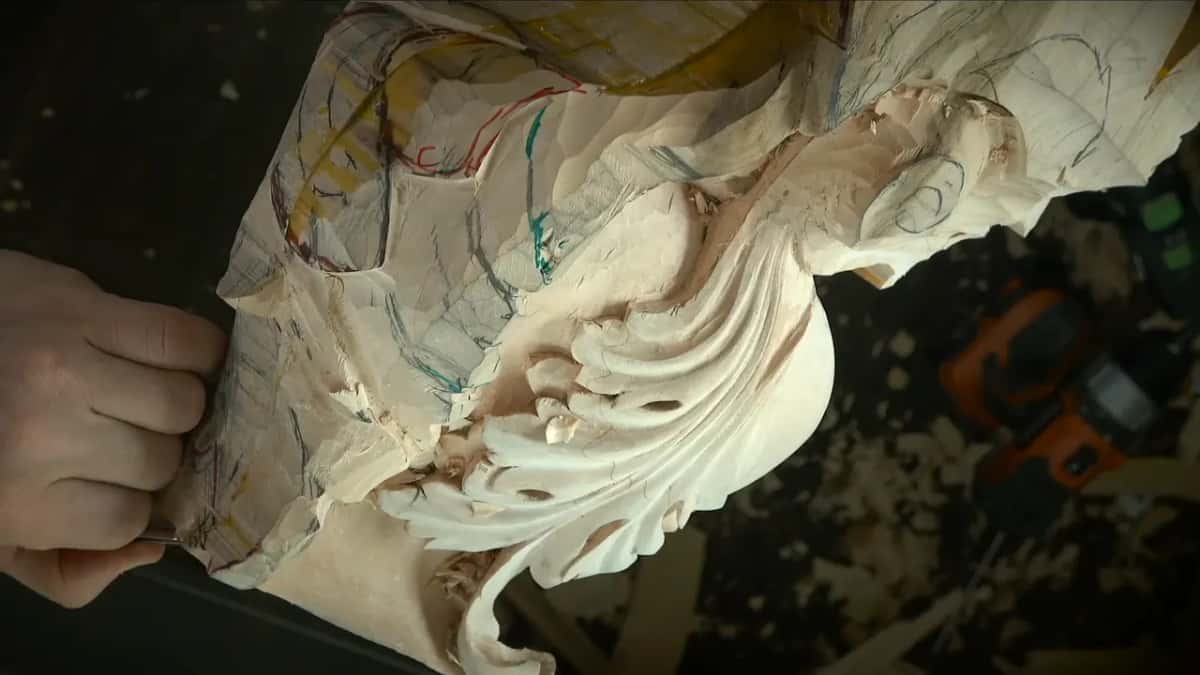
Later I found an eye that should not have been there at all. That's actually wrong, I said. Just made a mistake. That little chunk belonged to one movement, so the eye made no sense, and I went at it with a 3 mm #11, hoping I would not lose it. The pencil mark for that eye had to go as well, or it would confuse me into another mistake.
My eye there has to follow the main idea, I said, and the pipe heads for one point. Both sides of an eye get concaves. I drew the second one in blue so my students could follow it. Later the pipe still was not pronounced enough, so I went much deeper beside it and made another concave on its far side with the 7 mm.
I made the middle of this acanthus convex, which I told them is the particular Venetian style and not always the case, and the Byzantine acanthus keeps a convex middle too. The pipes and eyes of a single leaf have their own course in the Roman acanthus.
Why does a wrapping leaf need a taper?
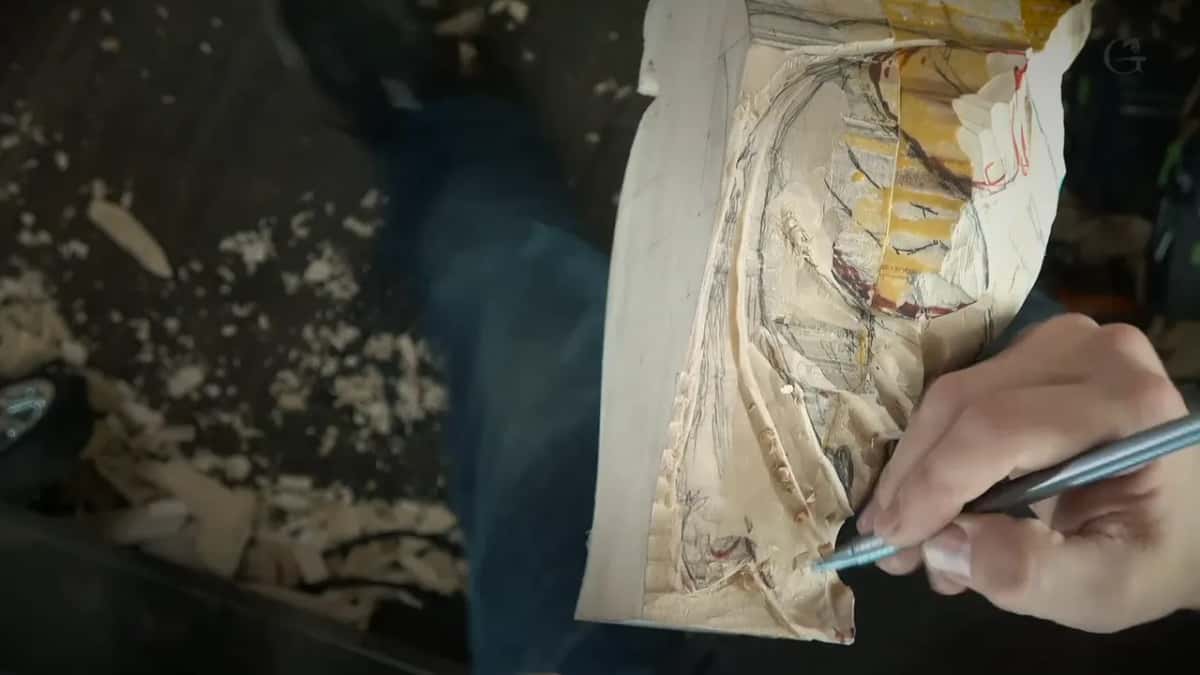
Two parts of this leaf had the same distance across, almost like a rectangle, and that is not good. Look at that section and that section, I said. It has to have some taper, I said, and in that spot the only way to get it was a separation.
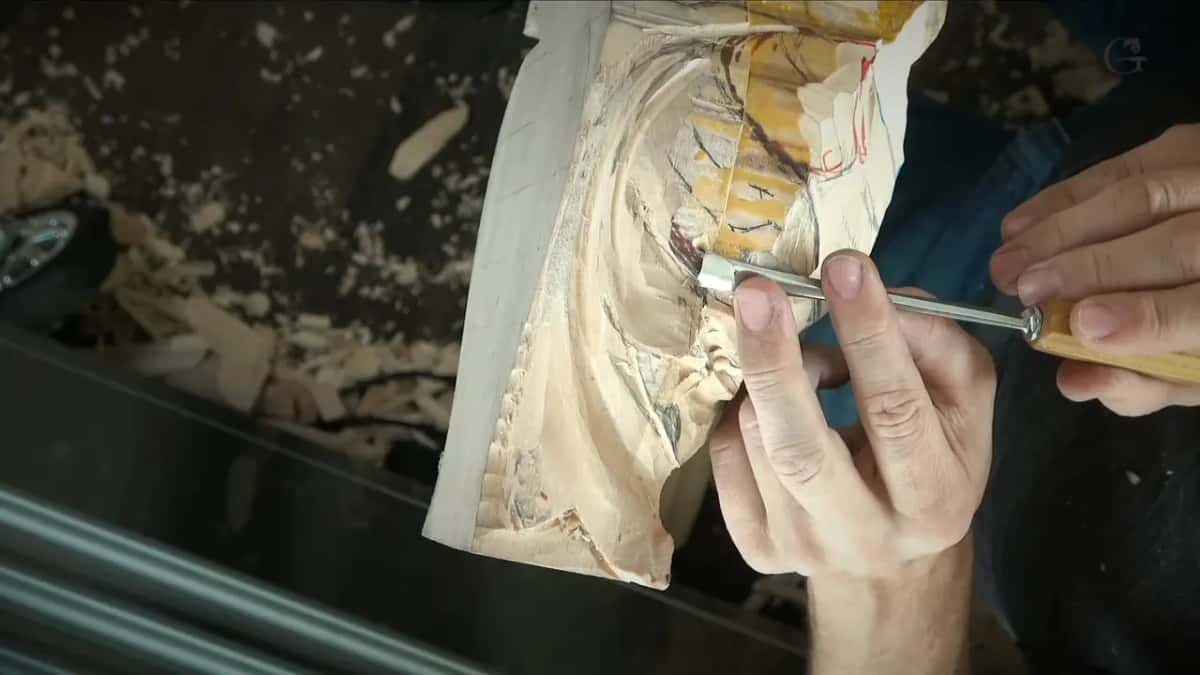
Separations came in more than one place. One went from above, down from the main body. Why not, I asked, and planned a second one near it to repeat the idea. Another I set with a 2 mm #11 and a small brass mallet, and at one point that mallet fell down. I have multiple mallets close by.
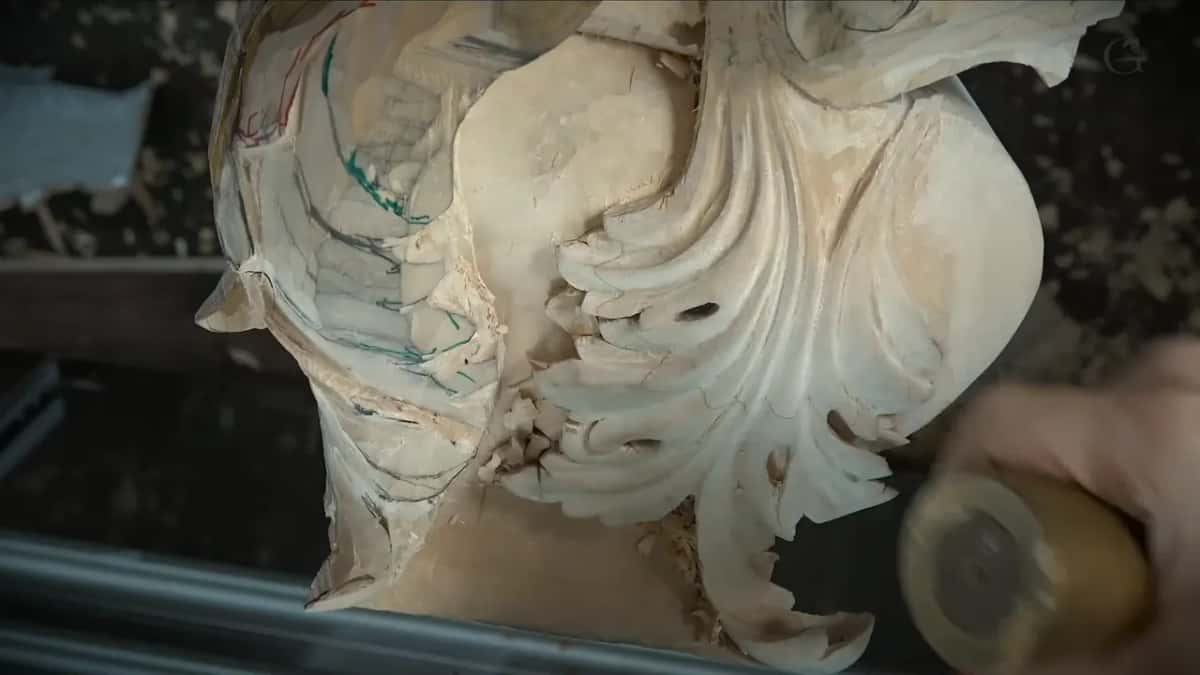
Inside one hollow I was not happy with how smooth it was, because I had used too small a tool there, by choice. I went to the 7 mm, and 7 was much better than what it was before. A skew knocked down a bumpy side. Late in the workshop I found the middle of one section, sent one separation this way and one that way, and put a concave on each side of that middle so it stood more convex.
What goes under the leaf where it turns?
Small pieces left standing underneath, so the space gets filled. Back in the second video I pointed at two little pieces sticking out from underneath on the earlier section and said it makes it richer and fills the space.
Later I said I would leave some material below for some kind of leaves, really nice filler movements. I needed some kind of spoon, I said, took a #5, and removed waste, but not much, because I wanted to keep some of that material. How much room to leave under a leaf is the whole subject of workshop 82, so I will not repeat it here.
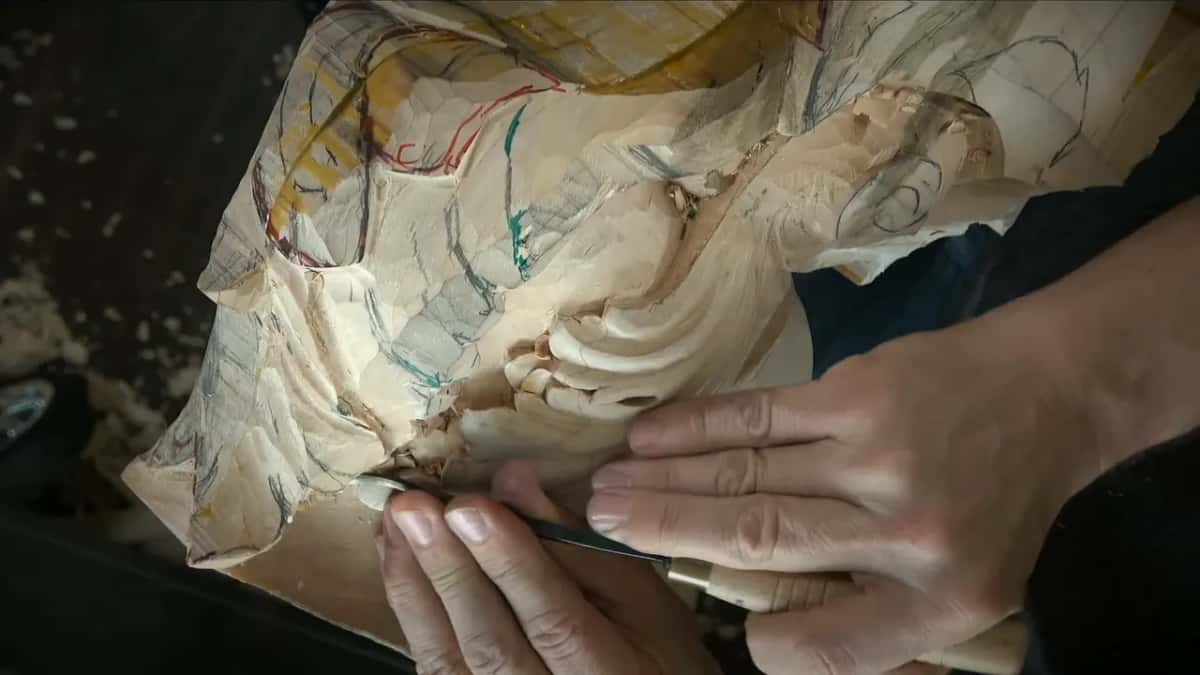
In one place the separation gave a really nice feel, like a really three-dimensional movement, as if that part grows from underneath. In video eleven I decided to undercut right away, because that piece is growing from underneath somewhere. First I needed its starting point, and then a 2 mm #11 went in. Really interesting transition, I said, and I kind of really like it. Section, not transition, I corrected myself a moment later.
How do you check a leaf that no single view shows?
By turning the piece and looking at the leaf from more than one side of it. I have to look from different points of view, I said late in the workshop, to understand if I'm making a mistake or not. Looks like I'm not, I said.
Before that I stopped to think how it would look overall. Even when it doesn't look too good right now, it will wrap really nicely, I told them. It's hard to understand, I admitted once, but you'll see at the end. My outline there was not the true shape either, but with it I knew exactly my movement.
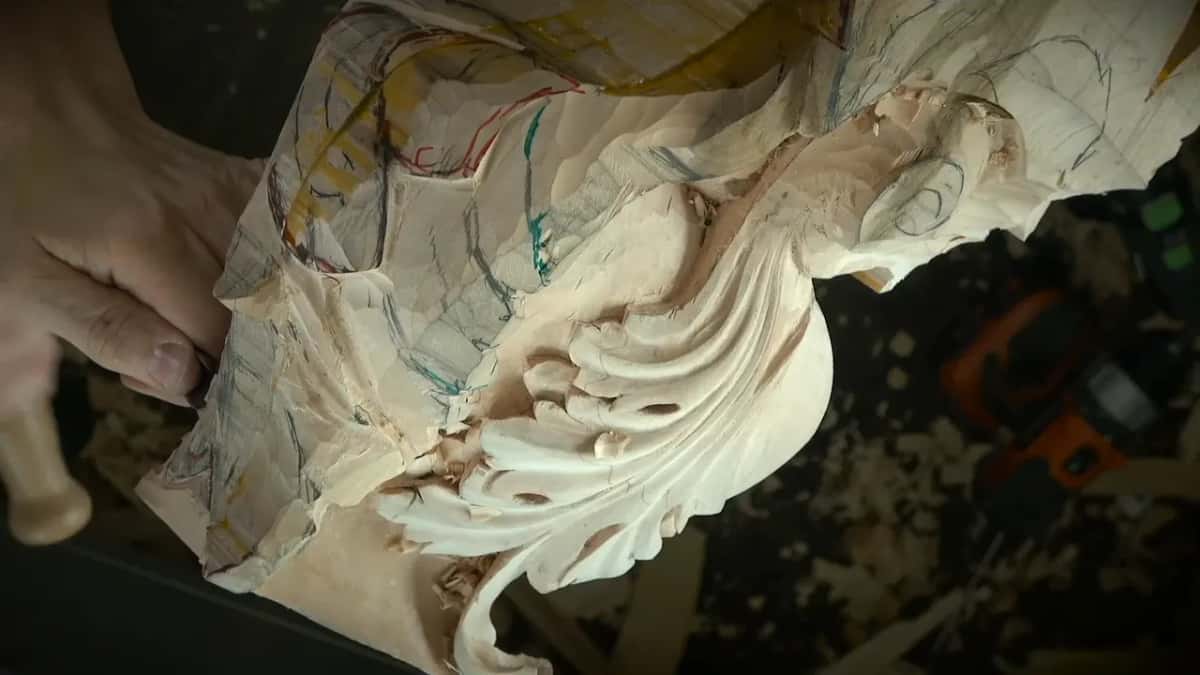
Some of this I did on my knees, carving like Michelangelo, upside down and looking up, and some I left for off camera, because no camera fits right underneath. Getting the drawing onto every face of the block came earlier, in workshop 79. Checking a shape against a screen is workshop 80, and a leaf that climbs across a molding is a different problem with its own course.
Which tools shaped the wrapping leaf?
| Tool | Job | Spot |
|---|---|---|
| #11 veiner, 7 mm | Outlined the side first, then the eyes. | Side outline |
| Wider #11, 10 mm (3/8 in) | Marked a separation in the wrapping movement. | Wrap separation |
| Narrow #11, 3 mm (1/8 in) | Traced the edge line without breaking it. | Leaf edge |
| Tiny #11, 2 mm | Separated one part under a brass mallet. | Part underneath |
| Little #3, 10 mm | Shaped the roll that kept the point. | Main shape |
| Long bevel #7, 14 mm | Lowered one side into a smooth transition. | Flip side |
| Plain #5 gouge | Took out some waste, but not much. | Below leaf |
| Quarter inch #8 | Took over underneath from a bigger #9. | Under section |
My #7 of 14 mm has a really long bevel. It slices through the fibers, I said, like you're sticking a knife in the butter. Keeping an edge like that is what the sharpening course is for. One stretch still did not flow. For that I used a rasp, my new addition, and I said nothing prevents me from doing it with gouges alone, but the rasp is fast.
Who should watch this leaf go round the corner?
Anyone who has carved a leaf on a flat board and wants to see where it goes next. This is one workshop in a long run. Workshop 83 comes right before it, workshop 85 right after, and the whole block of twelve is Part 7 of the Venice Room. It all began in Part 1, and it carries on in Part 8.
Do you like watching a decision get made in the wood? Would you rather see a leaf go round a real block than read about it? Then this room is for you, and it all sits behind one tuition plan, with the map of every lesson open to anybody first. If you have never held a gouge, start here.
How it's done
- Set the main form first. Get the main form settled first, and round the side where you have wood to spare.
- Let the leaf wrap. Carry the leaf round as one movement until it meets the main body again.
- Keep the main point. Decide which spot on the main shape must stay, then shape the roll so it survives.
- Check against your original. Double-check with the drawing, as I did, then decide. Mine rolled back further.
- Give it a taper. Where two sections share one width, add a separation so the shape tapers.
- Stay above the main body. Stop each hollow at the line of the main body.
- Look from several sides. Look from different points of view before you decide it is right.
Frequently asked questions
What does it mean for a carved leaf to wrap around a block?
A wrapping leaf runs round the turn of the block as one movement and comes down on the main body. During that workshop I showed it from a different point of view as well as the front, because from where the lens sat you did not see its true look.
What do you carve first on an acanthus corbel?
Settle the form first, and only then the leaf. On that side I still had roughly an inch to go to the form, enough to round it tremendously, and the leaf then seems to lie on that rounded form, an illusion I pointed out on camera.
How deep should the hollows on a wrapping leaf go?
Stop each concave before it passes the main body's outline. On camera I said you would not see extra depth there, logically, but you would feel it, and feel that something was wrong. A little more depth was fine, and I used it to lift the neighboring part.
What to carve next