

Alexander Grabovetskiy, woodcarver, School of Woodcarving · Published 2022
How do you carve a flower on a domed surface?
Quick answer: A domed flower carving, on my chamomile and bow rosette, is groove work first and dome work last. A 2.5 mm number 11 set the border of the raised middle, the knife went straight in on the slope, the ground went about 1.5 mm below the high spot, and a number 7 rounded the middle at the end.
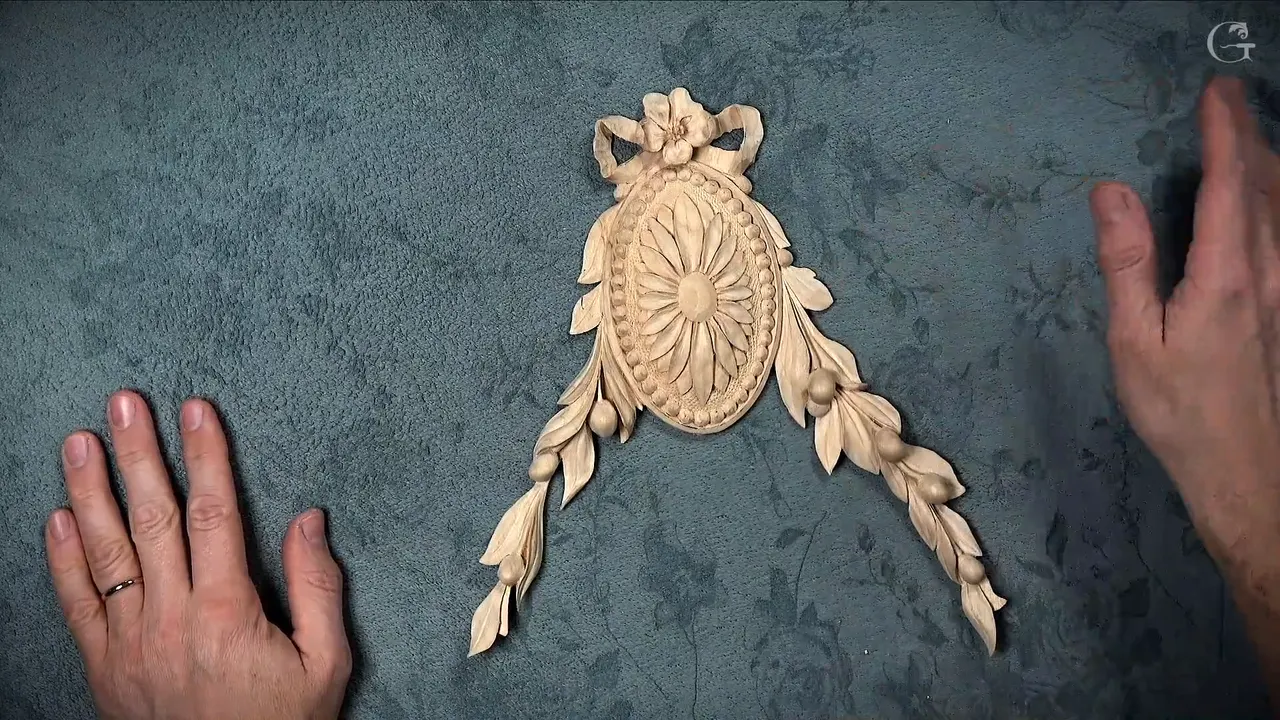
Carving the flower on my domed rosette is a number 11 groove round the raised center first, knife lines square to the slope, ground dug about 1/16 in under the high spot, and the center domed last. The ground between petals came out with a tiny fishtail spoon, a number 3, and a number 7 of about 20 mm (3/4 in) rounded the dome, slowly, with no forcing near the petals.
Whatever flower you want to call it, this wood carving flower is the main idea of the whole composition. I finished the other bits first.
Is a curve harder to draw on than a flat board? Does every line on a dome run downhill? Then start where I started, with a groove.
I'll give you the order I used on this piece, with the tools and sizes I named on camera, and the one undercut I forgot under the flower.
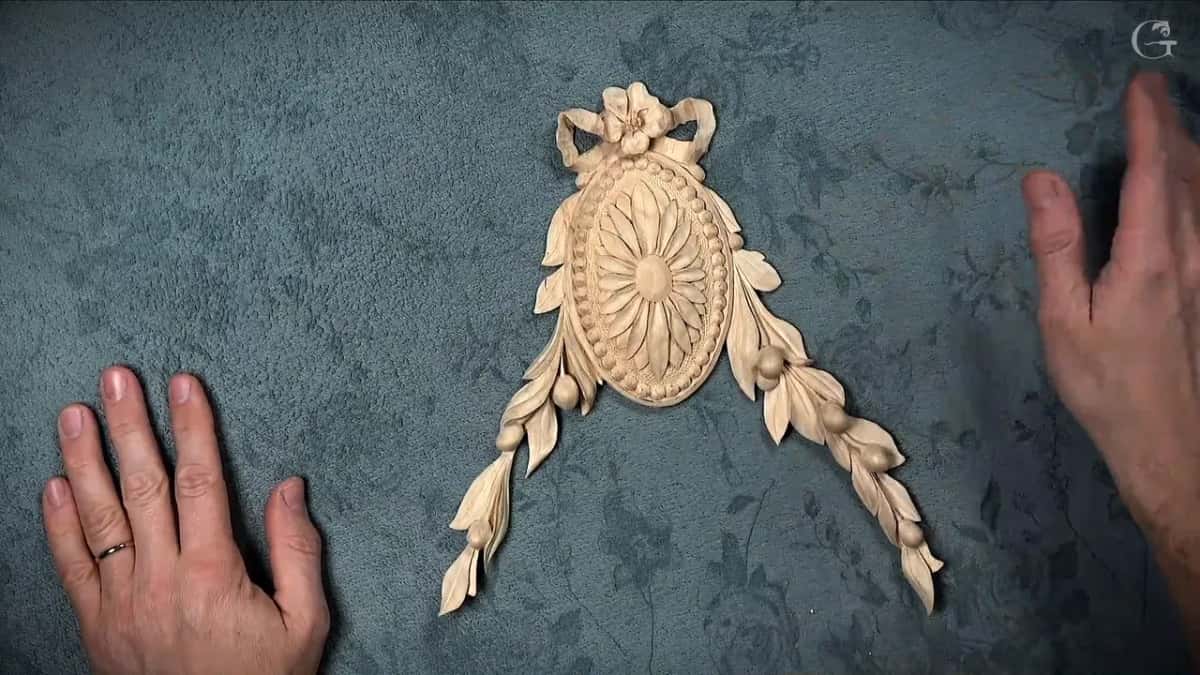
The whole flower in a few lines
Before any petal, a 2.5 millimeter number 11 circled the raised center, at least 2 mm (5/64 in) deep.
The knife outline went in upright on the curve and undercut nothing.
A really small spoon with a fishtail took the ground down about a sixteenth of an inch between petals.
For shadow, each number 11 after that was smaller than the last, down to 0.5 mm.
Each petal got the number 11 that fit its width.
Last of all came the dome, from a number 7.
I forgot one undercut under the flower and caught it in time, still glued down.
Where is the high spot on this wood carving flower?
Right in the middle. The center part is raised up, like a dome effect, and everything else goes downhill from there.
Getting the drawing onto that dome took a strip of drywall seam paper for the center lines and carbon paper to trace a quarter of my printout, and the course page tells that part.
There was no need for a hundred percent accuracy, so I eyeballed some of it.
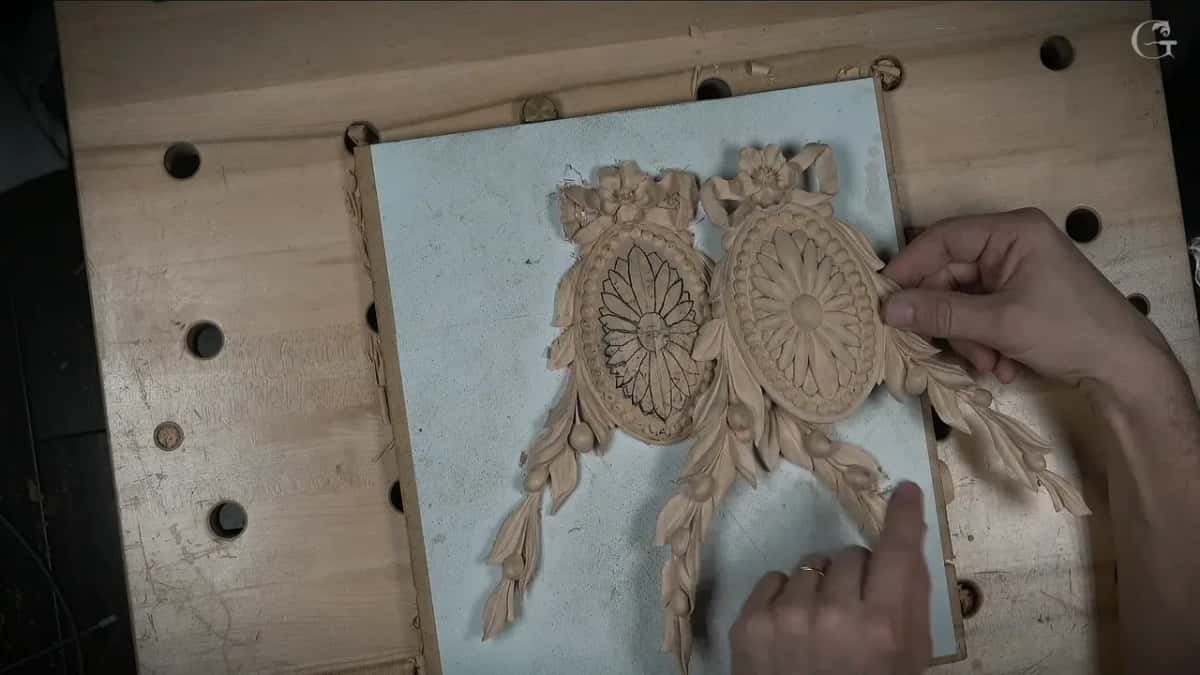
Early in this lesson both pieces lay side by side on the board, the first one already carved.
By then lesson 2 had already taken care of the berries and their stems, and the bow came in the lesson before this one.
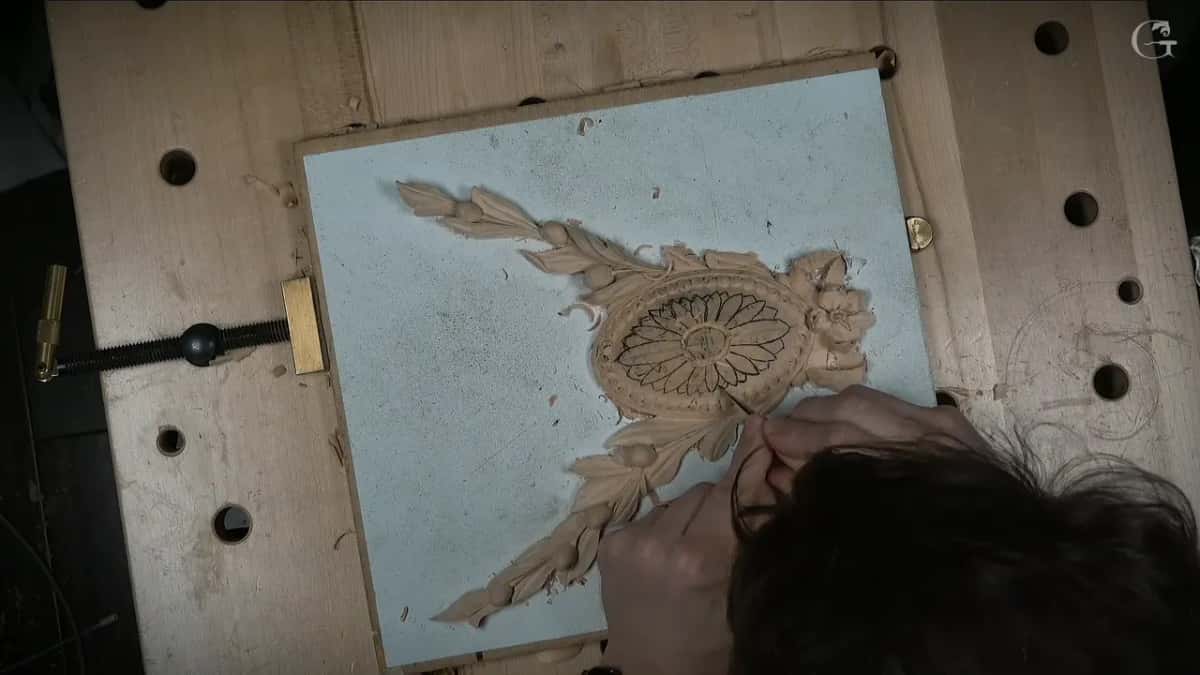
Why does the groove round the center come first?
A groove keeps the edge where I drew it.
When I picked up the number 11 gouge I called it 2 mm, and it's actually 2.5 to be exact, about 3/32 in, so I excavated all the way around the raised center with that. Any number 11 will work for this, I said.
If you would ask me why I don't just take a number 7 and start creating that shape, I don't want to lose that edge.
With one piece alone, I said, I could work that way.
But there are two pieces like that, and they have to match each other, so I wanted that middle part exactly the same as on the first piece I had already done.
I need that border established, so I cannot go beyond it, and that groove is where everything else starts going downhill. I got a full two millimeters down, at least. I could go even deeper, I said.
Then, before anything else, I went straight down along it with just the edge of that same tool. In case the tool has some kind of slope that way, I'm going to be right on the money. I said different tool, then changed my mind and said I can just do the same thing with the edge of it.

Which way does the knife go in on a slope?
Straight down, about 90 degrees to the surface, and on a dome that means square to the slope itself.
I went around with the knife right on those lines, just to outline the whole thing. I'm not undercutting anything there.
I didn't think this one needed relieving first, so I went straight to the lines, and I told the camera I wasn't sure which angle would show it best.
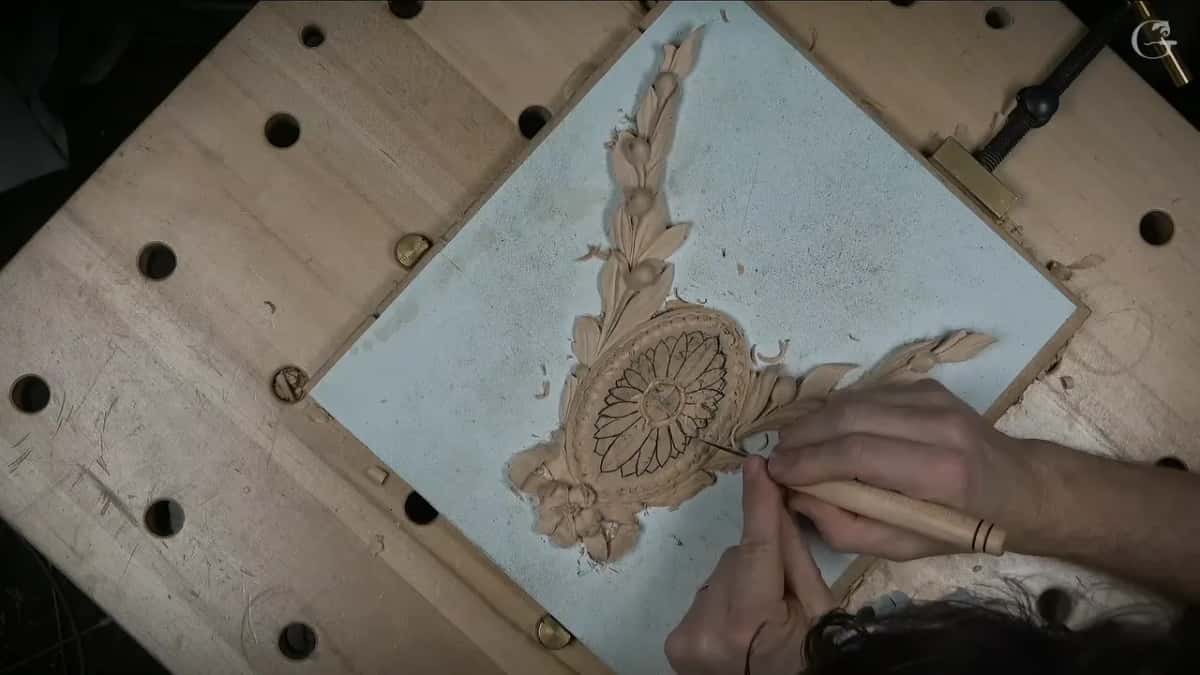
Popping the little triangles out with the knife alone would not be enough for me, a limit the page on those triangles takes up.
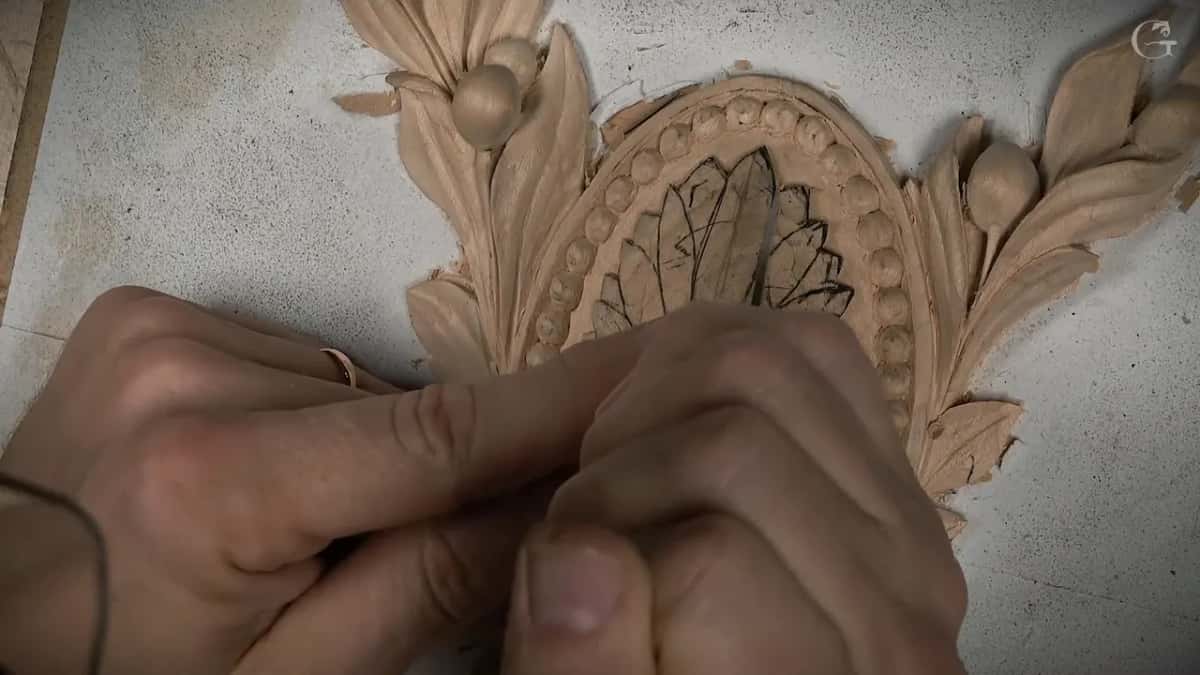
How deep does the background go between the petals?
About a sixteenth of an inch under the high spot, which is one and a half millimeters.
One millimeter was my first figure, and then I corrected myself.
For that I needed some kind of a spoon, and I took a number 3, a really tiny one, about one-eighth of an inch wide. See, I can get really to the point with it, because it is a fishtail.
I had to keep changing positions and work my way in, and that space was what I was after. I went around the whole flower like that and finished the rest of the ground off camera.

With the background out all around, the knife came back for straight-down lines along the drawing, without angling, pointing to the middle.
Did the first piece get the same tools?
On the first one I did not use a knife, just the normal gouges, which also you can do.
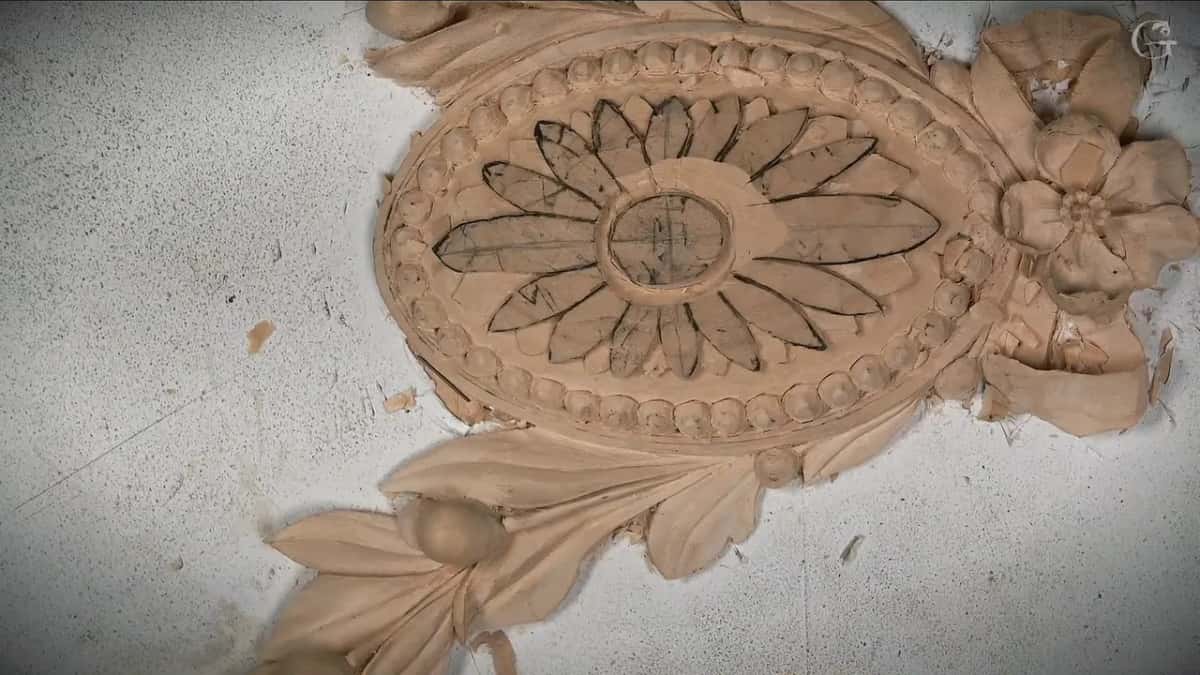
Before the blending I had said it's not about the perfection, and I really didn't want it perfect.
This time the knife left its earlier line where I could still see it, and that is why I held off blending until later.
Here you go, I said when the blending was done. That's what I'm after.
After the blending I went round the drawing again with the same line, just a little deeper.
After that came smaller and smaller number 11s, pushed in toward the center, first one millimeter (about 1/25 in), then a smaller one, then half a millimeter, the small one, because I'm after the shadow.
Deep shadow by the center of a little flower is what the page for lesson 1 is about, so I won't retell it here.
How many gouges do the petals take?
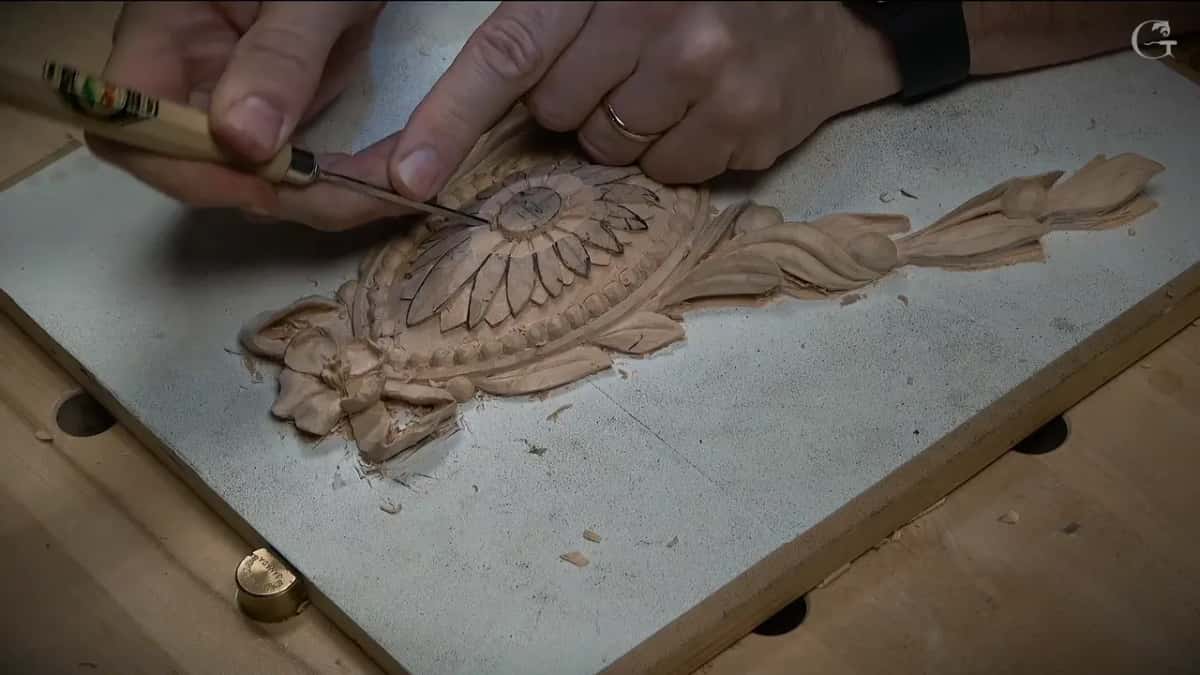
Several number 11s, depending on how wide each petal is, and every one of them runs right to the edge.
All of those get exactly the same operation, I said.
I changed the angle so you could see much better, one side of a petal and then the other. Next, I said, I'd go around and blend every one of those, and see you after that.

The concave inside each petal, deeper toward the future dome and lighter near the edge, has its own page with Venice Room 135.
I could spend a lot longer on all of them if I wanted to, but this project is going to be painted.
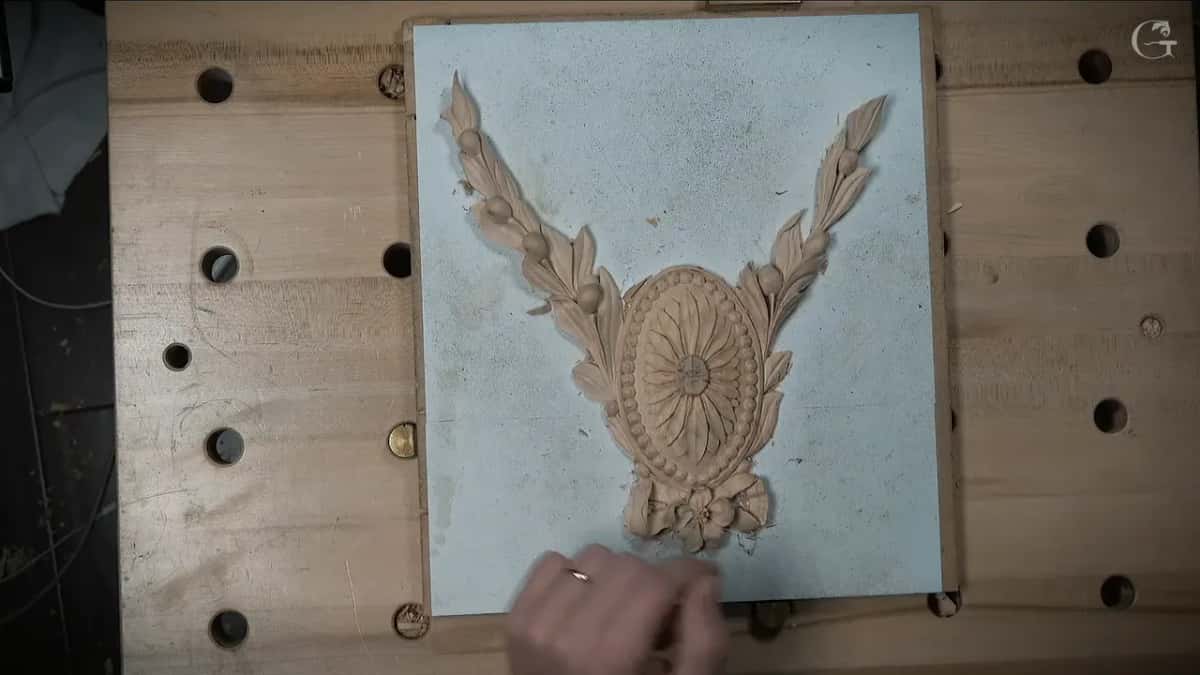
When does the center get its dome?
Last, once every petal around it is done.
A couple more things, I said, and it'll be done, and the first thing I have to attack is the dome of the middle part. You can see it's just a simple dome. There's nothing complicated in it, I said, and no secret either.
The gouge doesn't have to be a special type. I took a number 7, the bigger one, 20 millimeters or so (about 3/4 in).

Be careful when you get closer to the petals. I'm not forcing it there. I'd rather spend a little more time and clean that later than force it and make the mistake.
Any flatter tool will work. I just like the number 7 in this case, because it gives me a really good slope, or not slope, roundness.

A flower center with a hole dug inside its dome is a different job, on the page for furniture panel 25.
Cleaning after the dome is nothing special, a small flatter gouge or even a chisel, and later really small, tiny gouges and chisels until it's perfect. For that I have to stick my head in front of the camera to see, so I do it off camera.
Because this one is for paint, I wasn't afraid of a little sandpaper either. I cut a small section of Abranet 240 by Mirka and rolled it.
I really like that one, because it does not leave as much abrasive inside the fibers, and that is easier for my gouges. You can still see the tool marks after it. See, I didn't do too much.

What went where, tool by tool?
The tools below came out in this order, and the last column is what I said while each one was at work.
Job | Tool | Words |
|---|---|---|
Fixing the border | Number 11 I called 2 mm, actually 2.5, about 3/32 in | Any number 11 will work |
Squaring the groove | The same gouge again, going down on just its edge | Right on the money, I said |
Outlining every petal | Knife held upright to the curve, going round every petal | To the slope, even, I said |
Lowering the ground | Tiny number 3 fishtail spoon, about one-eighth of an inch | Space like that is what I'm after |
Lines toward center | Knife again, set straight down on the drawing, without angling | Toward the center, just go around |
Deepening the shadow | Number 11 at 1 mm, then smaller, then the half millimeter one | I'm after the shadow, I said |
Shaping each petal | Different number 11s, picked by how wide each petal is | And just go to the edge |
Doming the middle | Bigger number 7, 20 mm or so, about three quarters of an inch | See, I'm not forcing it |
Cleaning it up | Really small, tiny gouges and chisels, then a rolled Abranet 240 | Until it's perfect, off camera |
Texturing the ground | Punches, driven with a normal carpenter's hammer on this piece | So the texture is done |
Releasing the piece | My own tool levered from different points, then my mallet | I really have to be careful |
Clearing the paper | Sandpaper at 100 grit, on a flat surface or by hand | It takes just seconds to remove it |
What happens after the dome?
Texture first, then the undercut, then the piece comes away from the paper.
I punched the background with a normal carpenter's hammer. The punch is still metal, I said, and I don't want to damage the mallet.
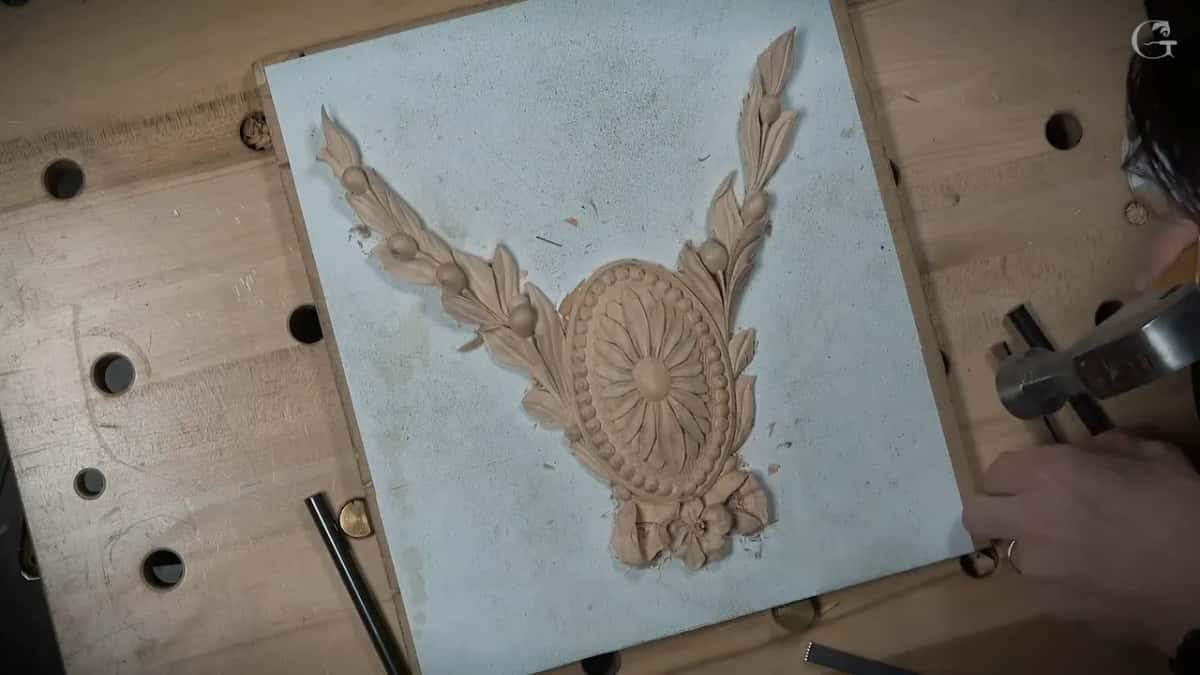
The undercut went in from the front as much as possible, but not all the way through, because I still have to have some gluing parts. All I need there is a really, really good shadow. It doesn't take too long, I said, and please don't rush it.
At one spot I was going against the grain and said I should attack from the opposite side, but because of the position of the camera I didn't want to.
By now I'd done the majority, I said, and maybe missed some stuff, which was okay, since I can attack it from the backside. I am not recommending the way I take it off, but I still showed you how I do it.
Then I forgot something. Hold on, I said, I need to attack this side first and get it completely done before I take it out.
It's a good idea to check everything before you take it off the paper. In my case I missed undercutting underneath the flower. It took me a couple of seconds, and it's easier while the piece is attached to the background. Once it's off, that gets harder, I said.
Some connections there are really fragile, so I levered from different points with my own tool, the one I call Sekira. One side was more stable, I said. Then I said I could use my mallet and carefully drive it in, and that it should start popping out. One spot was still holding while the rest was loose, so I got a second tool for it, and then it came loose.
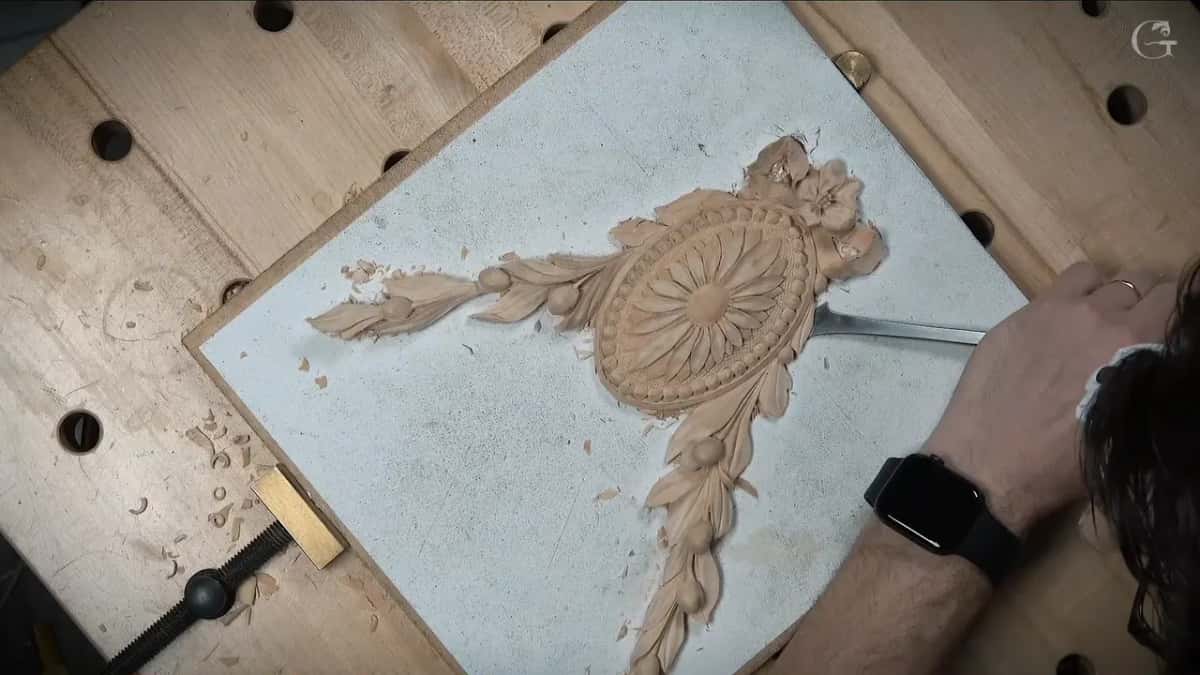
How a carving gets off its board has a page of its own, and the back side, with small tools held in my fingers, belongs to the tip for back cutting.
The last of the paper came off the back with 100 grit, on a flat surface or just by hand, and it takes just seconds. On a darker background you can see how it will look in the overall composition, applied on a panel above another element. I said I'd make a picture of how it is going to look there.
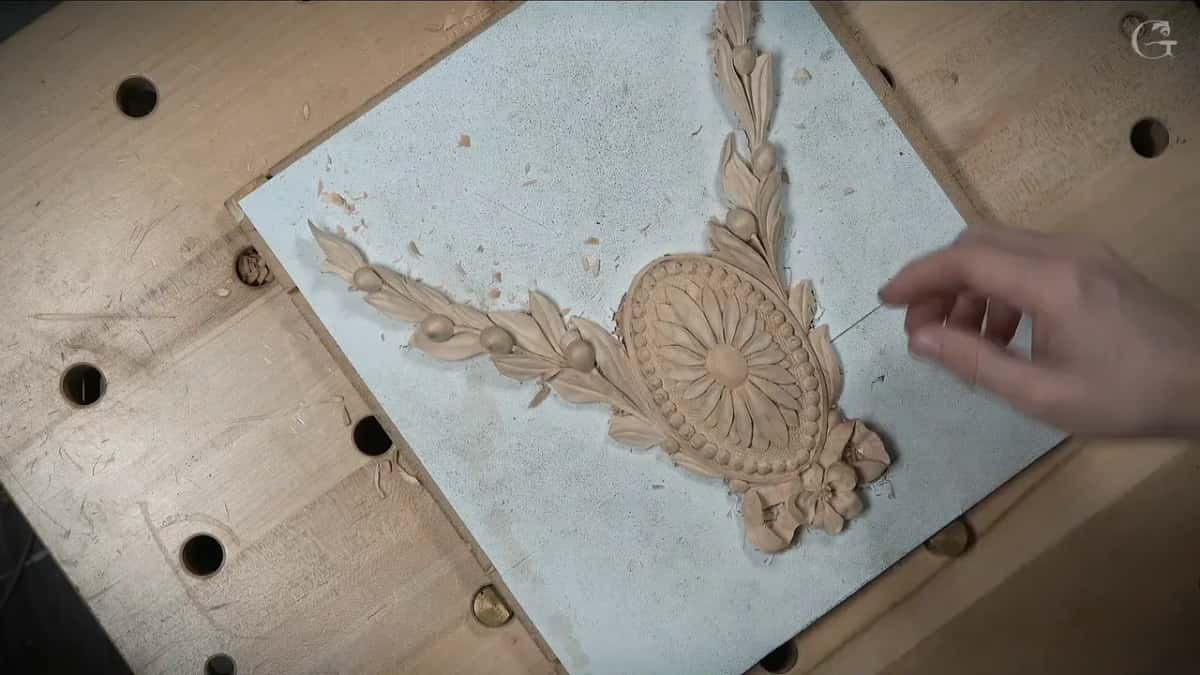
Where does your own domed flower start?
With the drawing and a groove, the way mine did.
Can you draw a circle round the middle of a board with a pencil and a little patience? Can you follow a line slowly? Then you can carve this groove.
Lesson 4 sits inside the Chamomile and Bow Rosette course, filmed at my bench, and Tuition and Access are on one plan page. The lessons map shows where it sits among the other courses, and Carving Flower Rosette is another rosette course here.
I hope you like that detail, and I hope you have fun making it.
How it's done
- Groove around the raised middle. Take a number 11 near 2.5 mm and circle the middle at least 2 mm deep. Then take the edge of the same tool straight down beside it.
- Outline the petals with a knife. Keep the blade at a right angle to the surface and go round every line of the drawing without undercutting anything.
- Lower the ground between petals. Take the ground down with a tiny fishtail spoon, a number 3 of about 1/8 in, to roughly 1.5 mm. Change position often and work your way in.
- Deepen the lines at the center. Set the knife straight in along the drawing again, then push smaller number 11s in toward the middle, down to the smallest one.
- Shape each petal. Match the number 11 to the width of the petal and blend every one out to its edge.
- Round the middle last. Use a flatter gouge, a number 7 near 20 mm in my case, about three quarters of an inch. Go slowly near the petals and clean up later instead of forcing it.
- Check before it comes off the board. Look over every undercut while the piece is still glued down. Fixing a missed one is easier then.
Frequently asked questions
Is a knife needed for the outline, or will gouges do?
Gouges will do. On the first piece I used normal gouges and no knife, and I said that also works. The knife came in on the second piece, for the outline, held upright, and later for blending and for lines aimed at the middle.
How do you carve a flower out of wood?
On this rosette the flower is not a separate part. I carved it straight into the raised oval of the piece, with a groove to hold the middle, knife lines around the petals and the ground lowered between them, and I rounded the middle at the end.
Do you need a special gouge for the dome in the middle?
Any flatter tool will work, I said on camera. My choice there is a number 7 around 20 mm, for the roundness it gives, and close to the petals I went slowly and left the cleanup for later rather than force it.
What to carve next