
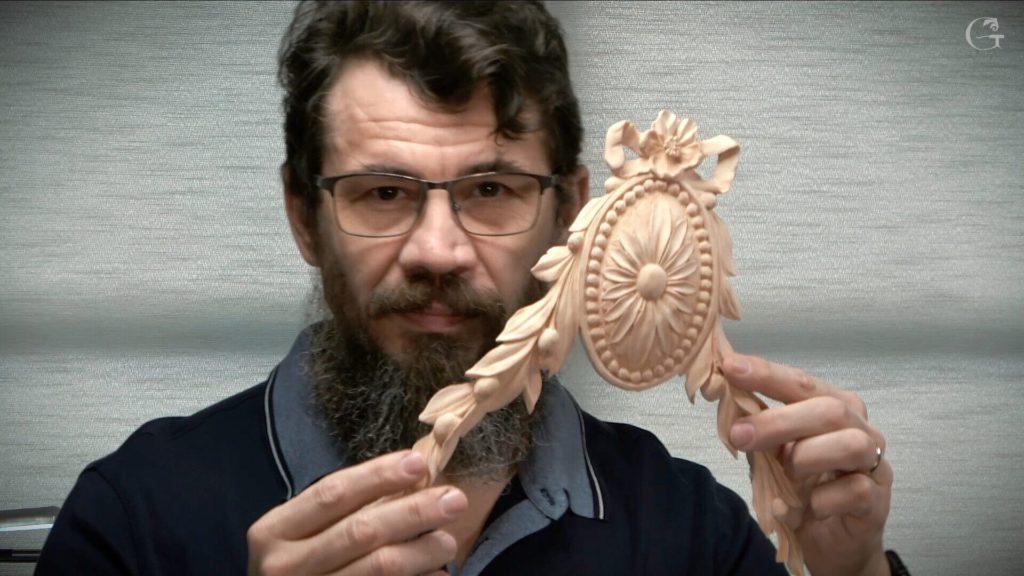
Alexander Grabovetskiy, woodcarver, School of Woodcarving · Published 2021
Why does my carved flower look flat?
Quick answer: I fought a flat look on my little chamomile flower with shadow and with height. On this flower, about an inch across, I set the petals at two levels, dug much deeper between them near the center, gave the center two layers, kept wavy edges raised over hollows and left a hill on every petal.
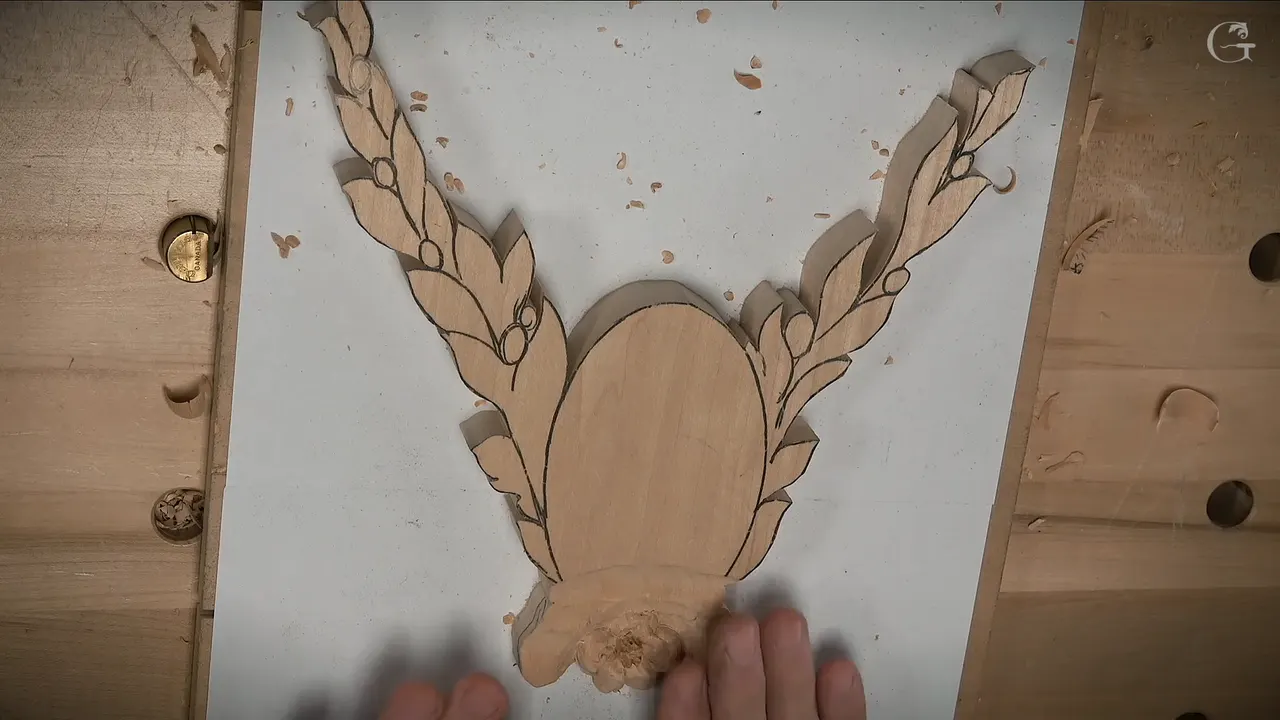
On the little flower in lesson 1 of my Chamomile and Bow Rosette, I worked against a flat look with deep shadow and with petals at different heights. That flower is about an inch across. Relief carving flowers at that size leaves you very little wood, and after my first pass the low side stood only four or five millimeters above the background. Three petals go uphill and two go downhill. Where the petals meet the center, the spaces between them go much deeper and wider, because I'm after shadow, deep shadow. The center itself has two layers. The upper petals get somewhat wavy, raised edges, dug out underneath from whichever side the grain allows. Every petal keeps a hill along its middle, never a perfectly flat top, and the upper ones get a small concave on top, while the lowest petal ends about 1/16 in above the background.

Did you draw every petal and carve every one? Have you rounded them over and cleaned them up? And the flower still sits there like a coin on the board? Then watch where the dark goes on this one small flower. Every move below is one I made on camera, with the tool and the size I used, so you can try the same moves on your own wood carving.
Six things that give a one-inch flower its depth
Two levels of petals, three curling up and back and two dropping nearly to the background.
The deepest spots sit between petals, right by the center.
A middle that stands a little higher than its ring.
Wavy, raised edges on the upper petals, dug out underneath where the grain lets you.
A hill on each petal.
Barely any wood under the lowest petal, about 1/16 inch.
How low should the bottom petals of a small flower sit?
Nearly down on the background. On this flower the lowest one finished about a sixteenth of an inch, roughly 1.6 mm, above it. I did not get there in one pass. Early in the lesson I took a bigger number 11 and drove one side of the flower almost all the way down, then left four or five millimeters there for the moment. That's all I need, I said, even less later on. That first pass only set the movement, how the flower was going to slope.
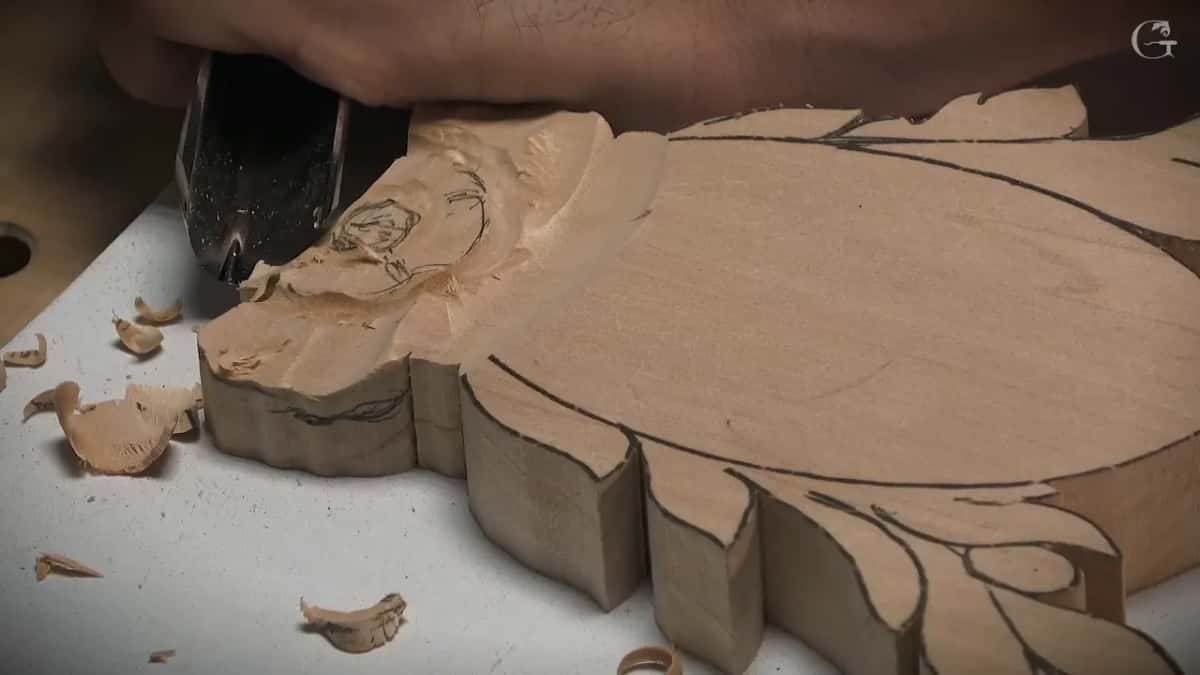
Two levels were in the design from the first piece. Up went three petals, curling back, and two went downhill, because doing all five the same would be boring, I said, and some up and some down gives me some shadow. The two lower petals came near the end of the lesson. A small number 11, about 4 mm, took them nearly down to the background, and I kept roughly that same small gap between the background and the lowest part of the petal. I brought the right-hand petal under the left one, so it would look more natural.
For a bigger flower on a Venice Room panel, see how deep a carved flower sits in a relief panel.

Where do you leave wood for the curl?
At the sections where a petal is going to curl back. Those sections matter to me, because there's going to be a curl back, the same way the petals curl on the first piece I carved. I went a little smaller there, to a number 11 of 3 mm. Then a number 3 of about 6 mm, a quarter inch, chopped down to the final look. The same result comes pretty much from a number 5. The widest part is on top, and it narrows toward the center.
Where does the darkest spot in the flower go?
Right between the petals, close to the center. Early on I marked five petals and a middle of about 10 mm, and went around that middle with a 7 mm number 11, keeping an eye on what the grain did. Once the five divisions were set again later, I went in closer to the inner part and made those spots much deeper and wider. I wanted deep shadow there. The tool was the same tiny gouge I had used before, about 1.5 mm, pushed in toward the middle. Then a number 1 chisel, only 1/16 of an inch wide, followed it straight down. That cleaned out the mess. Sometimes I went back to the little gouge to make sure the hollow ran into the center part.

If a spot was not really clean yet, I did not worry about it. I can always go back and take care of it, I said. My camera was zoomed in so close that I kept covering the work with my fingers, and I said sorry for it more than once. A number 11, a small one, made relief cuts next, just relieving those spots, and a half millimeter number 11 made the preliminary separations between petals. Those were only preliminary, I said.

What are the two layers in the center?
A middle that sits slightly higher, and a ring around it that comes down a little. To keep the middle higher I took a really small, tiny number 11, about 3 mm, and went around it. Go just slightly lower, not much, and don't go too low on the outside ring.
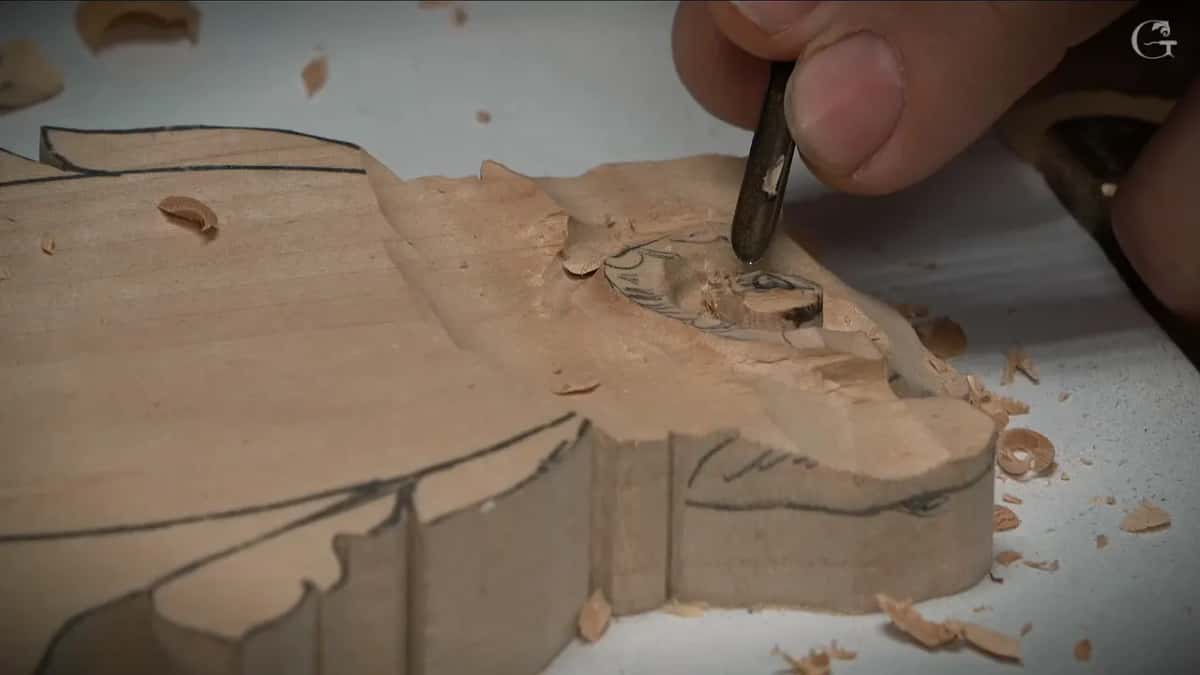
I also made sure it was not a perfect round. With the same tool I pushed straight down here and there to give it some curliness, which was the result I was after. From the sides, a number 3 of one-eighth inch came in next, because I really needed that effect of everything moving to the middle. Cleanup came last, with a small spoon, a number 6. I don't need to be too crazy about it, I said.

In the middle itself, a Dockyard number 8 of a millimeter and a half went straight down again and again, really close together, for the feel of a bunch of stuff growing up from the middle. With the small chisel I worked from the outside inward, and I know most of that will not even be seen by the human eye unless you get really close. But still, I think it's a really good idea, and it makes this one a little different from other flowers. A different middle, on a furniture panel, is in carving the center of a flower in relief. At this size the middle even moved under my tools, and I lost it later anyway.
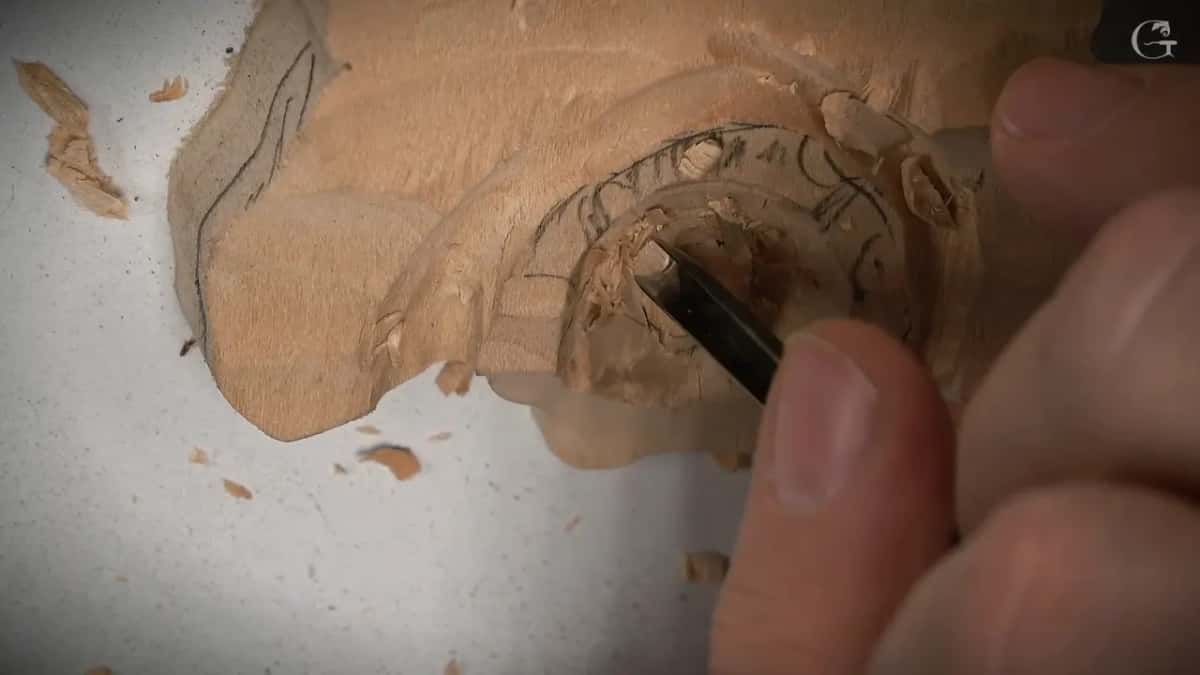
How do you carve a wavy petal edge that holds a shadow?
With a small gouge pressed straight down along the edge, and then by digging the wood out from under it. After rolling the petals back, I set my edge, and I made it somewhat wavy on purpose. The rolling back itself came from a quarter-inch number 3, and a petal that curls backward is told on another lesson's page. I rounded those petals all the way over, because it makes a really interesting movement.
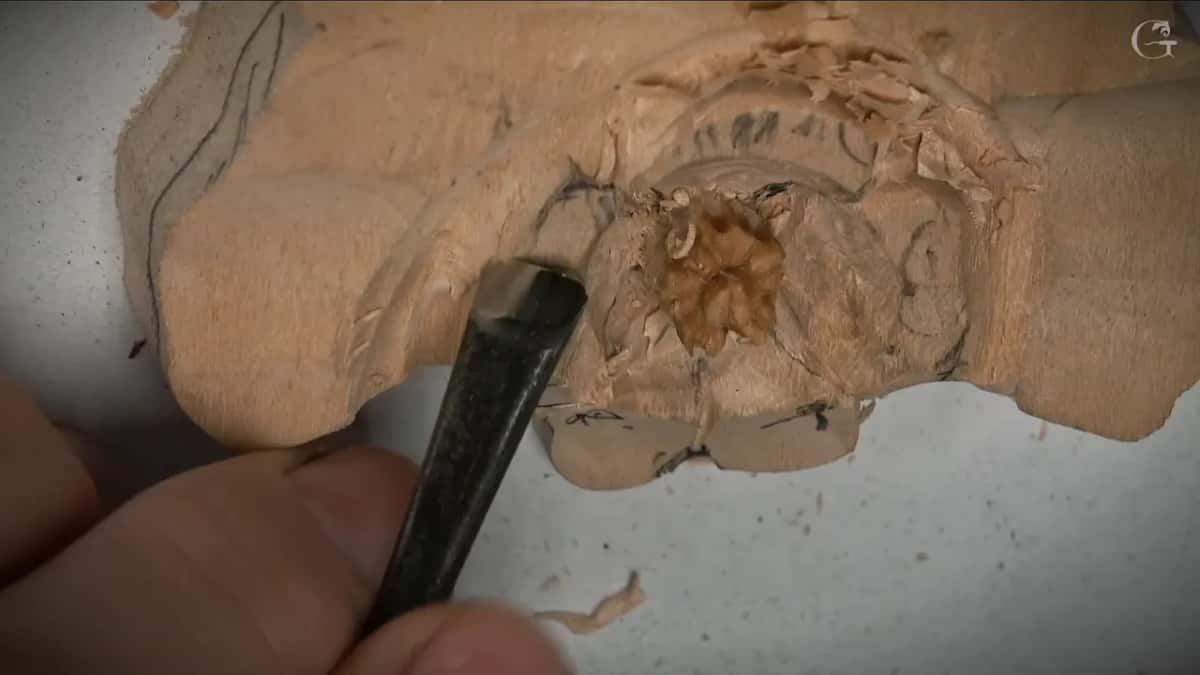
For the waves I used a small Dockyard gouge, about an eighth of an inch, and pushed it down, pointing in to the middle. Look what happened, I told the camera, I just made that waviness. Then I went at it from all the sides. Those edges have to stay raised, because I want to dig out underneath them and go inward. Then it's going to look really awesome, I said. At that point it was simple excavation, for now, as I put it.
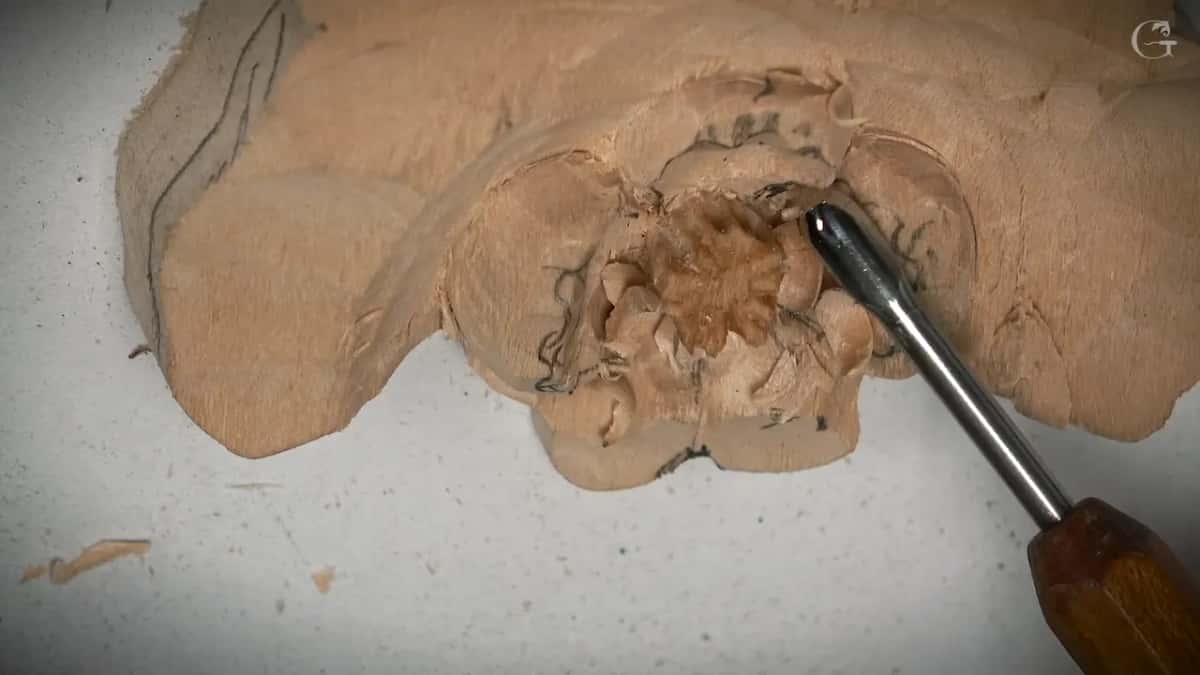
Let me tell you a story about one spot on that petal. I was digging under the wave with the same gouge, and that makes a beautiful shadow underneath. In one area I had to be careful not to push. The grain runs that direction there, and if I push it, I break it. So I went at it from the other side. That was what I was after.

Then an even smaller number 8 went deeper, and a number 9 works there too. I dug from both sides and under the sides of the petal, until the transition was smooth. I kept that high part high. Really important for me, I said. I said I would do the other two petals off camera, because it was hard to work there without my hands getting in the shot.
My floral and molding panel has a small flower in relief too. Undercutting on a big acanthus leaf is a separate story, in how to make a carving look deep.
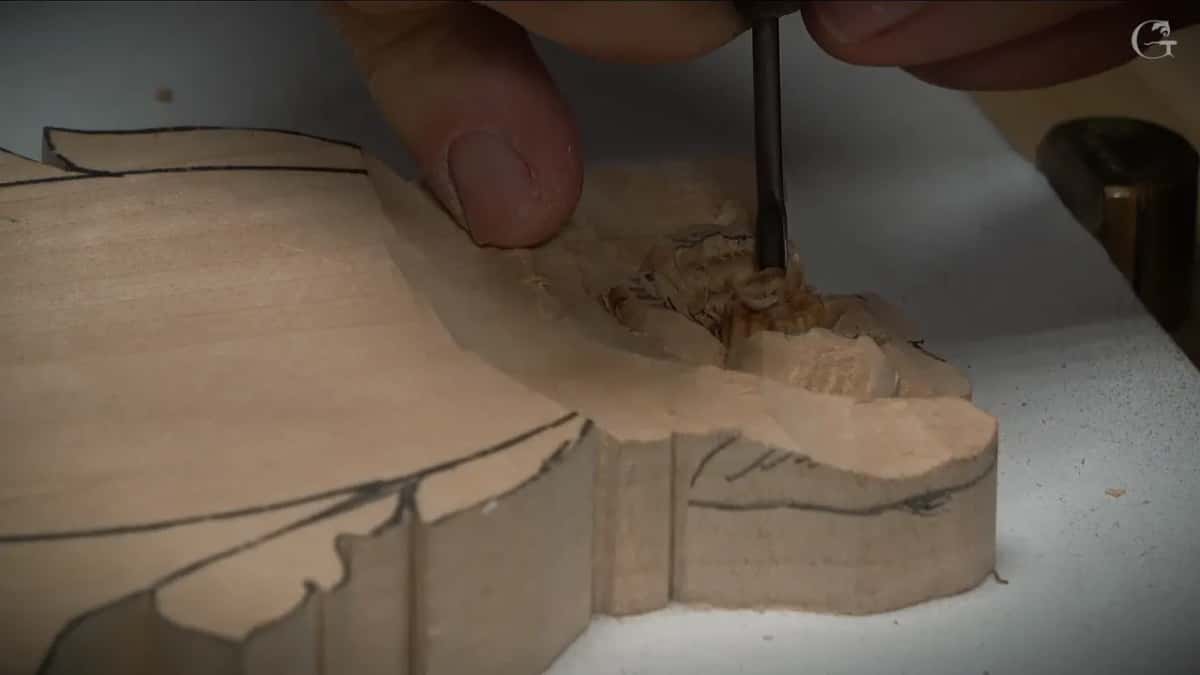
Should the top of a carved petal be flat?
Keep the middle of every petal raised like a hill, and break the top up so it is never perfectly flat. Please do not destroy that middle part, I told the camera, it stays raised in all five petals. Don't run your gouge right over the center of the petal. It's not going to be good. I really want you to understand that the center of that petal is like a hill.
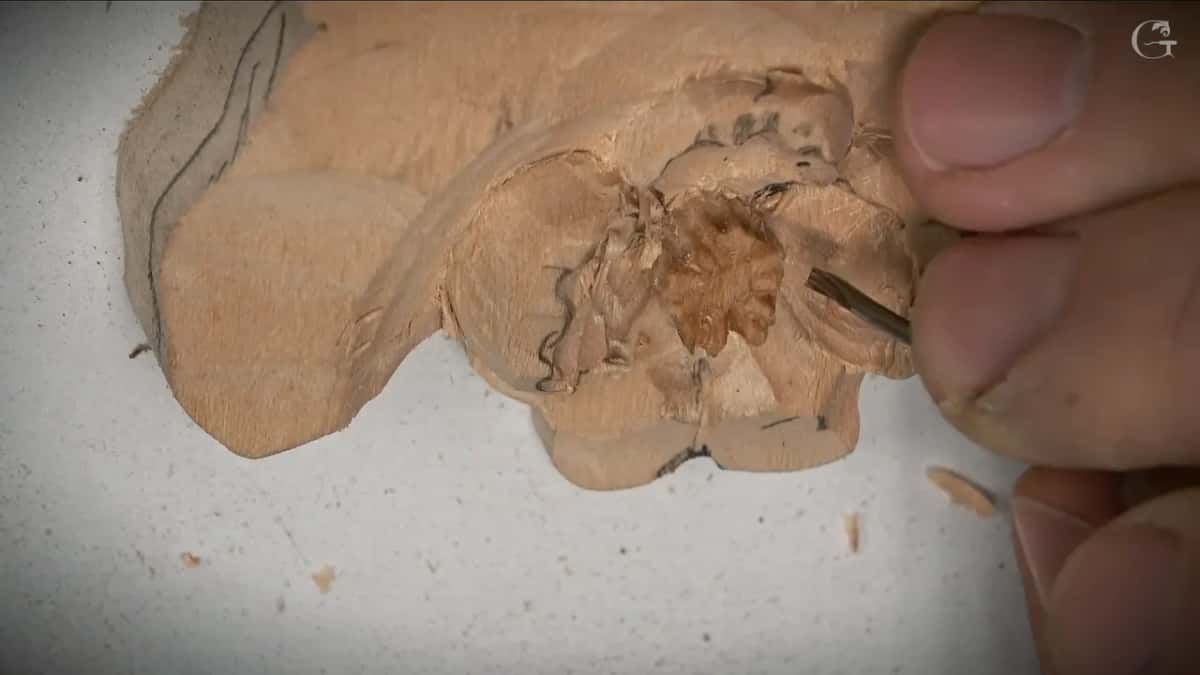
Before the final edge, I made sure the top was not flat. A few random concaves went in first. I really don't want to see a perfectly flat top, it's not going to look good. After that, a really small, tiny gouge took off a little wall I did not want to see, because I wanted a really sharp edge. A wall on a carved petal is explained elsewhere.
Last came a tiny concave right over the center of the petal, a millimeter and a half, about a sixteenth of an inch, and somewhat deep, with a couple more from the side. The petal ends up raised in the middle and hollowed on the inside at the same time. You can always get to perfection and clean a little more inside, and I left that for later, because my hand was right in the way.
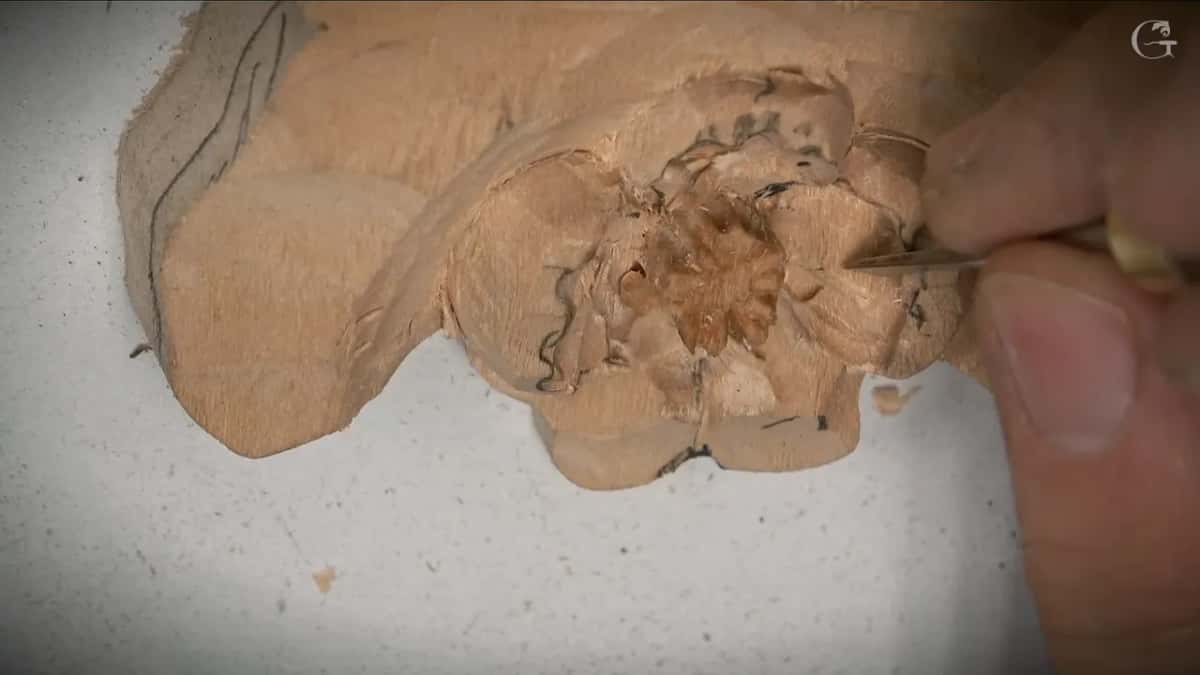
To blend the middle I used a flatter tool, a number 3 at 1/8 in. A number 3, 4 or 2 will work if the chart is European. On an English chart a number 2 won't, because a number 2 in the London pattern is a skew chisel. On the two lower petals it was all about blending at the end, with a flatter tool taking off all the facets. I said the second lower petal would get a concave somewhere too. I did not want too many movements if I did not need them.
None of it has to be perfect, I said, and in nature flowers look perfect until you look closer. Read why carved petals should not be perfect for more on that.
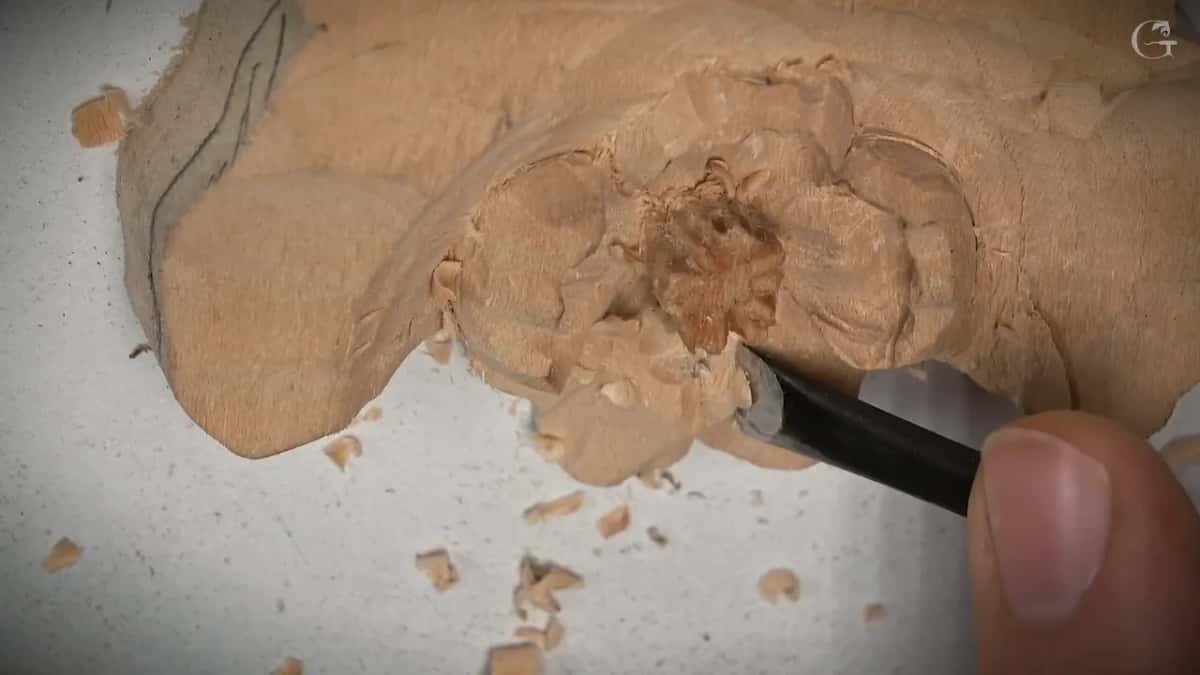
Which gouges dig the dark into relief carving flowers this small?
Mostly number 11s, as I said on camera, plus a few tiny gouges and one narrow chisel. Here is each tool, where it went, and the words I used with it in my hand.
Spot | Tool | Words |
|---|---|---|
Between petals, by the center | Tiny gouge, one and a half millimeters, pushed in | Shadow, deep shadow |
The wavy edge | Small Dockyard gouge, 1/8 in, going straight down | Make sure it's wavy |
Under each wave | Same gouge, then a smaller number 8 or 9 | A beautiful shadow underneath |
Rolling a petal back | Number 3 at a quarter inch, just small enough | My rolling back movement |
Ring around the middle | Really small number 11, 3 mm, taken around it | Slightly lower, not much |
Over each petal's center | Concave of 1/16 in, somewhat deep, plus two more | Concave right in the middle |
Bottom pair of petals | Number 11 of about 4 mm, nearly down | More natural that way |
At this size everything gets tight. The whole center is only about 10 mm, 3/8 in, across, and my camera would not zoom in any closer than that. I was really gentle with the tools, with no force at all, and still said the sticking-up part could break really easily. A tiny plug cut of 1.5 mm did not even pop out for me. Two tiny antique bent gouges came out later for the twists in these flowers, but I said you saw one done with just the regular tools. Carving a small flower without breaking it is another lesson.
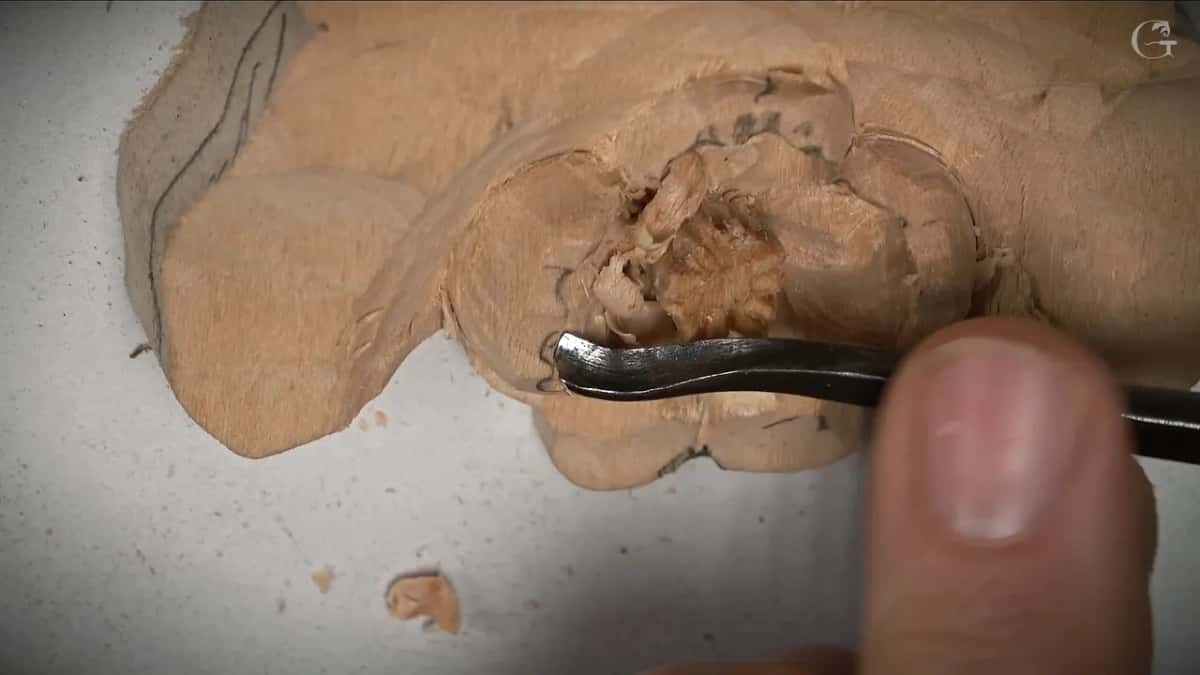
Do you have a flower like this on your bench right now? Would you like to see where every dark spot goes, one gouge at a time? Then come and carve it with me in Chamomile and Bow Rosette, where this little flower is only the start of the piece. The lesson stops at the overall composition, ready for the sides. The detail comes out of my Venice Room project, and I filmed it as its own course because finding one detail inside a big project is hard. Two more rosette courses sit next to it, Carving Flower Rosette and Venetian Flowers Rosette. The beginner course here is First Cuts for Beginners, and Tuition and Access are on one plan page.
How it's done
- Drop one side close to the background. Take a bigger number 11 almost to the background where the flower goes low, and leave a little wood there for now.
- Leave wood where the petals curl back. Keep those sections standing, since the petals there are going to curl backward.
- Give the center two layers. Go around the middle with a tiny number 11, an eighth of an inch, a touch lower than the middle, and keep it from turning into a perfect round.
- Dig the inner spots deepest. Between the petals, near the middle, push a tiny gouge in deep and wide, more than along the rest of each division, and clean straight down with a number 1 chisel.
- Press in a wavy edge. Stand a small gouge of 3 mm on the edge and press it straight down to make the waves, then work the edge from all sides so it stays raised.
- Dig under it from the side the grain allows. Excavate under the edge using that gouge, switch sides wherever pushing would break the petal, and finish deeper with a number 9 or a tiny 8.
- Keep a hill on every petal. Leave the middle high, add a few random concaves so the top is never flat, and on the upper petals set a concave of one and a half millimeters in the middle of the upper petals.
- Bring the lowest petals nearly down. Work the lower petals with a 4 mm number 11, almost to the background, leaving only a thin layer under them.
Frequently asked questions
What makes the wavy edge on a tiny petal?
On my one-inch flower it was a little Dockyard gouge about 3 mm wide, pushed down, and the waviness showed up right away. After that I worked the rim from every side and kept it standing up, ready for digging out underneath.
Why did my petal break when I dug under it?
Grain is what I watched for on this flower. In one spot the fibers ran a direction where pushing would have snapped the petal, so I switched to the opposite side and later went deeper with a still smaller 8 or 9.
How much wood stays under the lowest petal?
Roughly 1.6 mm, which is 1/16 inch, between the background and the lowest part of the petal on this flower. Earlier on, the whole low side sat about 4 or 5 mm up, and I said even less would be needed later.
What to carve next