
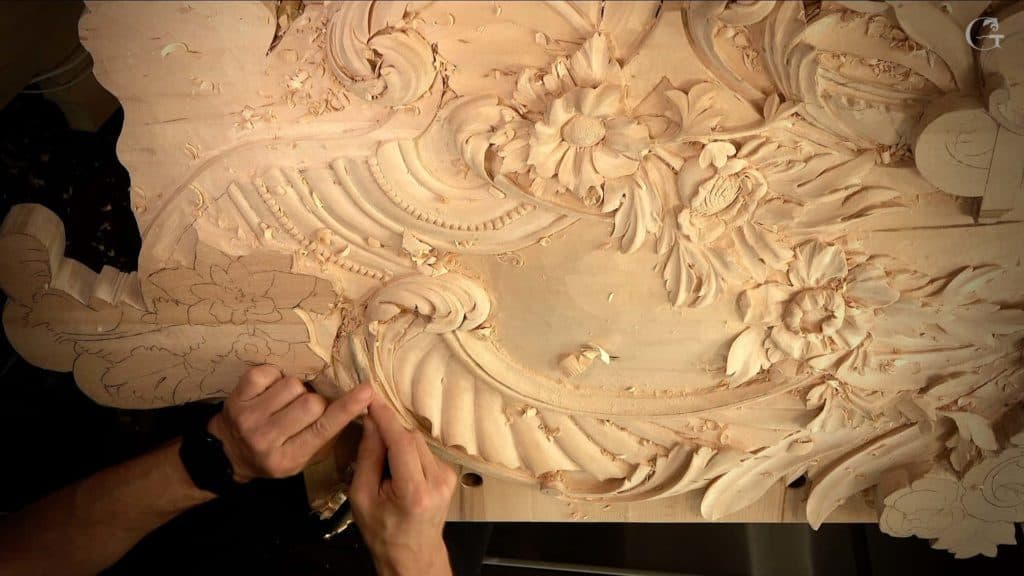
Alexander Grabovetskiy, woodcarver, School of Woodcarving · Published 2022
Does a carved acanthus leaf have to be complicated?
Quick answer: A simple acanthus leaf is one movement split in two parts, with a long pipe running down it. In lesson 147 of the Venice Room I called mine nothing complicated. Half of it tucks under a flower, and I said the pipe complements its movement, which is why I think it looks beautiful.
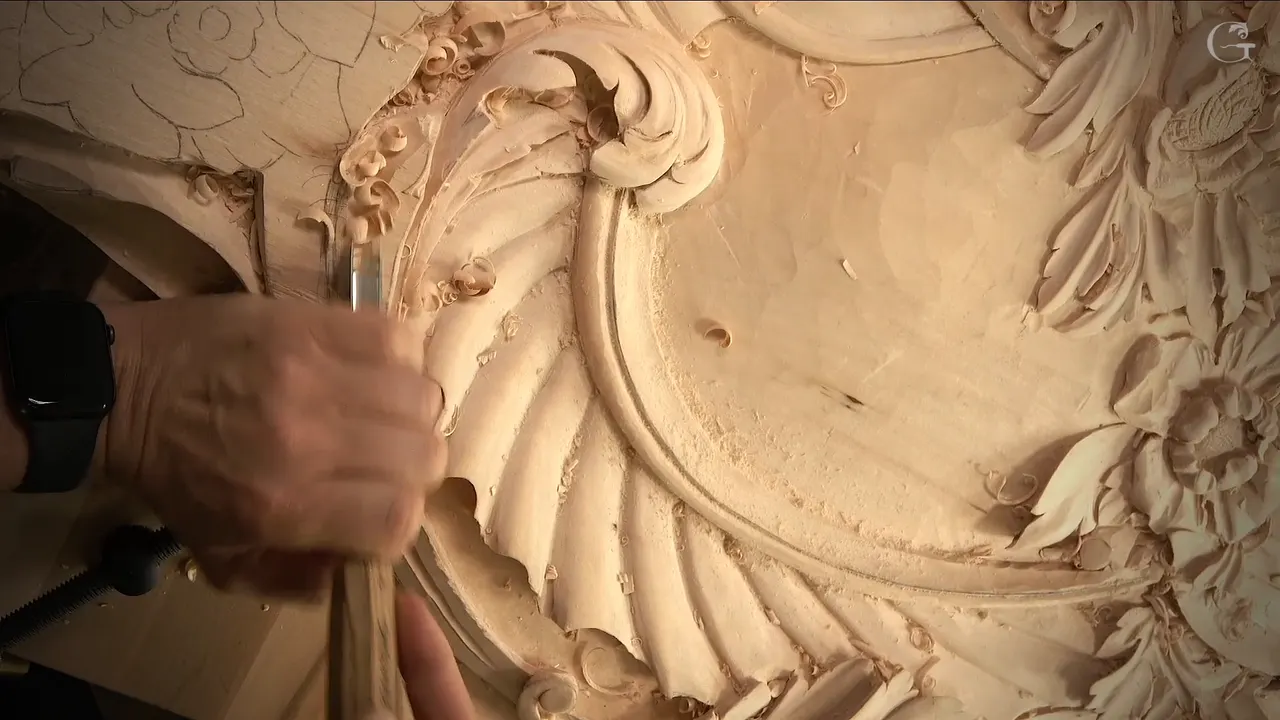
A plain acanthus leaf is a single movement with nothing complicated in it, and I think it can look beautiful anyway. The one in lesson 147 of the Venice Room divides in two parts. One part goes under a flower. The other just ends. What carries it is a long pipe, the raised ridge down its length, and on camera I said that pipe will work a miracle. This page is about acanthus leaf carving on a real Venetian panel, and about a leaf that stays simple.
Have you ever seen an old carved leaf with lobes folding over lobes? Did it look like months of work to you? The leaf in this lesson is not that kind, and I'll show you what it has instead.
You will see how it was planned, which tools went in and in what order, and what I said out loud at each turn, including the times I changed my mind.
The simple acanthus leaf in lesson 147, at a glance
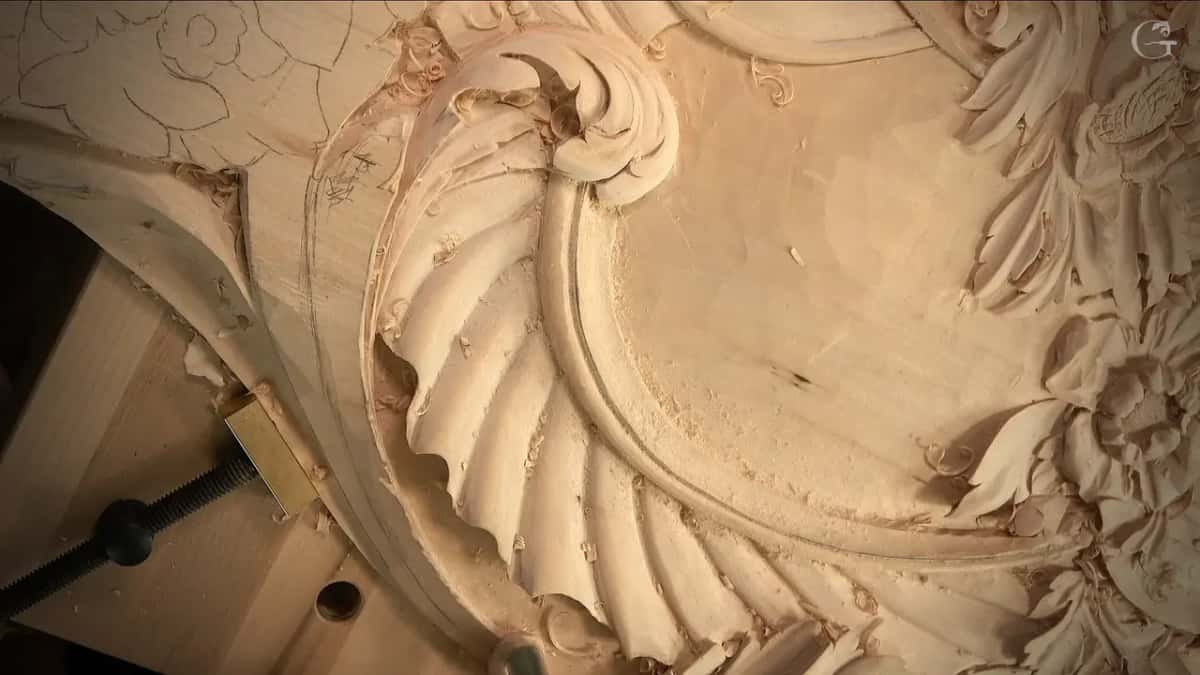
One acanthus movement split into two, and one of them tucked beneath the flower.
A long pipe runs down the leaf.
Between its edge and its pipe, the leaf copies how that molding works.
The eye went farther out than I first set it, since where I first put it nobody would have seen it at all.
Its ridge stays soft, a movement and nothing sharp.
What makes this acanthus leaf simple?
One movement that divides in two parts, and that is all there is to it. My words on camera were plain: just a simple acanthus, nothing complicated. Half of it slips underneath the flower, and the other half is just ending up right there.
I could have gone a different route. That part could go under a little of the shape beside it, or the opposite, over it. I thought it would look much better moved lower, so lower it went.

Lower meant the flowers too. I wanted to outline them right away, and that whole area would sit a little lower, not much, maybe about 5 mm, 3/16 of an inch. That also took this area of the pipe a little lower. Then I changed my mind out loud twice. Maybe even less, maybe about 4 mm (5/32 in), I said, and moments later: oh, no, it's actually a full 3/16. Of course I was eyeballing it.
Why can one long pipe make a plain leaf look good?
The pipe plays along with the movement of the leaf, and that is the reason I gave. I gave it twice.
Simple, but still, I think it's going to look beautiful, I said, because I'm going to have a long pipe. If you look at that pipe on the video, you don't see it, I said, so I tried to show it to you and said sorry if the focus was not good. That pipe is going to just complement that movement, I told you, and if you look at it, it just complements.
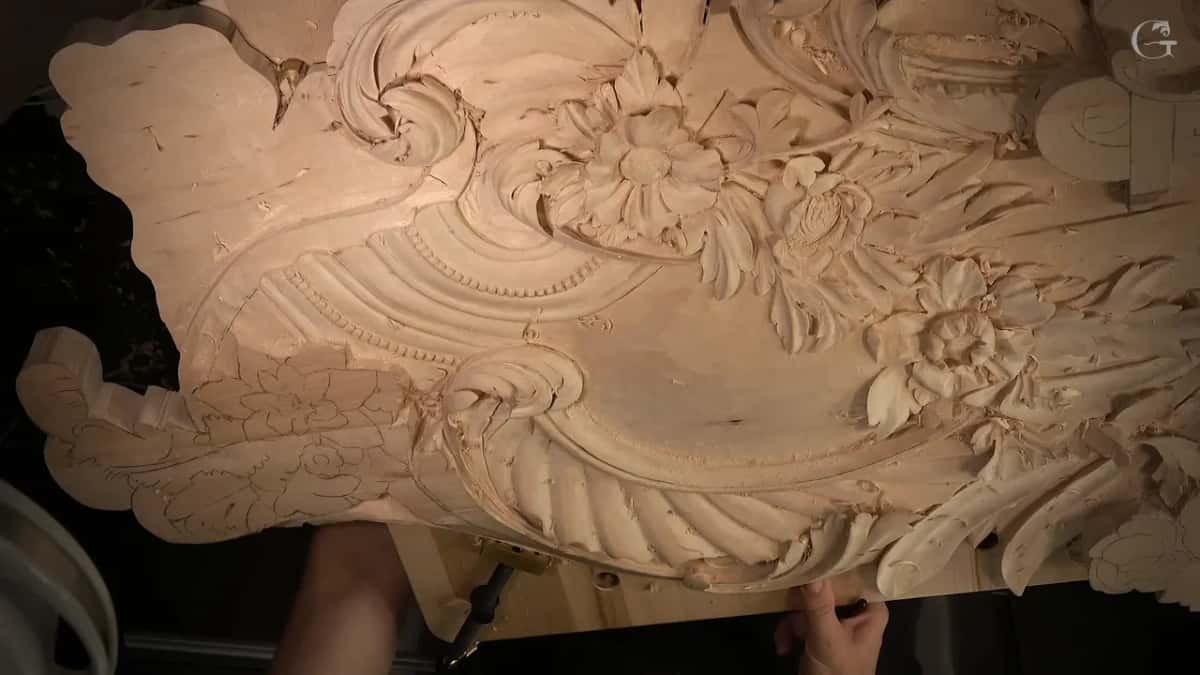
A pipe, if the word is new, is the rounded ridge along a lobe. The Corinthian course has a clear lesson on what a pipe is, so I will stay with this one leaf.
All I need to see is just a long pipe. The course page gives another side of why Venetian pipes run so big.
How can a leaf follow a molding?
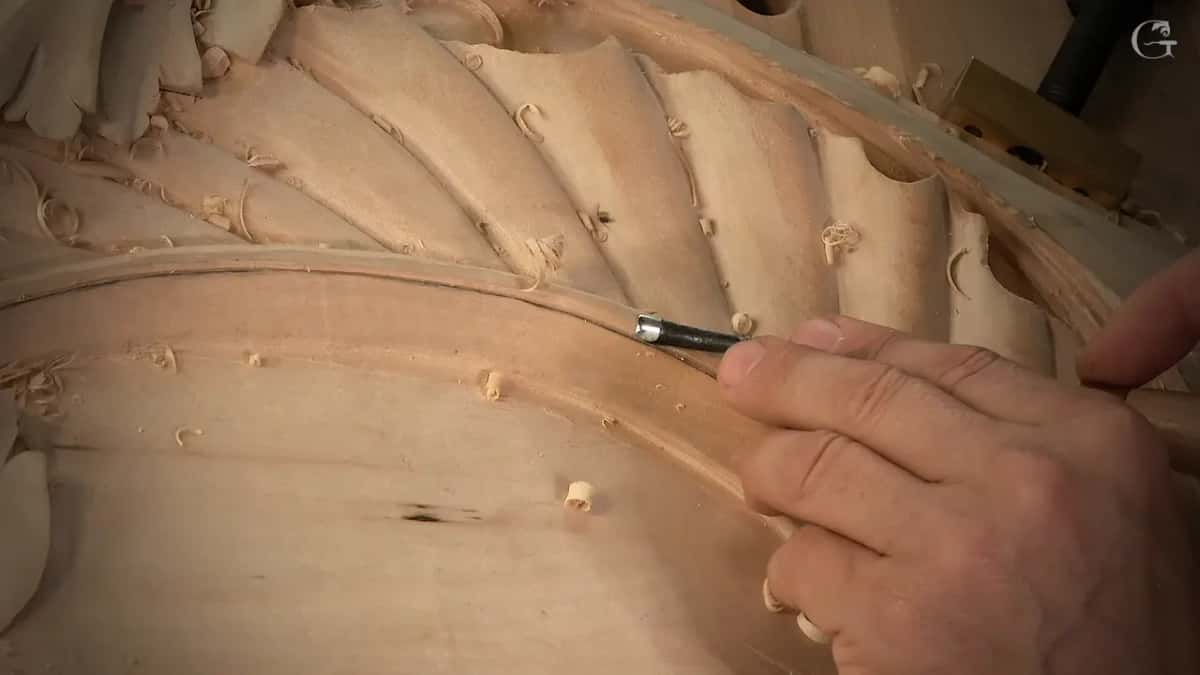
The detail between its edge and the pipe works exactly the same as that piece of molding beside it. The pipe is part of that. So for the eyes it will be pleasant, I would say.
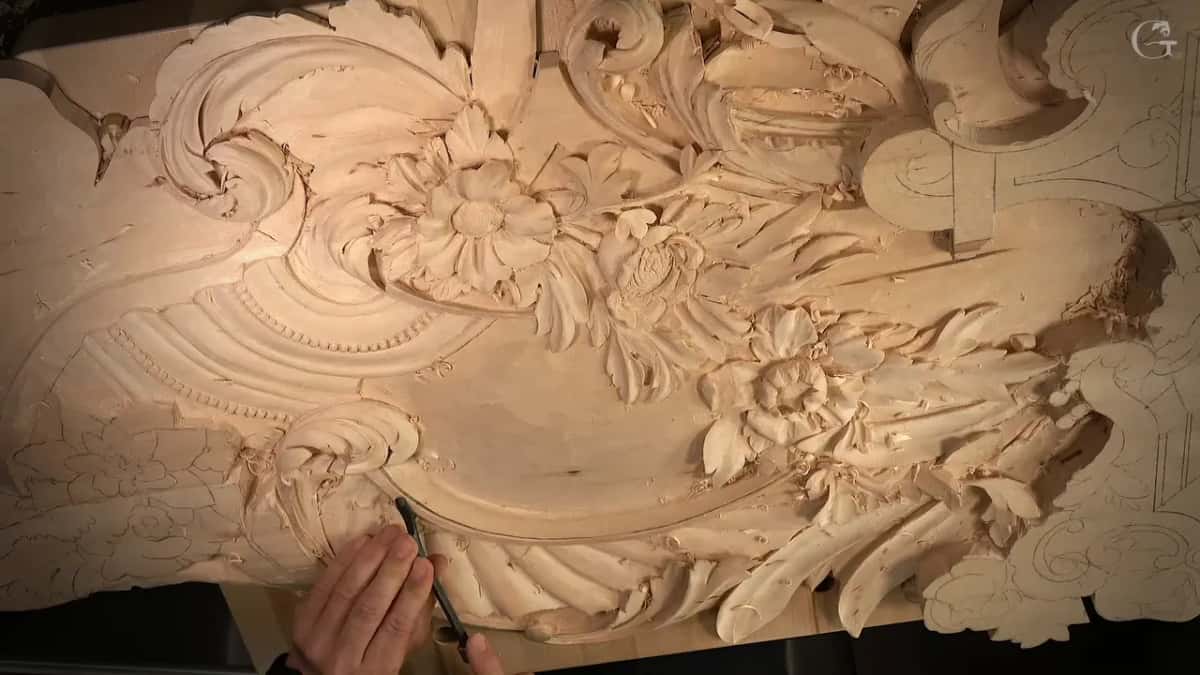
That molding was the first thing in the lesson. I was working that band with back bends, a small one first. It was obviously too small for that area, so I took a slightly bigger back bend, maybe 12 mm or so (about 1/2 in), and blended the two, the small back bend with the big back bend. That looked good, I said, except I could probably start blending somewhere right there. Then it had its convex and concave.
Somewhere along there the pencil line looked a little wavy on camera. It was not wavy. Just my pencil mark.

When part one closed I said I'd come back to the band a little later, and jumped to the spot where the final acanthus in that area goes. There's going to be a flower, and there's going to be acanthus, I said, and then all I have to do is just this side.
Later, on the leaf, I talked about riding a number 7 over the ridges for a nicer convex, and said that convex would work as a complement to this convex. And everything matters, I said. A leaf that climbs right across a molding is another job, and it has its own course, Acanthus over Moldings.
How was the long pipe carved?
With a number 11 at 12 mm, about half an inch, starting from almost nothing near the volute, the curled scroll on the shell. I had to be careful how I started it. My first touch was right by the volute, and I was moving just slightly to the right as the gouge went.
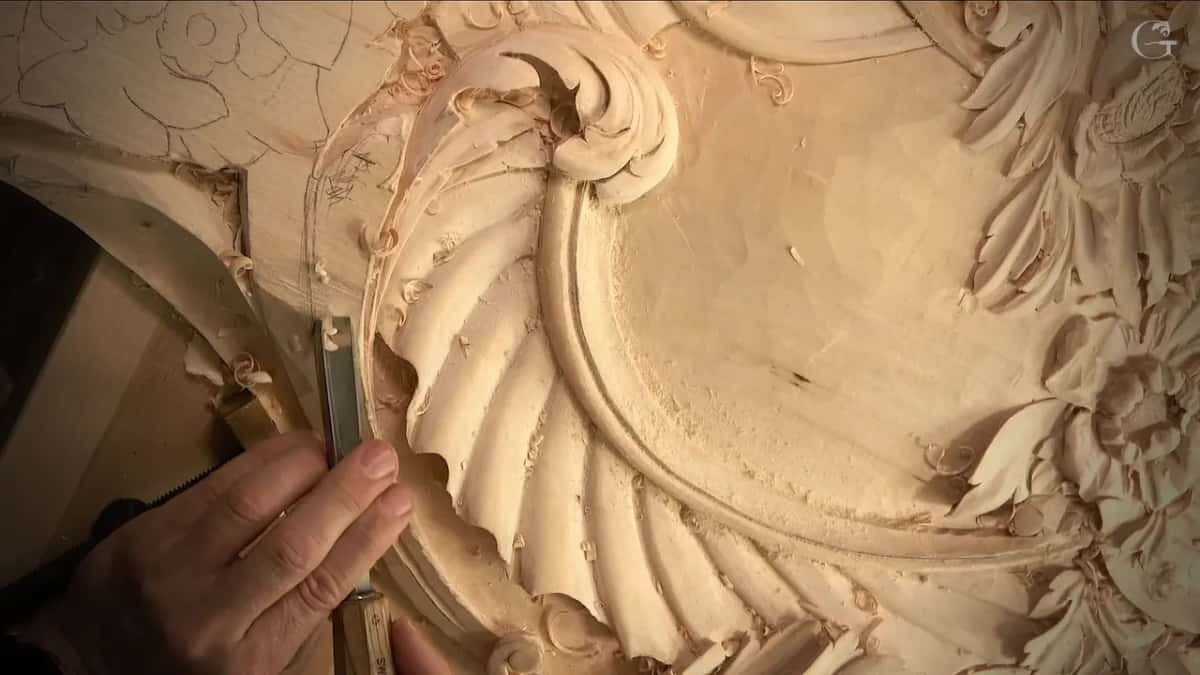
I ran that hollow on to where it ends, not close to the pipe, so the pipe would be wide right there. My reason was the separation there. I wanted to raise up that part. Then came a little deeper excavation, and a second pass over the same ground.

A ridge was left behind, and I did not want to see it. I needed something like a flat gouge, maybe a number 3, and gave it a preliminary blend. The leaves by the flowers got a blending pass too, with a flatter gouge, I said number 4 or number 3, a little lower than the edge beside them. Hope you understand that, I said, and kept going.
Stage | What happened on the leaf | Tool |
|---|---|---|
First hollow, pipe side | began at the volute with barely any depth, drifting a little right as it went | 12 mm #11 (1/2 in) |
Ridge left over | a preliminary blend, since I didn't want that ridge showing | shallow gouge, maybe #3 |
Second hollow, far side | light at the start, then pushed hard to exaggerate the pipe | that same #11 |
Excavating the eye | tool rolled round to 2 PM, then smaller and smaller | 4 mm, 2 mm, then maybe 1 mm (5/32, 5/64, 1/32 in) |
Softer concave | still a concave, just not as pronounced as before | any spoon, a #3 |
Riding the ridges | on top of them for a nicer convex, until I said it doesn't work | #7, then a flat |
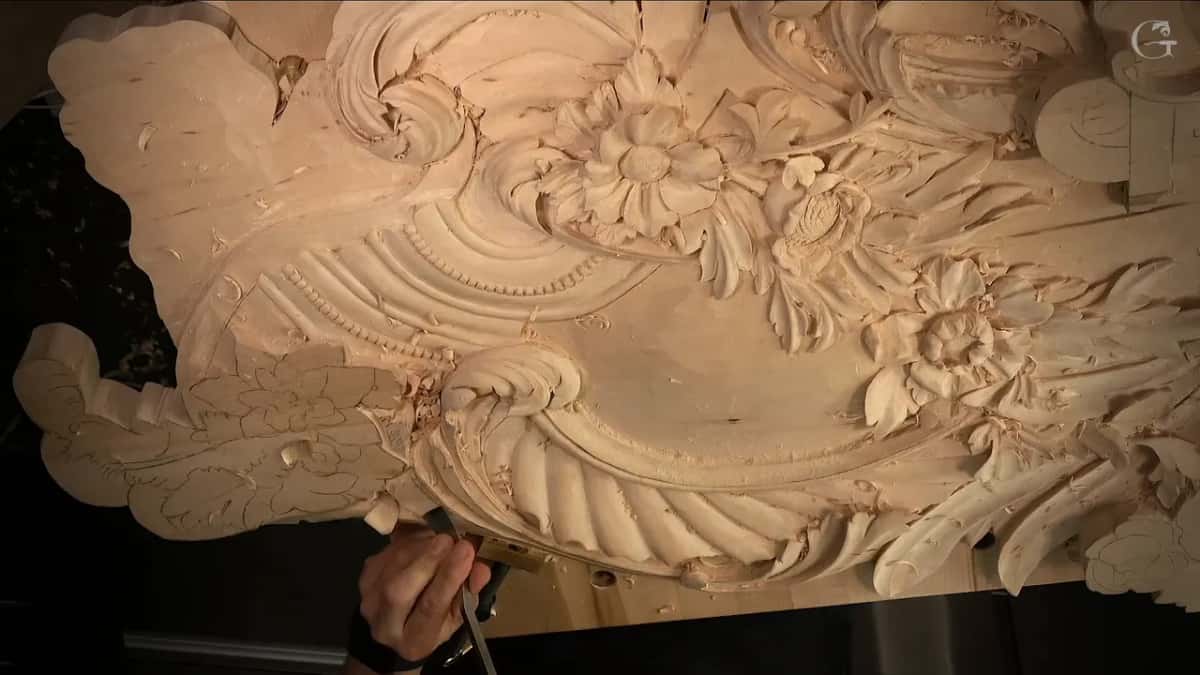
Where does the eye go on a leaf this plain?
Farther out than my first spot, or it would not even be visible. I picked one spot first. Then: well, actually, no, I'll get that eye much farther.
Next was another concave on that side, the same #11. I really pushed it in one spot, because I want to exaggerate that pipe, and there was a lot less pressure at the beginning. How far to push a shape is its own subject, taught on a grape onlay.
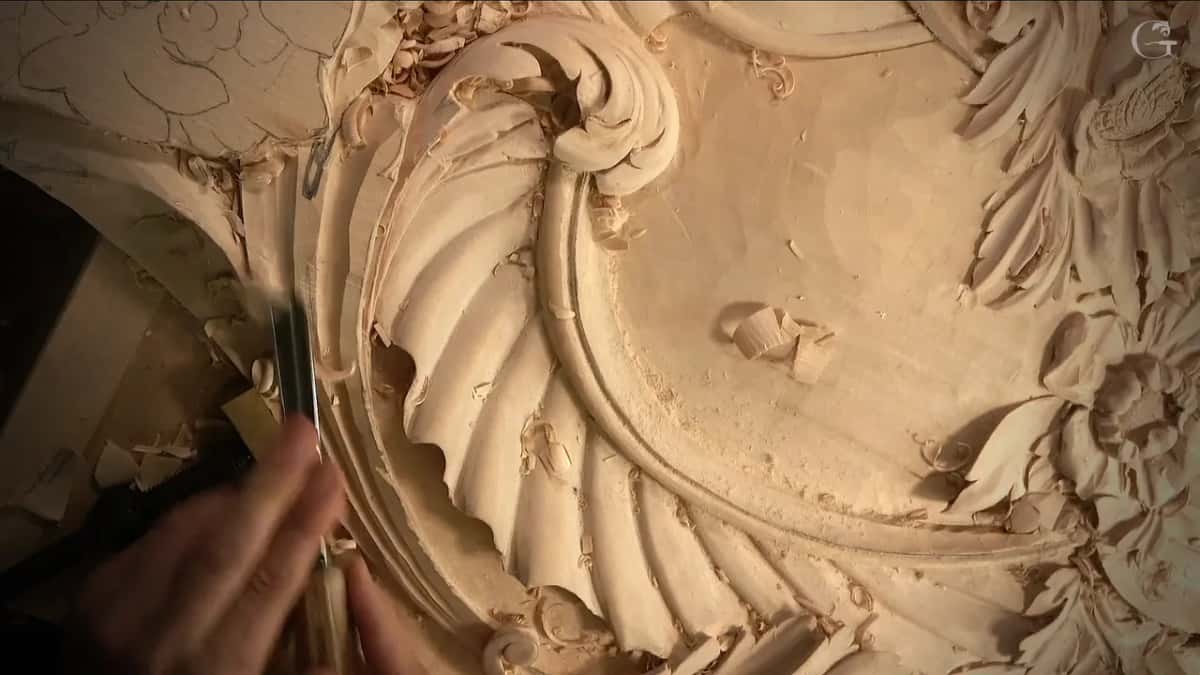
One side of that hollow did not worry me at all. I don't worry about being choppy on this side, I said. What I really worry about is the side of the pipe coming out clean, and that is really important for me. Like I said, that pipe is going to make a huge impact on the design and the overall movement. So I walked around and attacked from the opposite side. That way I could take care of how clean it is. It did look clean. It really did.
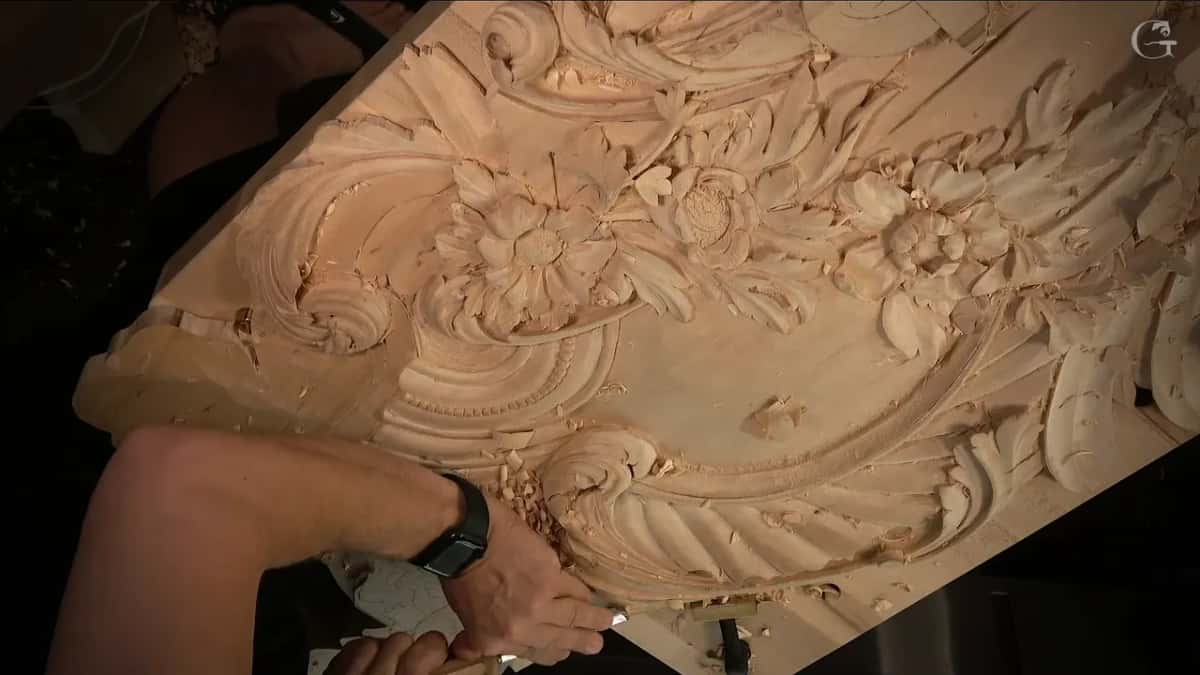
After that came the eye, excavated with a 4 mm tool turned to about two o'clock on a clock face. I said fourteen o'clock first, like 2 PM, and then said sorry, since it was afternoon for me and that was the first thought in my head. Next I went with 2 mm, and then I said I could go with 1 mm (5/64 and 1/32 in) and create that excavation. I'm not sure if I like how it turned in this area, I said, but I'll keep it for now.
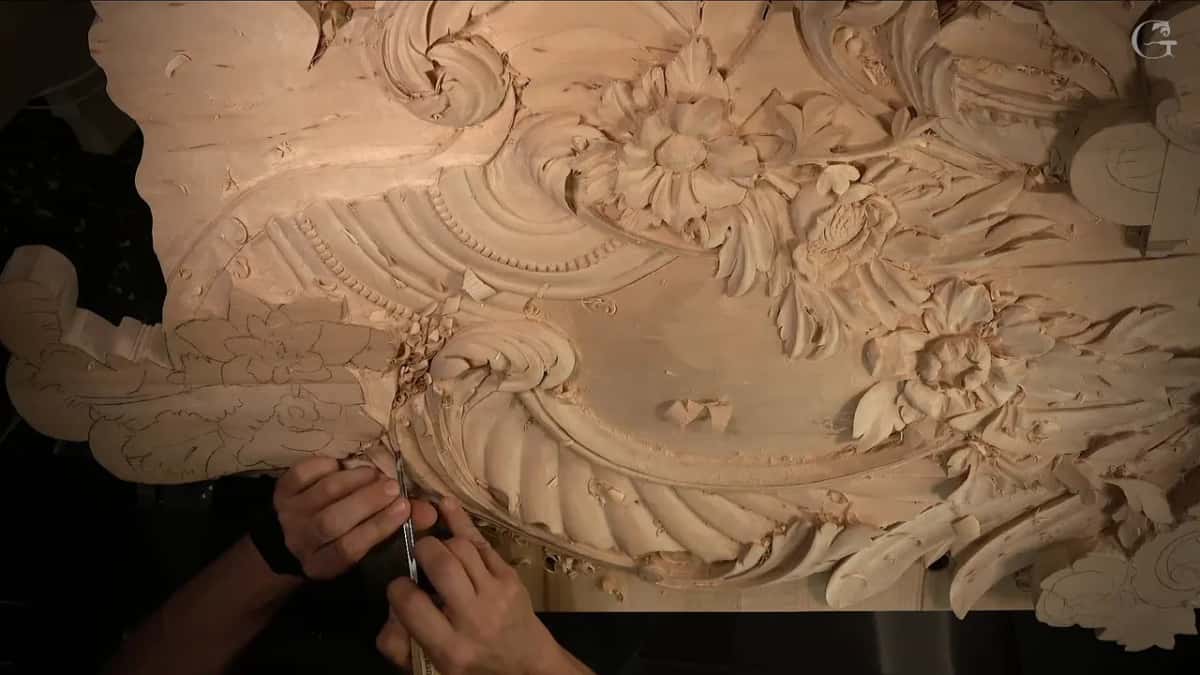
By the end of part three I had a big pipe. I was really happy with it. I said I could excavate on the inside like I'd done before, and that I wasn't sure yet if I would. A ridge still didn't look too good, and that was next.
How do you keep a simple leaf readable?
I brought the hollow nearer the middle line, since otherwise it would not be readable. All of it was in part four.
First I called the blending so far a preliminary blend, and I said why. Another concave was coming. On that long running part I wasn't going to do too much, since I don't really need to. Here's my center, I said, and right on the side of the center I ran that concave along and let it fade, just fading to nothing. I started really far out again, closer to that volute, barely taking any material out.

What I was after was a raised edge with a concave running along its side. I asked on camera if that really matters, and answered that I think it does, and that it will look much better. The concave went pretty much to the edge, almost, and a little downhill.
Some of the hump came off with a number 1 back bend. It still needed a nicer blend, and I had to bring it in toward the middle line. Right there too, a little more.

Earlier, in part three, a spoon did some softening, and I said any spoon will work before taking a number 3. Then I started blending from all the way over there too. The concave stayed a concave, just not as pronounced. At one point I said it would be a good idea to use the right direction, then, that's okay, and carried on. Then came the number 7 on the ridges. No, doesn't work, I said a little later, and got a flat and blended that carefully instead.

The last shapes were a separation with a letter S curvature and a second separation right on its side. I made relief cuts in those triangles. Maybe this tool is a little too big, I said, so maybe 3 mm or even 2 mm, and I used 3 mm (1/8 in) first to free those areas up. A number 7 at 14 mm (about 9/16 in) came next, and I said I would finalize the shape with it. Then a bigger one, maybe a number 6, and it was going to fit perfectly, I said. Yep.

What does just an indication of movement mean?
A movement, and no really sharp ridge in that area. Those were my words near the end, and I said I achieved what I wanted to. I like that movement, and this side I would take care of a little later.

That doesn't look too bad at all, as far as the movement goes, I said, and then, obviously, here's my pipe. For the rest of the blending I took rasps, my new helpers. I called that cheating, and said it was going to save me a lot of time. The edge was not perfect yet, but you get an idea, I said. The final cleanup was for off camera, and you really don't need to see that.
One more job waited off camera as well. I still had to make some glue-ups in that section, because a crown molding will butt against it, and I said I still needed to figure out the best way to do that. Anyone new to the word movement can read what movement means in carving.
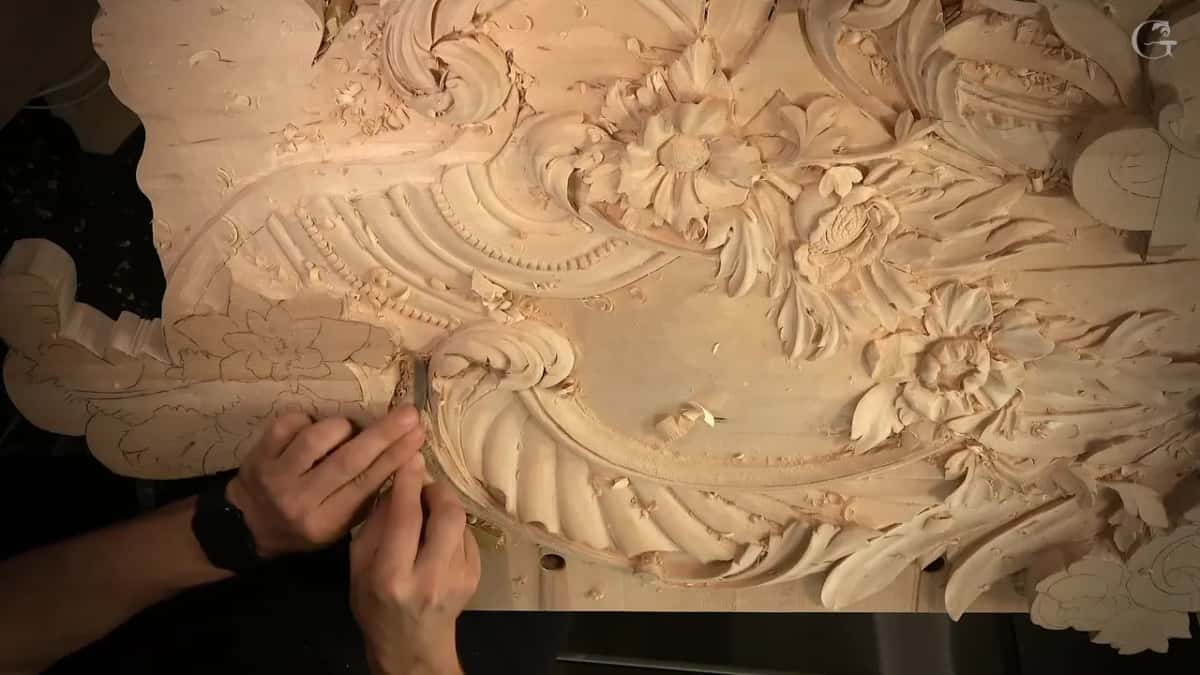
A leaf like this is one small part of a bigger relief panel, with a molding, a shell and flowers around it in the same ornament. The same lesson that gave the flowers their outline gave the leaf its long pipe, in roughly thirty minutes of video. The lesson ends with me heading to another side you can't see yet, and a promise said twice: we're going to finish it.
If the acanthus itself is new to you, the Roman acanthus course and the modern acanthus course each carve a whole leaf, and the school also has a course on the principles of design.
Would you like to watch that pipe come up, pass by pass? Want to hear every change of mind along the way? All four parts of lesson 147 are there, with lesson 146 right before it and lesson 148 right after, and they open with tuition to the school, monthly or yearly, renewing automatically until you stop it.
How it's done
- Split the movement in two. Tuck one half beneath the flower and drop it lower, and let the other half just end.
- Begin the pipe at the volute. Set the #11 next to the volute with barely any depth and run the hollow on to where the leaf ends, not close to the pipe, which keeps it wide.
- Soften the leftover ridge. Give it a preliminary blend with a shallow #3, since more concaves are still to come.
- Exaggerate the pipe from the far side. Carve a second hollow with the same #11, light at first and harder where the pipe should rise.
- Excavate the eye. Roll a 4 mm tool to the two o'clock position, then drop to smaller sizes for the hollow.
- Keep it readable. Fade a second concave out to nothing, pull it nearer the middle line, and blend until a soft movement is all that is left.
Frequently asked questions
How many parts does the leaf in lesson 147 have?
Two, because the movement splits once and stops there. One half tucks beneath a flower, and I dropped that half lower, where I thought it looked best. The other half just ends, and a long pipe runs down the leaf, the part I said would work a miracle.
What gouge dug the hollows beside the pipe?
Both came from one #11, twelve millimeters wide, or roughly half an inch. I eased in near the volute with almost no depth, went light at first, and pressed harder where the pipe needed to stand up. Between the two, a shallow #3 softened the leftover ridge.
Why did the eye move?
At the first spot I chose, nobody would even have seen it. I moved it much farther out, dug it with a 4 mm, and went smaller for the hollow, with 1 mm as the last size I named. One area turned in a way I wasn't sure about, and I kept it for now.
What to carve next