

Alexander Grabovetskiy, woodcarver, School of Woodcarving · Published 2017
How do you carve a wood rosette?
Quick answer: A wood rosette is carved from a square basswood block, and the finished ornament stands 3 mm above its background, one eighth of an inch. You score the circle with a knife held straight down. Then the ground drops away under a number 9 gouge, and leather punches pebble the background.
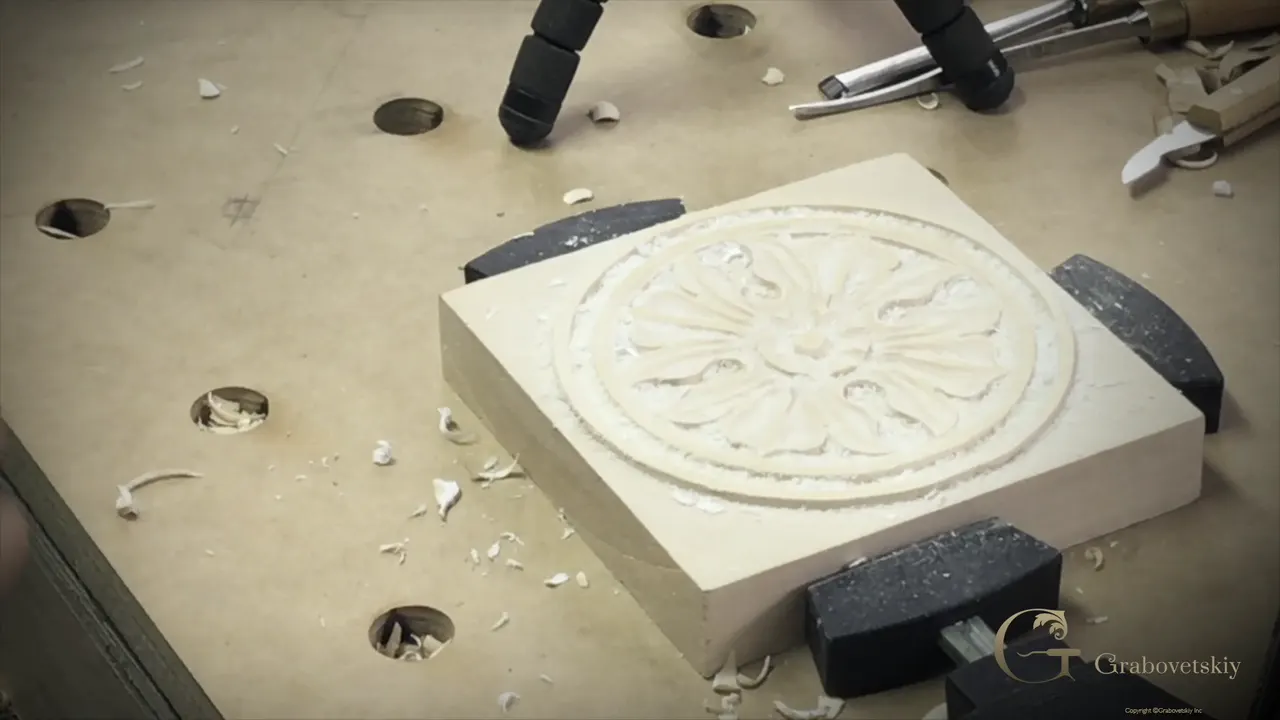

What is a rosette in wood carving?
A rosette is a round ornament with a flower sitting inside a circle, and it is one of the oldest ornaments people have. The name came from the rose, or from any flower, inside that ring.
Archaeologists dug rosettes out of Egypt. Babylon had them, Greece had them, and later all of Europe, so when you carve one you are copying carvers nobody can name any more. The shape outlived the whole lot of them.
Mostly a rosette is architectural carving. Goes on a building, or on furniture, in the corners.
Where do you use a carved rosette?
Corner blocks, mostly. On the casing around a door or a window, up where the trim meets and the eye stops. Furniture corners take the same piece. Or you carve one just for fun and keep it as a decorative piece.
Have you got a door casing at home with two blank corners? Do you want that trim to look like a person made it instead of a factory? Then a rosette is the piece to carve, and mine is 5 3/8 inches square, 137 mm.
Can you carve a rosette from a photograph?
Yes, and a photograph is all I had for this one. A client ordered 15 rosettes in an antique style and sent me a picture. No original piece came with it.
Everything across these six workshops is me matching that photograph, guessing at the parts the camera never showed, and deciding what the depth must have been. I love working from pictures. Given the choice I would rather carve my own design, and that is my problem to live with, because I carve for a living and what the client wants is what the client gets.
I made 16 blocks. Fifteen were for the order, and I made one extra just in case.

What wood is best for carving a rosette?
Basswood. It is probably the best wood for carving. Same tree as lindenwood and limewood, and the name only changes with the country you live in.

Grinling Gibbons called limewood the queen of all woods, and he carried that idea into England out of Holland. Before him the costly English carving was oak and the cheap carving was pine. Germany was ahead of both, doing all its church carvings in limewood in the 15th and 16th centuries, and that work still looks fresh today.
Funny thing about the old trade. Basswood was never filed as a softwood. Pine was the softwood, and basswood went down as a hardwood, even though it is soft.
How thick does the wood need to be for a shallow relief carving?
An inch and an eighth, 29 mm, for a rosette this size. The background sits down at one inch, 25 mm, so the ornament ends up standing an eighth inch tall. 3 mm of carving, and that is every bit of relief the piece will ever have.
The client's picture never showed me the depth. I assumed an eighth inch and no deeper, because any deeper and it would not look right.
Get your blocks dead square first. Mine came out 137 mm each way, five and three eighths inches, and they have to be perfectly square, so there are no gaps whatsoever.

How do you transfer a pattern onto wood for carving?
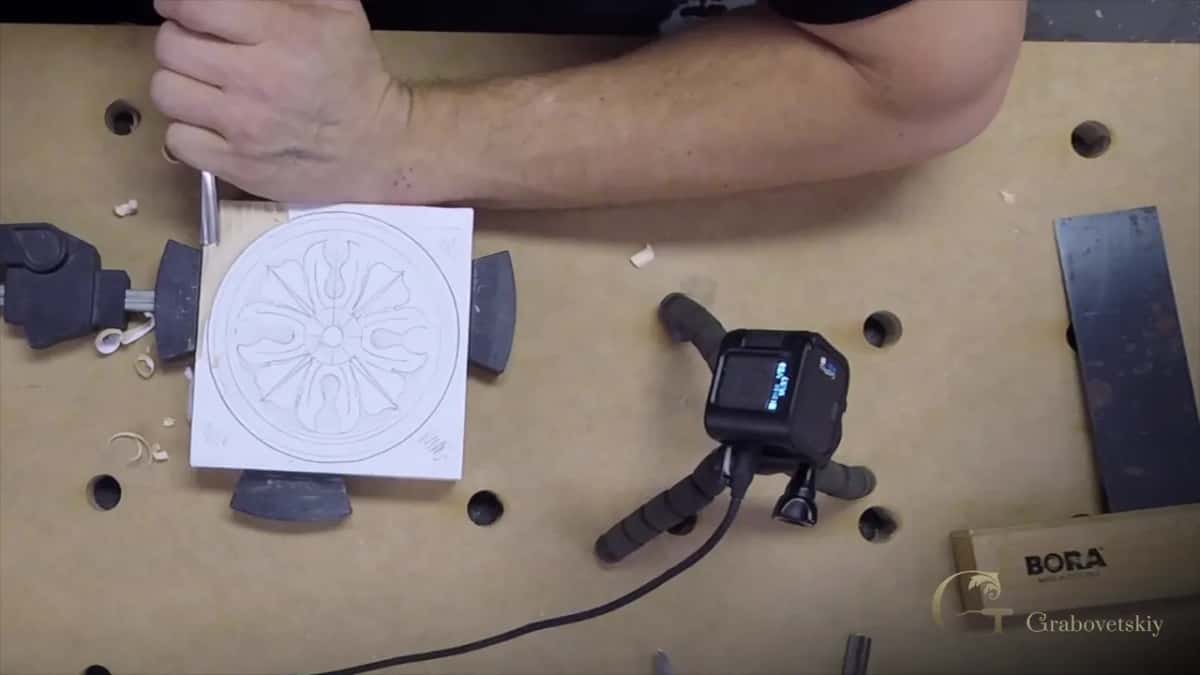
Glue the paper straight down onto the wood. I drew the rosette one time, ran 16 copies, cut them into squares, and glued a square to the face of each block.
Ordinary yellow wood glue holds it fine. Thick glue, not thin. A thin glue soaks into the fibers, and if you ever stain the piece that patch shows through the color, so keep the penetrating stuff away from carving. Nearly all that paper gets carved off as you go anyway.
How should you clamp a small carving?
Clamp it down to a board full of holes. I took a piece of MDF 20 mm thick, three quarters of an inch, and drilled 20 mm holes through it about four inches apart, 100 mm center to center. Clamps drop into any hole and hold from any direction.
The work rotates easily, and on a rosette you will be turning it all day. Small block, big panel, odd shape, the holes do not care.

How deep should the background of a relief carving be?
One eighth inch on this rosette, 3 mm, everywhere and not a hair more. Every scrap of background sits at that one depth, so the ornament floats at a single level.
Take a marking gauge, set it to the eighth, and score all four sides. Two or three passes, so the line goes a little deeper. Drawing that line freehand with a finger against the edge works too, and I do it all the time, but 15 of these had to match each other.
A screw run through a scrap gives you a depth gauge for nothing. Let an eighth inch of it poke out the far side. I eyeball mine and come close enough.

How can you carve a perfect circle in wood?
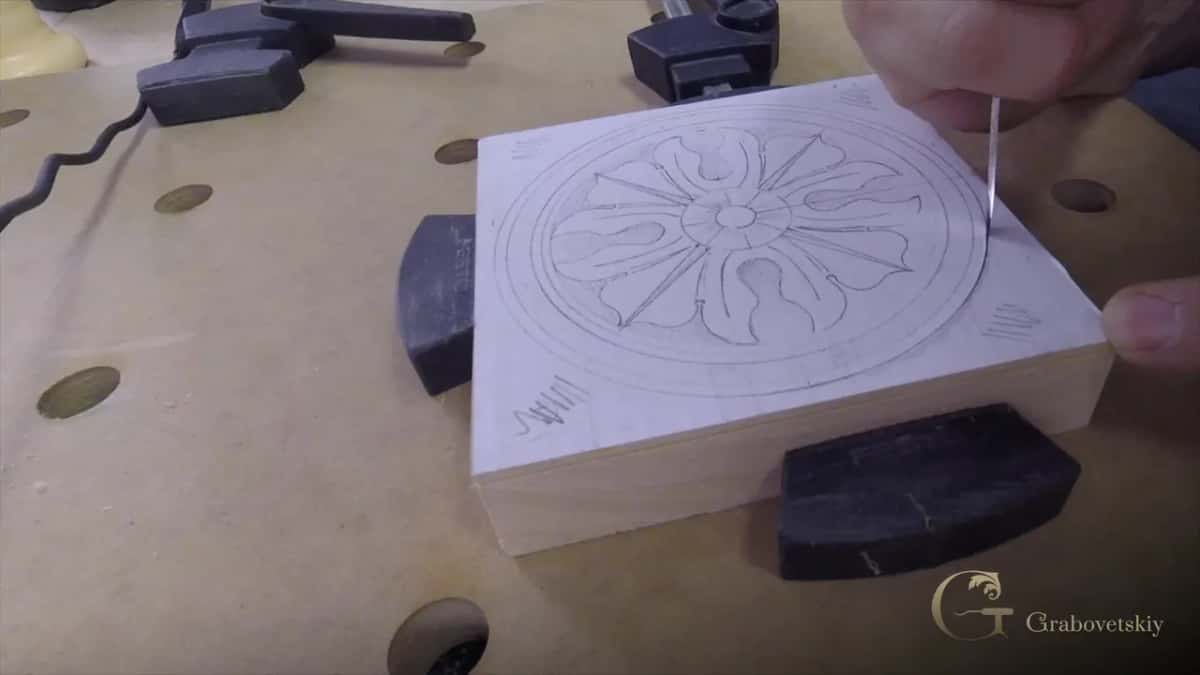
Stand the knife straight up on the line and walk it around a quarter of the circle at a time. A cheap carving knife does this job, and mine is nothing special.
Straight down is the whole trick. Lean the blade even slightly and you carve a bevel into the wall of your circle. Hold the knife in your fist and pull it toward yourself. Pushing it away works too, so go whichever way your hand likes.
Rotate the block and take the next quarter. Four quarters, one circle. A lathe will turn that circle more accurately than my hand does, and I might do that on some of the fifteen.
Which gouge takes the background off a relief carving?
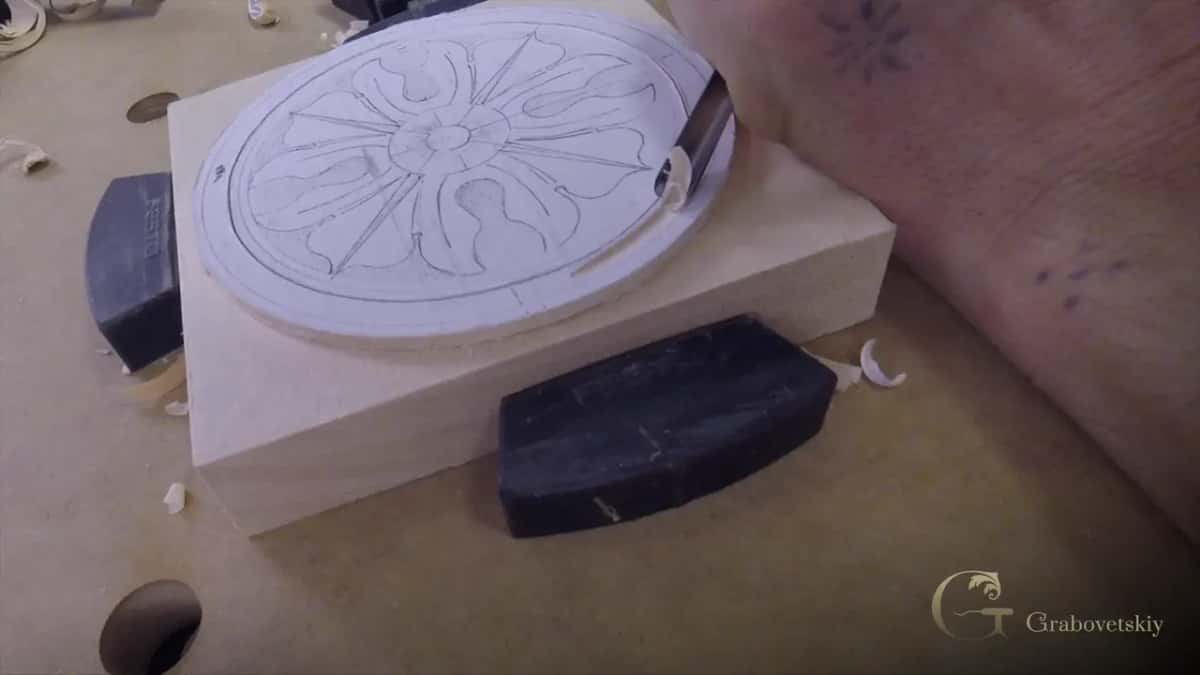
A number 9, or a number 8 if that is what you own. Set it slightly above your marked line and drive it with a mallet.
Slightly above is the part to remember. Land right on the line and you bruise the edge of the ornament, and I do not want to see any damage there. Check your grain before the first blow and plan to go against it.
A mallet is about control, not power. I could push this gouge through basswood by hand with no trouble at all, but with a mallet I have a lot more control.

What is a relief cut in wood carving?
A relief cut is a shallow hollow carved just inside a line, so the wood beside that line has somewhere to move. Skip it and a 3 mm band of basswood chips out, taking a piece of your ornament with it.
The reason sits in the wood itself. Press a blade into solid wood and it shoves fibers away on both sides at once. My second circle had plenty of wood behind one side and almost none behind the other, so the blade would have split the thin side clean off.
Before the second knife line goes in, I take a small number 9 and carve a shallow hollow about a millimeter inside the line. Now the fibers have room. A V tool does the same job, or a number 8, or a 10, or an 11. Once that hollow is there the edge is strong and the knife has nothing left to fight.
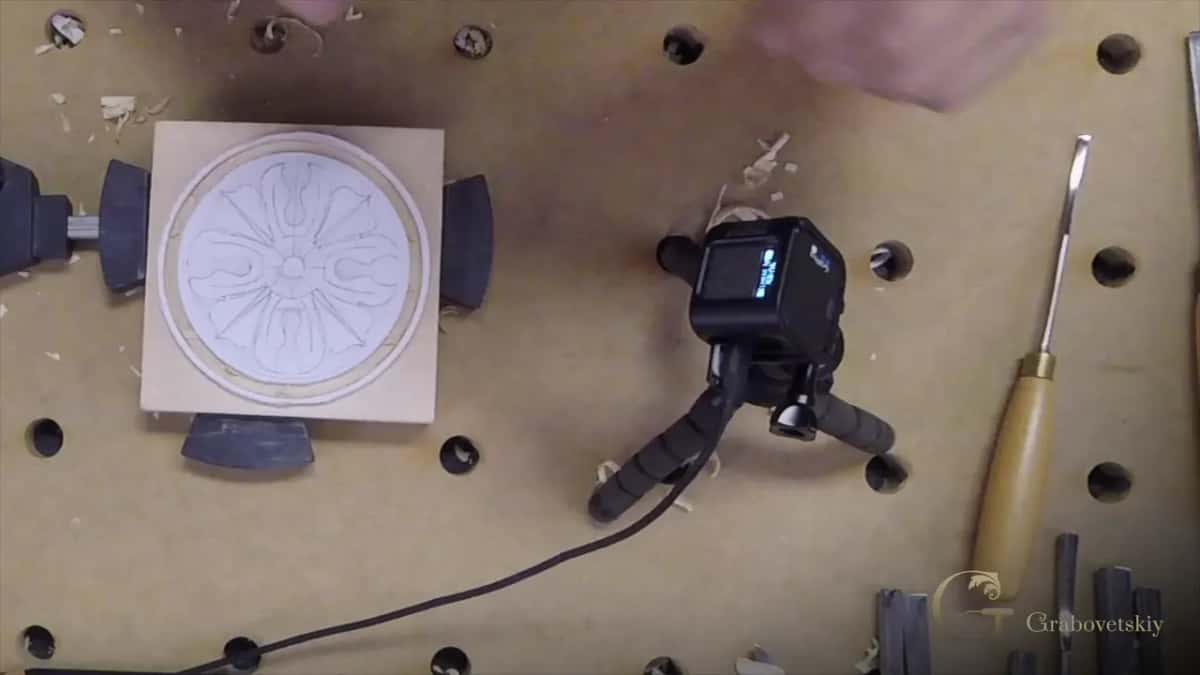
Why does my carved line come out wavy?
You rushed it. It makes no difference how steady your hands are or how good you are.
Your eye catches a wavy line very easily, and once it does, the work no longer looks clean.
A few shallow passes beat one deep one. On that second line I go no deeper than a sixteenth of an inch, 1.5 mm, per pass. The band I am working is 3 mm thick, and it snaps if you ask too much of it, especially on end grain. When a line still comes out slightly off, leave it alone, because hand work is supposed to show a hand.
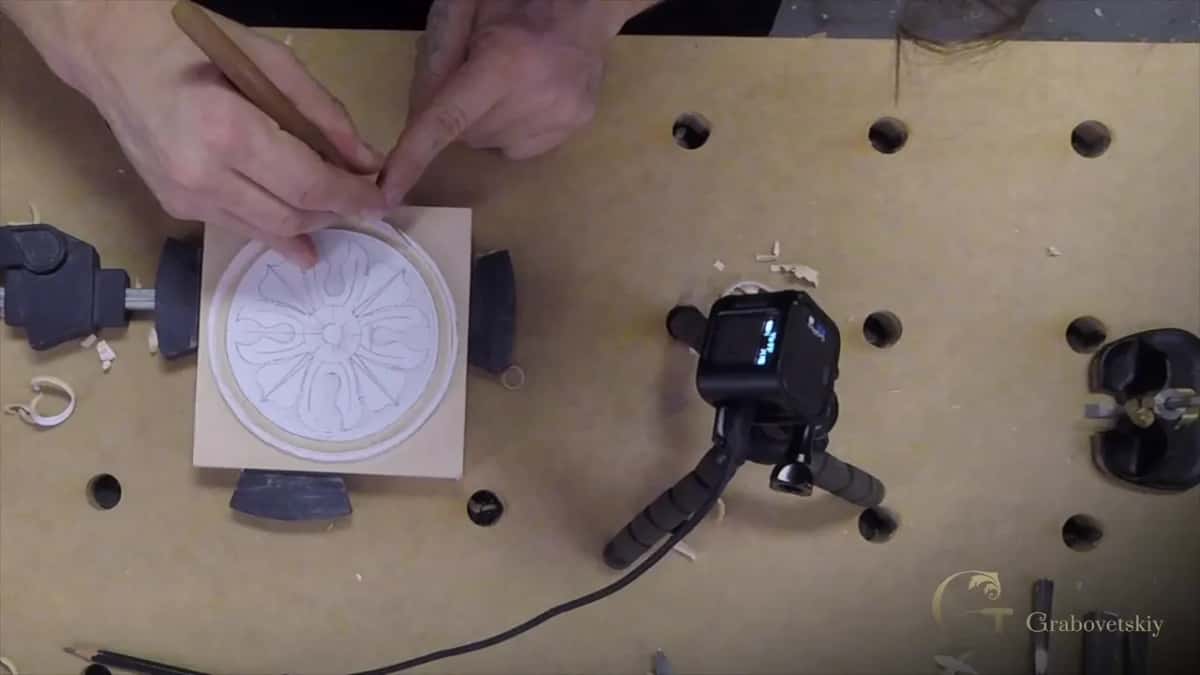
Which way do you pull a carving knife?
Your other hand stays on the far side of the blade, always. Never in front of the edge.
Two knife grips show up on this rosette. For the first line the knife sat in my fist and the arm pulled it. The second line wanted more care and a pencil grip, with one finger riding the blade to steer it. Slip with your hand behind the edge and nothing happens. In front of it, you carve yourself.
What tool makes a carving background flat?
A router plane. Set the blade a touch high, sweep it across the background, lower it, sweep again, and the ground comes out flat and all one depth.
Best tool there is for a ground, as long as the opening is wide enough to let it in. On the inner parts of this rosette it would not fit, and I went back to a grounding tool and my eye.
Three passes, and the last lands on the line. Keep that blade sharp. With a router that matters a lot. Fifteen rosettes is production work, and in production I always have to think how I can make it quicker.

What does a grounding tool do in wood carving?
Grounding tools clean the background right up to the wall of the ornament, and get into corners nothing else reaches. Mine is a number 47 from Ashley Iles and it is in my hand most of the day.
Buy a narrow one as well. I keep a 47 that is a sixteenth of an inch wide, 1.5 mm, and a tiny German one from Lamp, number 0015, and those two reach the corners the big one cannot.
One detail decides which grounding tool I reach for, and it is the bend. The Ashley Iles ones have a slight bend, which in many cases you must have, and they just work easier. I own excellent straight two and a half sweeps by Chris Pye and use them less, only for that.

Which gouge sweep matches a drawn curve?
Hold your tools against the drawn line, one after another, until one of them lands on it exactly. No measuring and no math. You try them.
The answers came out like this on this rosette, once I had tried them all against the drawing. First a number 9 at 10 mm, three eighths. Then a number 7, 14 mm, about nine sixteenths, and after that a smaller 7 back at 10 mm. An 8 covered the same width, and a number 6 of that size went in where the 7 sat too wide. One curve wanted a huge number 7, a monster of a tool, and it dropped onto that line like it had been ground for the drawing.
Walk a small tool around the curve when you do not own the big one. A number 5 at 12 mm, half an inch, fit that line for me too. With more sweeps you can almost always find the right one, and what each one does is the whole of All About Tools for Wood Carving.

Should you carve with the grain or against it?
Against the grain wherever the shape allows it. First I find which way the grain runs, and then any pass I can make against it, I use, because it is a lot safer.
A hollow has a clean side, and which side that is comes from the grain direction. Work out where the high point of the grain sits before you start, then begin there and carve away from it. Rotate the piece and take the other half of the same hollow from the other side.
What are the eye and the pipe on a carved leaf?
The pipe is the raised ridge running down a leaf, and the eye is the small round or half round where that pipe starts. The leaves on this rosette carry both, and the drawing tells you where.
Start with the eyes. A very small gouge sets each one, and I use a tiny dockyard tool because it fits and because I like how it behaves.
Then the pipes, except you never carve a pipe. You carve a groove down each side with a number 11 veiner, 3 mm wide, an eighth inch, and whatever stands up between the grooves is the pipe. Rounded, like plumbing pipe laid on the wood. Middles of leaves get the same treatment.
Go gently in there. Push a veiner too hard and it runs into the wall of the center circle and leaves a ding. Dings happen there and they are expected, and it is not a big deal at all.


Why leave the edge of a carved leaf high?
Leaving the edge of a leaf high was common practice with the old carvers. In Romanesque stone and wood the rim of a leaf stands higher than the inside.
So I leave the paper glued along the rim while I hollow. The paper reminds me to keep steel off the high spot. Work from the rim inward, take the middle down into a shallow concave, and stop while the rim still stands above everything around it.
Some sections have no high spot at all and simply roll over. Let your own drawing tell you which is which. On this piece I missed a line once and had to go back, because it did not look right.

What grip do carvers use for fine detail?
Pinch the blade between two fingers about an inch from the edge, 25 mm. The hand nearest the steel is the hand doing the aiming.
You will find yourself working that way without being told, as soon as the details get small. And the finger closest to the edge earns its place twice, because it also keeps the tool steady in position.
Nobody is timing you, so do not rush it. If you want to stand at a bench and be shown instead of guessing, that is what the school is for.

What makes the bubbly background on antique carvings?
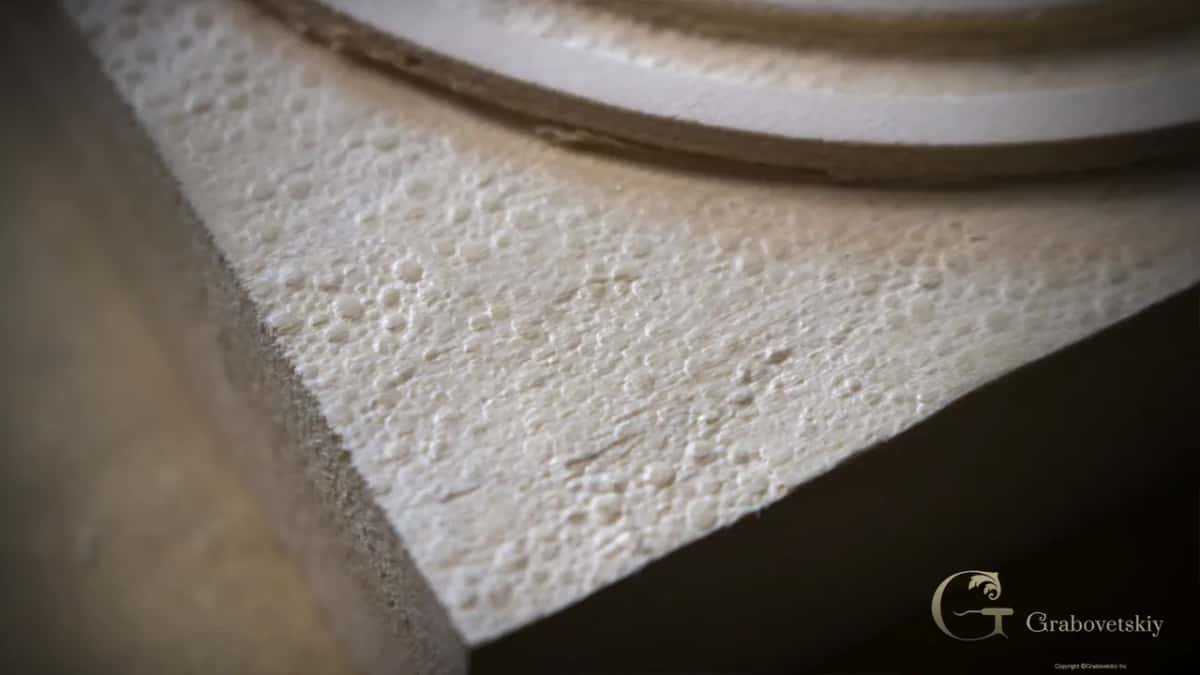
You do not carve it at all. You punch it, and the punches are sold for stamping leather. That pebbled ground on old rosettes stops a great many carvers cold, and the answer is not expensive.
Search for background tools for wood carving and you turn up nothing useful. The old carvers were not shopping from a catalog either. They picked up whatever was lying in the shop, and so do I. Leather workers stamp hide with steel punches whose faces carry tiny raised dots, and those faces print basswood beautifully. Order a set of background punches for leather. Three sizes come in a set, and three is what the job needs.
Biggest first, about half an inch across, 13 mm. The 3/8 punch, 10 mm, follows it into the tighter ground, and the smallest one goes into the corners. Place them at random, and the ground comes out just like the one in the picture.
I use a carpenter's mallet with a plastic face. Any mallet will do, and so will a hammer. Go easy, too. A small punch sinks deeper than a big one under the same blow, so you have to feel it.
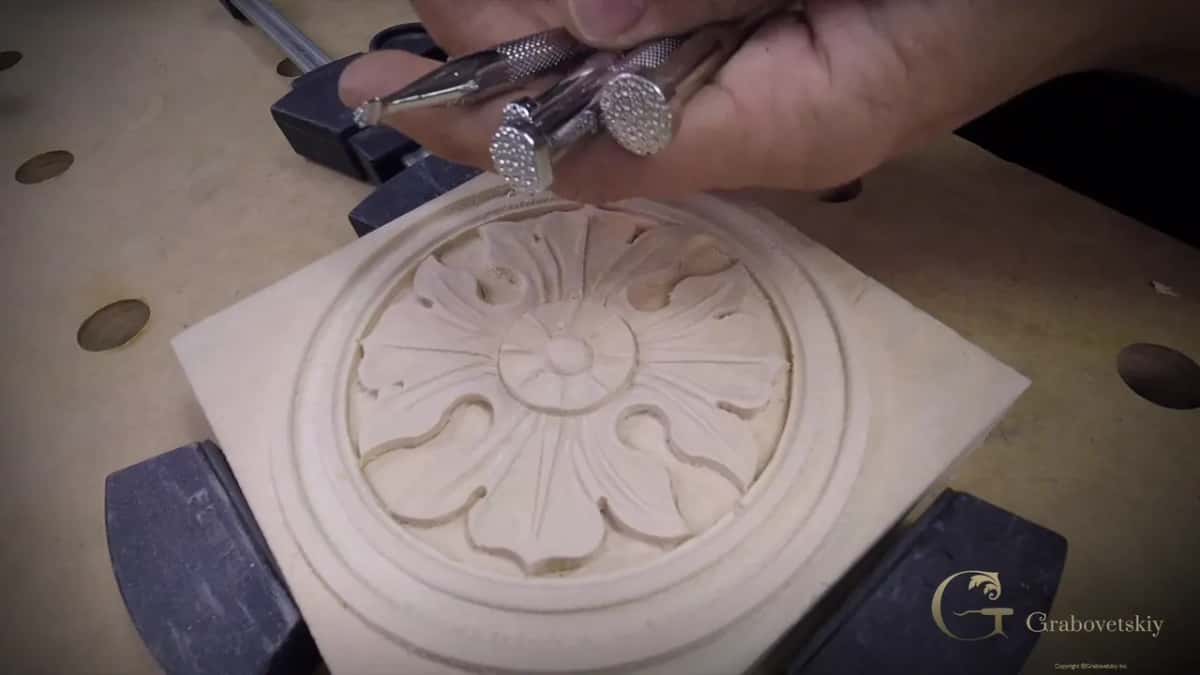

A punched ground also takes stain a little differently from the raised carving above it, and it looks really nice. Knowing the ground will be punched saves you work, too, because every gouge track down there is about to be pressed out of sight.
Do wood carvers sand their carvings?
I usually do not sand mine, and there is nothing wrong with sanding. Leaving a carving straight out of the chisel used to be the European habit, and a habit is not a law.
Sandpaper earns its keep here in one place, on the paper pattern. When the carving is finished I wrap 150 grit around a block of wood and take the drawing off, then walk a number 7 around everything once more and get closer to the edge.
Europe is a big word, by the way. People say European tradition, picture Germany or France, and forget the Czechs, the Poles, the Ukrainians, the Russians, all of them Europe and all carving their own way. I grew up in the Russian part of it, learning one on one at the shoulder of one master. That way is close to gone now even over there, and I still teach by it.
Were wood carvers ever paid well?
In the 15th and 17th centuries a carver earned around 40 times what a man working the fields earned. Not 40 percent. Forty times over.
Nicholas Stone carved wood and stone in England early in the 17th century, and he owned five houses. Paid cash for all five, because the banking of the day handed out no mortgages. He was not an old man either. Men in England then were often finished living by their forties.
Then it turned. Royalty were the customers, and royalty stopped paying on time. Same price agreed, money much later. One carver waited two years to be paid for a commission, and if that sounds like ancient history, some of today's clients are working hard to keep the tradition alive.
Is a rosette a good project for a beginner?
Yes. A rosette is considered easy carving, and it is easy. The design is shallow all the way through, and the wood is basswood.
One part of it is not easy and I will not pretend otherwise. That 3 mm band around the circle snaps when you get greedy, and end grain snaps first. Patience is the actual skill here. If you have never held a gouge, begin with First Cuts for Beginners and come back after.
Other rosettes wait once this one is behind you. The flower rosette is rounder and deeper, the chamomile and bow adds a ribbon, and the Venetian flowers rosette will make you sweat. Our lessons map puts them in order, and the old carving books in the library cost nothing to read tonight.
How long does it take to carve an antique rosette?
Six workshops, and the sixth one is only the background. Bench time depends on your hands, so I will not sell you a number I cannot stand behind.
What I can tell you is how the time feels. Once your hands know the pass, carving drops into an automatic mode and I stop being able to feel the clock. Silence bothers me, so audiobooks go on, and I once took a whole university course while I carved. Back then it was tapes, later DVDs. Before you ask what it costs, it is fair to ask who is teaching, and here I am.

With all fifteen carved, I went around the ground of this one with the punches. Smallest punch still would not reach one corner, so I carried it to the grinder, took a whole side off it, and then it fit. The tool cost so little that ruining it never crossed my mind. At the end of that last workshop I said I hoped the client would be happy, and the recording stops there.
So you have a square of basswood on the bench and a door casing with two blank corners. Where does the knife go first? Come and find out at the bench, and by the third workshop you will be picking the right sweep by holding it against the line. Shall we carve?
That is the whole of Carving Antique Style Rosette. Six workshops filmed right there at my bench, and the first one is Workshop 1.