
August 4, 2024 · Updated August 12, 2026
By Alexander Grabovetskiy — Master Woodcarver · Founder, School of Wood Carving · 30 min read
Wood Carving for Beginners, and How to Cut Your First Clean Groove
Key Takeaways
- Basswood is the best wood for beginners because it cuts easy and holds detail well
- Spoon carving is not a good first project because it takes more control than basic carving
- Start with a simple shape or basic relief carving to get comfortable with your tools
- Keep your tools sharp with a strop and mirror paste, and coat them lightly with oil after use to stop rust
- Look for wood with a clean, consistent grain and avoid dark streaks or spalting that will give you headaches
Quick answer: Wood carving is the craft of cutting a shape out of solid wood with edged hand tools instead of building it up from parts. Start with one basswood board, one sharp knife, and one groove cut in the right direction. My own master gave me a knife and nothing else until the knife obeyed me. That order still works.
Your first cut went fuzzy. You pushed the blade in, the wood refused to slice, and a ragged little crescent lifted out of the exact spot you wanted clean. So you pushed harder. It got worse.
You are not short on talent. This is a direction problem, and ten minutes fixes it.
Most beginner guides hand you seven carving styles and a tray of twelve gouges you cannot read the stamps on. Below is the order I teach in my shop instead, and it has not changed much in forty years.
What should you get right in the first week?
- Basswood, Tilia americana, is the beginner's wood. Around 410 lbf on the Janka scale, roughly a third of red oak, and it hardly moves after drying.
- Buy a knife before you buy anything else. One Swiss made knife has done nearly all my knife work for twenty years.
- The stamp on the steel reads sweep, then width. An 8/6 is a number eight sweep, six millimetres across.
- A gouge you can rotate on the board without rocking is a well made gouge. One you cannot is scrap, whatever it cost.
- Fuzz has two different causes, and on the surface they look identical. A blunt edge crushes fiber, an uphill cut splits it. Test the edge first.
- Reach for the biggest tool the job allows. Beginners pick the smallest and then wonder why the work takes all month.
Which kind of wood carving should you start with?
Begin with low relief on a flat board, because it is the only branch of this craft where you can see your mistake and measure it. There are half a dozen ways in, and beginners get pushed toward the two hardest because those photograph best.
| Kind of carving | What the work actually looks like | The cost of starting here |
|---|---|---|
| Low relief | Shapes raised slightly off a flat panel, cut 3mm to 6mm deep | Almost nothing |
| High relief, undercut | Deep panel work, elements standing well clear of the ground | Depth judgement arrives only after a few hundred leaves |
| In the round | Free sculpture, finished on every side | Grain reverses on every single surface, and one hand is always busy just holding the work steady |
| Chip carving | Triangular chips lifted out to build a geometric pattern | Patience, and a layout you can trust to the millimetre |
| Knife work in the hands | Small figures and spoons, cut freehand | Nothing clamps. You learn grain, tool control and safety all at once |
| Power and rotary | Burrs spun in a handpiece | It abrades fiber instead of severing it, so the cut surface never catches the light |
Those last two are where most beginners land, and both hide the information you need. I teach relief because a clamped flat board gives you two hands on the tool and one grain direction to read.

On power carving I will be plain, because people ask and then feel judged. It makes shapes. It does not make a cut surface. A gouge severs fiber and leaves a facet that catches light, while a burr tears fiber and leaves a fuzz you then sand away. It has no place on my bench and I never teach it. Carve with it if it brings you joy.

What do you actually need on day one?
Carving removes material until the shape you want is the only thing left, which makes every cut permanent. You can glue a chair back together. A chip off a leaf never goes back on.
That single fact decides everything about how a beginner should set up his bench. You want wood that forgives, an edge that slices without being leaned on, and work flat enough to clamp so both hands are free.
| Item | Why it earns the space |
|---|---|
| Basswood board, 8 by 10 inches, three quarters thick | Parts under the blade instead of tearing, and holds a crisp detail |
| Straight carving knife | Lines and stop cuts, and most of your first month |
| One gouge, a number seven around 14mm | Scoops and levels both |
| Leather strop and honing compound | Thirty seconds with this replaces most of your sharpening |
| Two clamps, or a bench with a vise | Frees the second hand, which is where your control comes from |
| One pencil | The line always comes first, before any steel touches the board |
Short list, and complete. Everything else people sell beginners solves a problem you do not have yet.


Safety, briefly. Keep your holding hand behind the edge, because a knife that skates travels forward. Clamp the work rather than bracing it with a palm. For the longer list of ways this craft bites, I wrote up the dangers of wood carving for beginners separately.
What is the best wood for a beginner?
Basswood is the best wood to start carving, because it has a fine even grain, it cuts at low force, and it holds a crisp edge on a detail. In Europe the same tree sells as limewood. Both are Tilia, and both have been the carver's wood for centuries.
Price is not why I recommend it. What earns basswood the spot is how it behaves under the blade. Fine grain means small, evenly packed fibers, so the tool parts them instead of ripping through bundles. A beginner's cut therefore looks clean in basswood and shredded in pine.
Basswood also stays put. Look up the shrinkage figures in the USDA Wood Handbook and you will see why furniture makers use it for pattern work. A basswood panel you carve this winter will still be flat next winter.
| Species | Janka hardness | Grain | Forgives | Punishes |
|---|---|---|---|---|
| Basswood (Tilia americana) | 410 lbf, roughly a third of red oak | Fine, even, dead straight | A wrong angle, hesitation, and even a slightly greedy cut | Blunt steel |
| Eastern white pine | 380 lbf, softer than basswood by the numbers | Straight, but loaded with resin | Soft going, easy on the wrists | Crushes the fiber instead of slicing it, every single time |
| Butternut (Juglans cinerea) | 490 lbf, and harder than it looks | Swirling, open pored | Colour hides small errors, which is a trap | Grain reverses halfway |
| Black cherry | 950 lbf, more than twice basswood | Tight and close | Polishes beautifully once your edge is genuinely right | Real force |
| Red oak | 1290 lbf, three times basswood | Coarse, ring porous, and thirsty for oil | Nothing whatsoever | Tears on every single curve you attempt |
Read the last two columns and you have the argument. Pine is softer than basswood by the numbers and remains the worse choice, because hardness is not the property that matters. Fiber structure is. Catalogues get this backwards constantly, listing butternut and pine as beginner woods on the grounds that they are soft, when the open pores of one and the resin of the other are exactly what tears under a new blade.
Want the long version, including where to buy blanks and how to spot a bad board? I wrote that up in the basswood guide.
My own master had a harder line than mine, and I have come round to it. He told me bad wood does not exist. Only dull tools. Sharp steel does beautiful work on the worst board you own.
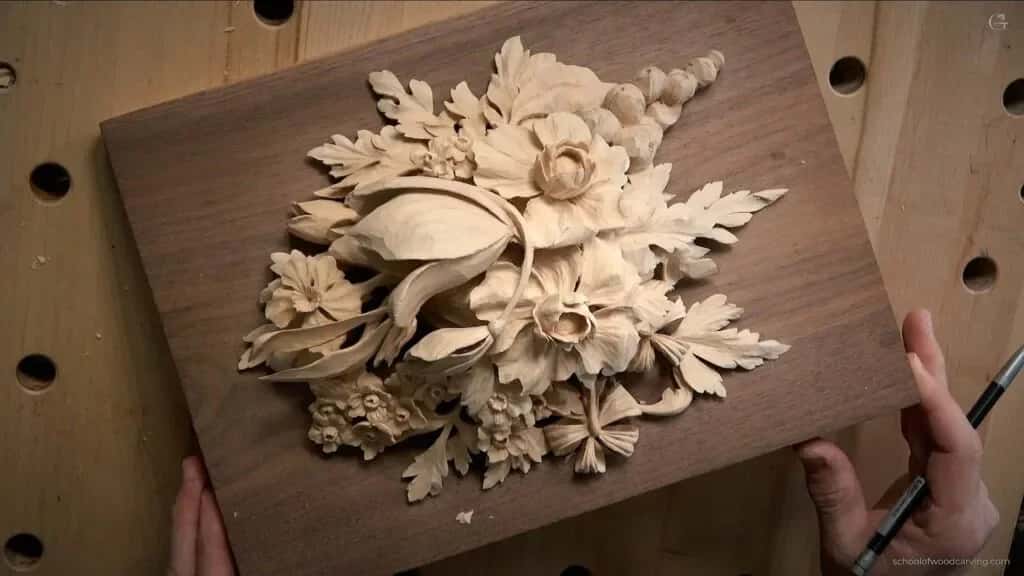
One more thing about limewood, and it matters. Grinling Gibbons carved in it in the 1670s. His work is still hanging in St Paul's Cathedral three hundred and fifty years later, petals a sixteenth of an inch thick, uncracked. In over forty years I have not found a wood that holds a thin turnover better.
Why did your first cut tear the wood instead of slicing it?
Your cut tore because the blade travelled uphill against the fibers, or because the edge was blunt, and the two leave identical fuzz. Almost every guide reduces this to three words: carve with the grain.
True, and nearly useless, because nobody tells you how to see which way the grain runs.
So here is how. Those fibers run the length of the tree, thousands of them, packed and glued along the board you are holding. On its face they almost never sit perfectly flat. They rise and fall at a shallow angle. When your blade travels in the direction the fibers are lying down, it slides under them and shears them off cleanly. That is a slice. You hear it. A soft hiss, and the chip curls off in one piece.

Travel the other way and the edge gets under a fiber and lifts it. Now it does not shear. It splits ahead of the blade and drags its neighbours along, and you get a fuzzy pit where you wanted a line.
The part that keeps beginners stuck is this: on any curve, grain direction changes under your tool while you are cutting. Halfway around a leaf you go downhill one moment and uphill the next without moving your hand. The cut was going beautifully, and then it was not.
Most carvers meet that moment in one of two ways, and both make the tear worse. They press harder, driving the split deeper. Or they buy a sharper tool, which produces a cleaner tear.
What I do instead is stop before the turn and cut the second half from the other end. I carve into the turn from the left, lift out, walk around the board, and carve into the same turn from the right. My two cuts meet at the top of the curve where the grain changes. Neither one ever travels uphill.

One change of hand position. It sounds too simple to be the answer, and it is the answer.
What do the numbers on a carving gouge mean?
The first number is the sweep, meaning how deeply the blade curves across its width, and the second is that width in millimetres. An 8/6 is a number eight sweep, six millimetres wide, about a quarter of an inch. Sweep is a professional term and it means curvature, nothing more.
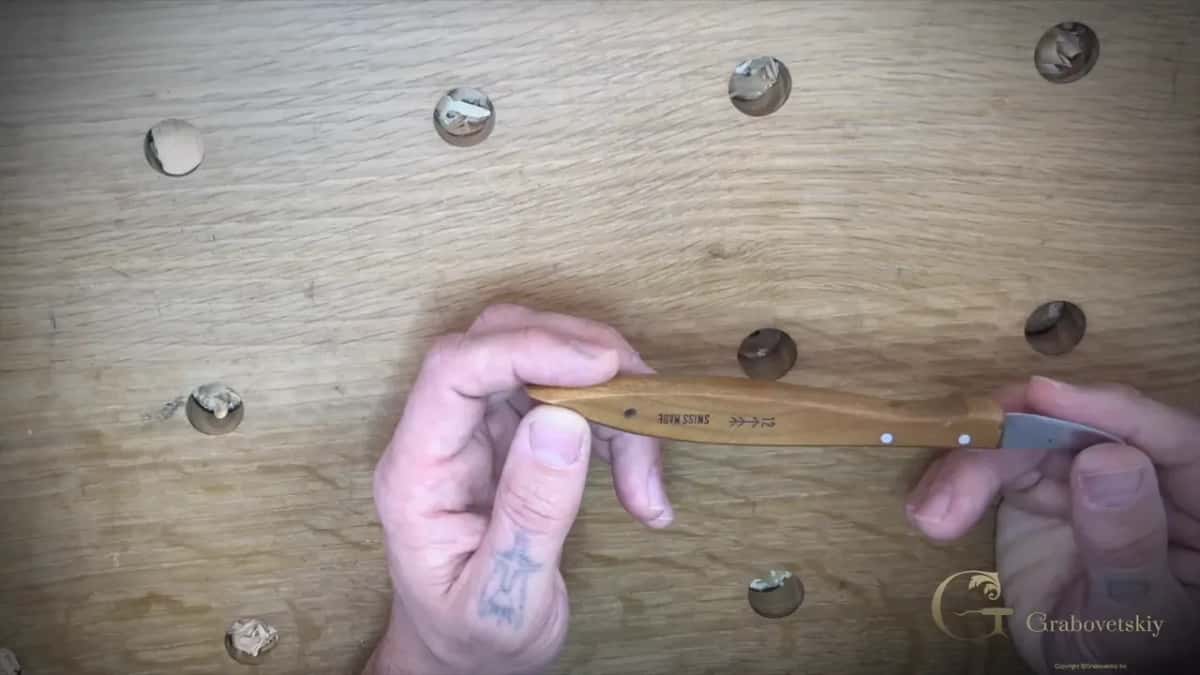
People call every carving tool a gouge or a chisel, and neither is right. Out of all of them only number one is genuinely a chisel.
| Number | Profile | Where it earns its keep |
|---|---|---|
| 1 | The only true chisel, flat straight across | Cleaning a flat background |
| 2 | A skew chisel in Britain, already a slightly swept gouge in Europe | Skimming a background without digging the corners |
| 3 | Shallow sweep | Broad soft surfaces, and a petal that barely rolls |
| 5 | Medium sweep | General shaping, and the second tool most carvers reach for after the seven |
| 7 | Deep sweep | Scoops and levels both, and it is my workhorse at 14mm |
| 9 | A true half round. Draw a circle and it is exactly half | Hollows, and the inside of a turnover |
| 11 | Past half round. A U shape carried up the sides. The veiner | Outlining, and cutting the channel between two parts |
| 12 to 16 | V tools, also called parting tools, at 90, 60, 45 and 35 degrees | One crisp line, for a vein or a boundary |
Gouges stop at nine, and some makers run to ten. Anything past that is a veiner or a V tool, which are different animals.
Two warnings that will save you money. First, British and continental makers do not count the same way. British gouges start at three, European ones at two, so the same curve carries different digits depending on which side of the Channel forged it. The Tools for Working Wood carving guide sets the equivalences out properly. Second, some makers barely mark anything. Ashley Iles leave widths off altogether, and they have a reason: a tool stamped 10mm may measure nine, because forging is not a printing press.
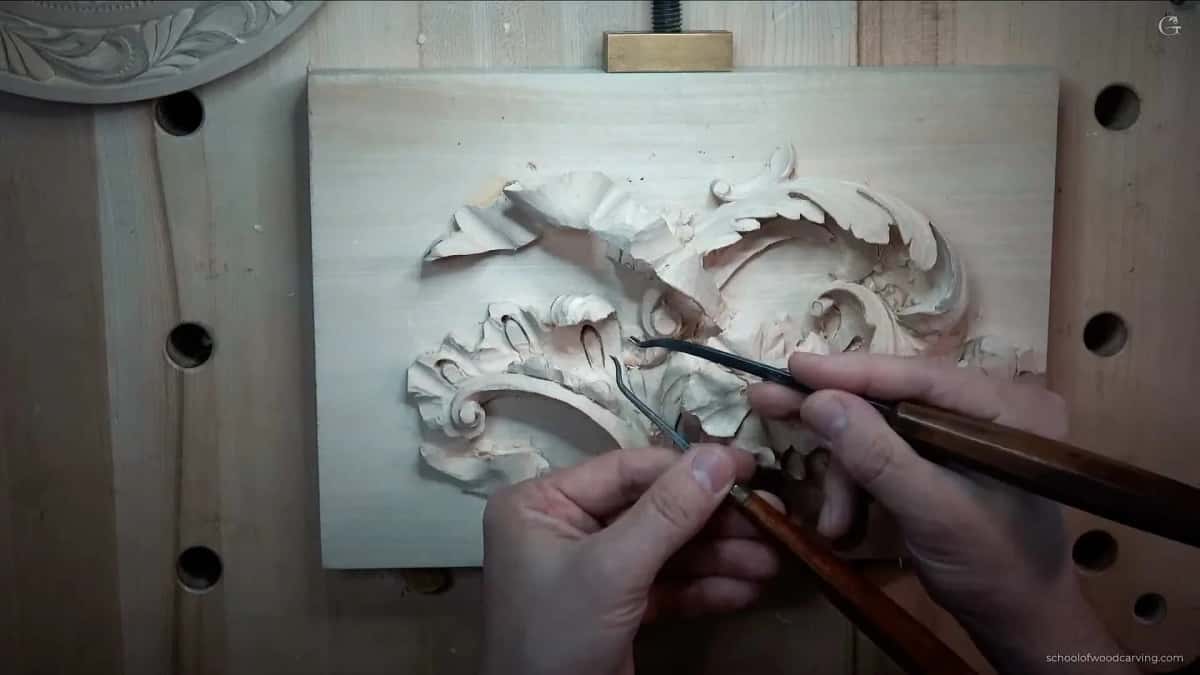
Blade shape is a separate axis from sweep. A fishtail flares its edge out from a narrow shank. Nearly all my own tools are fishtails, because I can drop into a tight corner using nothing but the corner of the blade. The spoon bent curves up at its tip, edge on the convex side, and it goes down inside a hollow where a straight tool bottoms out. Reverse that bend and put the edge on the concave side and you have a back bent. A macaroni exists as well, rectangular, and safely ignored for years.
The V tool deserves its own warning, because it is the tool beginners ruin first. There is no such thing as a sharp V. Look closely and you have a small gouge at the bottom and a chisel up each side, three tools in one, and it has to be sharpened as three. I favour the 35 degree, a number sixteen in the Swiss range, because it cuts deep without the sides touching. A 45 or a 60 works perfectly well.
How can you tell a good gouge from a bad one before you buy it?
Set it on a flat board and rotate it. A well made gouge sweeps the same arc and returns to the same spot, scribing a clean circle. A badly made one rocks and steps as it turns, and it leaves a mess. That test takes four seconds and it tells you whether the toolmaker knew his trade.
Run it before money changes hands. Do it especially at a flea market or on eBay, where the bargains are. I once found an antique gouge stamped as a twelve by some earlier owner, when the shape was really a nine, and it rocked all the way round. The number on a used tool is a previous carver's opinion. The rotation is the fact.

One spec gets quoted as though it settles something. Nearly every carving tool made runs between RC 58 and RC 62 on the hardness scale. Cheap ones and costly ones sit in that same band, they all claim it, and you still feel a difference the moment you start cutting. So the hardness figure is not the thing you are choosing between. What you are choosing is geometry, grinding, and how the handle sits in your hand.
How many carving tools do you actually need?
One knife to begin, then one gouge, and a number seven is the gouge I would pick. Exactly what I started with, and I did real work with it.
My master was strict about the order and I have stayed strict about it. He took me on at sixteen as his only apprentice, handed me a single knife, and told me plainly that until I mastered the knife he would not give me a gouge. So I designed around one knife. A project on my school site, a plate with two raised butterflies, is very nearly all knife work even now.
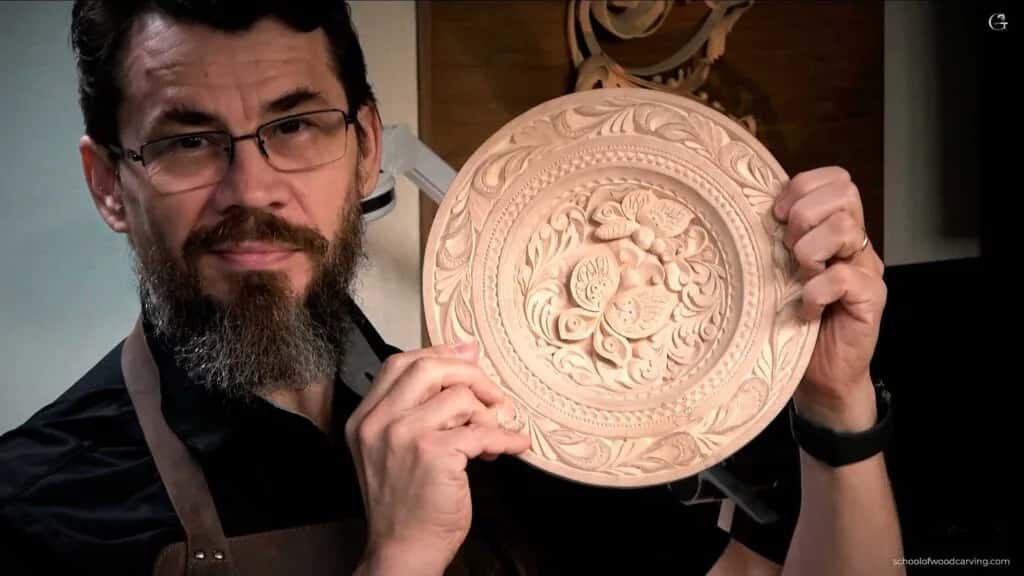
Now the honest part, and it cuts against the minimalism you will read elsewhere. A small kit is no virtue by itself. More tools let you do more unusual things, and that is simply true. Think of every tool as a soldier. The bigger your army, the more ground you can take and the more ambitious the work can be. Two soldiers still win a small battle, but you are limited, and the limit shows up as time rather than quality. There was a stretch when I had one knife and one number seven, and the work was fine. It was also unbelievably slow.
Gibbons himself kept collecting tools his whole career, and you can watch his designs get more complicated as his kit grew.
I read a forum once where people agreed that real carvers use no more than twenty tools. I have about half a thousand, so I suppose I am not a real carver. On the bench in front of me right now there are three.

Thomas Wallis was a Hull carver who wrote his life down in the nineteenth century, and one line of his has stayed with me for years:
When I returned home, I cleaned and sharpened my carving tools ; I had 228 of them, but only about 55 in general use.
Two hundred and twenty eight owned. Fifty five in service. A working master, a century and a half ago, using a quarter of what he had.
My complaint about boxed sets is specific, and it is not price. I carved a whole project with an inexpensive twelve piece set to find out, and the tools were good. I would buy them. What a set gives you is small and medium tools, because that is what fits in a tray. You will almost never find the big tool in a set, and the big tool is what makes the work move. If you buy a set, plan on adding a narrow one millimetre veiner for undercutting and a 35 degree V tool, and you will have covered its two real gaps. My longer reasoning sits in what tools a beginner should use.
Ashley Iles in Sheffield are among my favourite makers, with Auriou in France and Pfeil in Switzerland. Nobody pays me to say that. The thickness of the steel is what I like about the Sheffield tools, along with the way they build a fishtail.
Which size tool should you reach for?
The biggest one the job allows. Carving tools divide roughly into three bands: big at around 80mm, which is three and an eighth inches, medium at about 20mm or three quarters, and small at a quarter inch and under.
The commonest mistake I see, in beginners and in people who have carved for years, is grabbing the smallest tool and then zigging away at a big surface. Zig, and zig, and zig, for an hour, and the frustration builds until the work gets abandoned. Take the largest tool that fits, drop to a medium when the shape tightens, and save the small ones for detail. On a big panel I will knock the whole thing out with a three inch gouge in a day.
Eventually you stop reading the numbers altogether. I glance at a tool and know it is about an inch, and that is all I need to grab the right one.

Handle format matters too, and it decides whether you ever need a mallet. Palm tools are short and sit in your hand, and they shine when you want the blade controlled very close to the surface. Britain used to call them ladies tools, on the assumption that only women would want something small, which tells you more about the era than about the tool. Full size tools are long, pushed with both hands or struck.
And the mallet is not what you think. I left mine on the shelf for years, assuming a mallet was for force. It is for control. When you push a tool by hand you drive it with your whole body, and the momentum in that push is what carries an edge past where you meant to stop and into the detail you already cut. A mallet delivers a measured amount and no more. Three of mine get used: twelve ounce, thirty ounce, and a little brass one at half a pound.

What are the cuts every carving is built from?
Four cuts do the structural work: the stop cut, the push cut, the paring cut, and the V cut. Name them and your hand stops guessing.

The stop cut goes straight down on your pencil line. Nothing dramatic, but it severs the fibers so the next cut has something to break against, and without it your chip keeps travelling. Push the tool forward at a low angle and you lift a chip. Pull that same motion toward you with the blade almost flat and you get a shaving. The V cut sets two angled faces into a single line, and the shadow that falls into it is what makes a vein read as a vein.
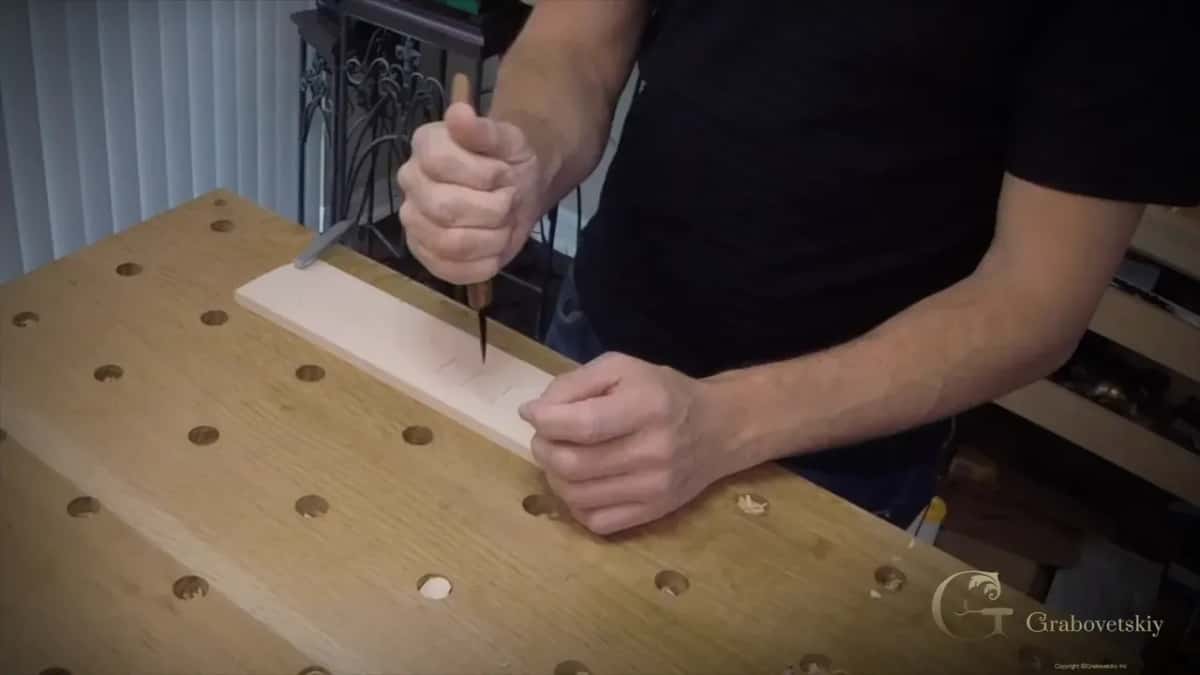
The order rarely changes. I outline first, then establish the main forms, then work details. Three stages. We call that middle one boasting, and it is where a piece stops looking like a drawing.

For eighteenth century chair work I am usually taking an eighth of an inch, sometimes three sixteenths, occasionally a quarter. Six millimetres is deep for ornament of that kind. Beginners routinely go twice as deep as the job wants and then wonder why a leaf reads as a lump.
How do you cut a groove that stays clean around a curve?
Make a stop cut first, take the waste toward it, then meet yourself at the turn. Four steps on a flat clamped board, and you will have learned more than a month of watching videos gives you.
Step 1. Draw the line and read it
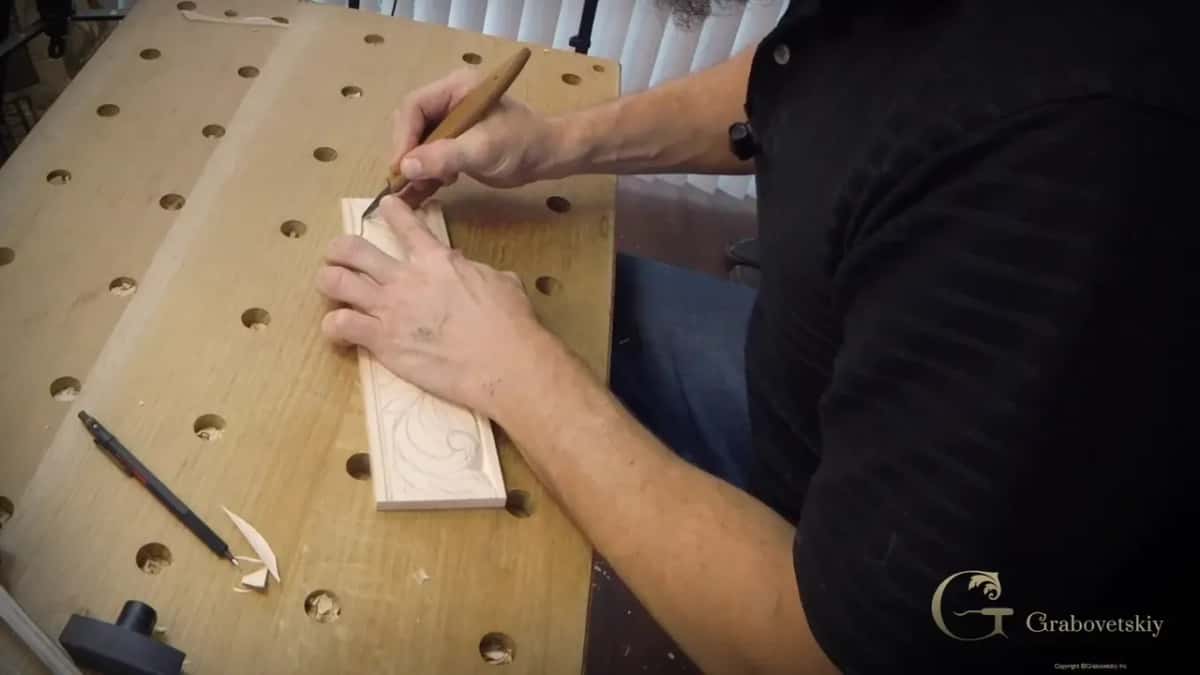
Pencil a shallow S curve across your basswood, about four inches long. Now find the grain. Take your knife and make a tiny test slice, a quarter inch, at the start of the curve. A clean hiss and a curled chip means downhill. Fuzz means turn around and work from the other end.

Step 2. Make the stop cut
Hold the knife straight up and press it into the pencil line, about an eighth of an inch deep, following the curve. Straight down, no angle. Skip this and your chip runs past where you wanted it to stop.

Step 3. Take the waste toward the stop cut
Hold the gouge at a low angle, maybe twenty degrees off the surface, and push toward the stop cut from the downhill side. Waste lifts and breaks off at the stop cut. Take a thin one. Two thin cuts beat one greedy cut every time.

Step 4. Turn around and meet yourself
Stop at the top of the S, right at the point the fibers flip. Lift out, reverse the board, cut the second half from the far end, downhill again. Your two grooves meet in the middle. Sight along it against the light. Clean walls mean you have the fundamental skill of the whole craft.

Do that groove twenty times on scrap before you touch anything you care about. It is boring. And it is why my students stop tearing their work in about a week.

What if a chip will not come out?
The chip is trapped because only one end of it is free, so cut a release at the other end. A short slice across the far end of the waste, and it drops out on its own.
Beginners lever it out with the tool instead. Do that and you snap the corner off a veiner, and a clean groove ends up with a bruised wall.
How sharp does a carving tool have to be?
Sharp enough to slice end grain in basswood under the weight of your hand alone. Lean on it and it is dull, and a dull edge crushes fiber ahead of itself instead of cutting. Crushed fiber is what fuzz is.
A new tool out of the box is not sharp. Only ground. There is a difference, and it disappoints a lot of people in their first hour. Some brands do arrive ready to cut, and that lasts a day or two. Every tool at every price needs you eventually, so the phrase sharpened and ready to use describes a shipping condition, not a feature.
Strop before you carve, and strop again every twenty minutes. Leather charged with honing compound, ten strokes on the bevel, two light ones inside the flute. Half a minute, and it keeps you away from the grinder entirely. Most of the sharpening people complain about is sharpening they would not need if they stropped.
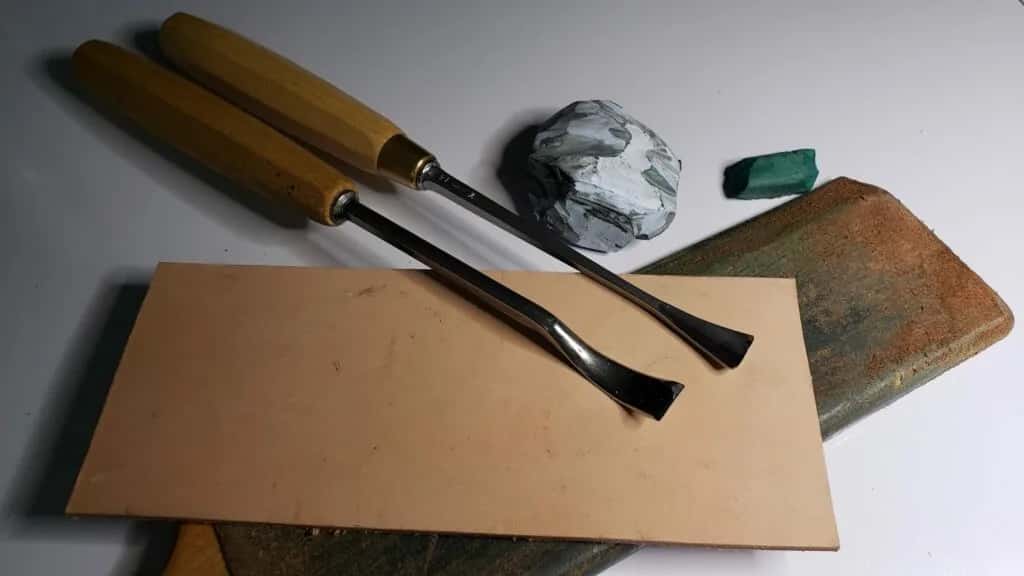
I learned stropping before I ever learned carving, watching my grandfather draw a straight razor down a leather strop. He gave me my first chisel when I was six.
Reshaping is a different job, and here I will tell you what I actually do. Reshaping a bevel by hand takes about two hours. On my machine it takes two minutes, and with five hundred of them on the wall I would never carve again if I did it by hand. So I use a Work Sharp with Tormek jigs, slow enough not to blue the steel and flat enough to trust. The maker discontinued that model, so I say this knowing it is awkward advice to act on. Used ones turn up.

Sharpening is one of the main things you have to learn, and it takes longest of anything in this craft. My full sequence, with the angles I use on a gouge and on a V tool, is in how do I sharpen my carving tools.
So should you always carve with the grain?
No, and here I part company with almost every beginner guide, including the earlier part of this one. With genuinely sharp steel you can cut against the grain, with it, across it, in any direction you like, and the surface still comes off clean.
I mean that literally. Carve in the Gibbons style and the rule about following the fibers stops meaning anything, because the design attacks from every angle and you must follow it. On a crotch board where fibers run four ways at once, a sharp tool does not care. What I avoid is not difficult grain. I avoid grain that fights the drawing, where I intend one thing and the board insists on another, and that is why I hunt for clean stock.
Then why did I spend a whole section teaching direction? Your tool is not that sharp yet. Direction is the fix that works while you are learning, and it will carry you a year or two. Sharpness deletes the problem rather than steering around it. Sharp tools, and you break the rules.
Most people never get there, because stropping feels like the chore you do before the real work starts.
David Esterly spent a year replacing a Gibbons carving lost to fire at Hampton Court, and he wrote the best book there is about this work. One line of his I go back to more than any other:
A hundred chisels like a hundred different thoughts, a hundred ideas to propose to the wood.
Why should your first project not be a spoon?
A spoon is a poor first project, and it is the one most often recommended. I know that contradicts what you have read everywhere.
Spoons are carved in the round, so grain direction changes on every surface, and you hold the work in your hand while it does. You are learning grain reading, tool control and one-handed safety at once, with nothing clamped and nothing measurable. When it goes wrong you cannot tell which of the three failed.
The bowl is worse. Inside a concave surface fiber rises toward you from every direction simultaneously. An advanced problem, sold as a beginner project because spoons are small and cheap.
Flat work fixes all of it. Clamp a board and both hands go on the tool. Grain runs one way across the whole face, so you can see it and predict it. Depth is measurable, so a rule laid across tells you whether you took an eighth or a quarter, which is the difference between a leaf that reads and one that looks pressed on. And when a cut fails you know why, because only one variable moved.
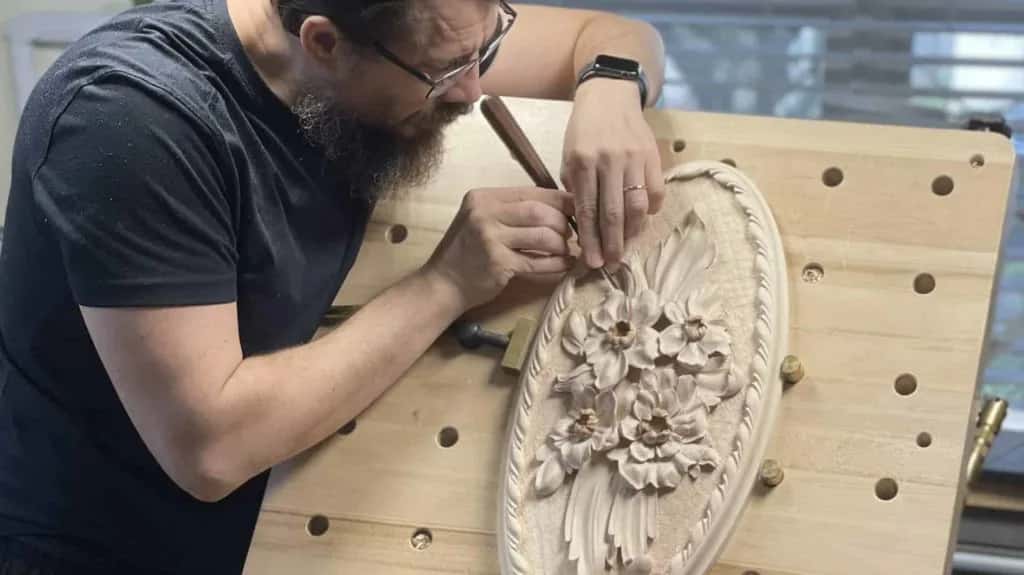
What should you carve first?
Carve a single leaf in shallow relief, on a flat basswood board about three inches long. One element, one plane, and four cuts you have already practiced twenty times.
You get a stop cut around the outline. A background lowered with the gouge. A centre vein. And a rolled edge on one side where the leaf turns over. That last cut is the first thing in the whole craft that looks like real carving, and it lands in your first week.


Then repeat it. Same leaf, six times. Your sixth will not resemble your first, and that comparison is what keeps people carving.
This technique is also the oldest thing here. Go north in Europe, to Norway, Sweden, north Russia, north Germany, and you will find carvings from the ninth century made exactly this way.


Want the leaf taught properly, with depths called out and mistakes named before you make them? My first cuts course for beginners is built around exactly that leaf.
What finish goes on a first carving?
Leave the tool marks and skip the sandpaper. A surface cut clean off the gouge reflects light in facets. Sand it and you get a soft even blur, and any carver can tell across a room which one happened.
No sanding here, and no scraping either. Partly because those facets are what make a piece look carved rather than moulded, and partly for a reason nobody warns beginners about: abrasive grit lodges in the fibers, and the next tool through that surface comes out dull.
If you want to smooth something anyway, use a mesh abrasive rather than paper, because mesh does not clog and does not pack grit into the grain. Abranet by Mirka is what I keep.

Then oil it. Oil sinks in, darkens the wood a little, and throws every shadow you cut into relief. Right there the work stops looking pale and starts looking three hundred years old.

How long before you are any good?
Give it a week for clean cuts, a few months for a piece you would hang up, and years for the deep work. I will not pretend otherwise, because the people who quit are usually those who were promised faster.
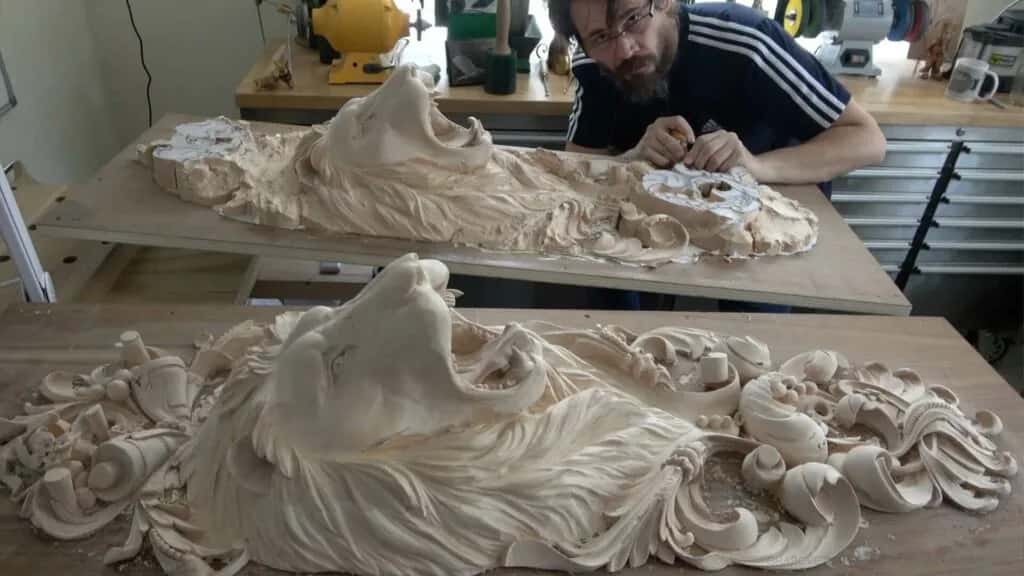
But that first week is genuinely fast. Clean grooves and a leaf that reads as a leaf, that is days rather than months, once you stop cutting uphill.
Forty years and more I have been carving, teaching for a good part of that, at my own school and at the Marc Adams School of Woodworking, where my classes run five days. Carving with a Classical Flair, and Carving in the Style of Grinling Gibbons, are two I have run there more than once. A plaque on my wall reads International Woodcarver of the Year. It did not come from talent. Cutting the same leaf a few hundred times is where it came from.

A man who keeps coming back teaches design at the University of Cincinnati. He does an impression of my accent for the room and tells everyone I said curve wood when I meant carve wood. He has kept that up for years and it still gets a laugh.
Another of my students is Roy, older than me, a professional carver who spent his working life on faces and now wants flowers. He came to Marc Adams and told me he had to take the class again before he died, because he wanted to learn something new. I have students past eighty who still turn up. Watching them is most of why I still keep teaching at all.

Have you got a board and something sharp? Do you know which way the fibers lie on it? Are you willing to cut one groove twenty times before you cut anything that matters? Then you already have what the first week asks for, and most people who own carving tools never get that far.
Frequently asked questions
How many carving tools does a beginner really need?
A single knife, mastered, before any gouge comes near you. Then one number seven at roughly 14mm. Owning little is no virtue in itself, and a larger kit genuinely widens what you can attempt, but the price of a small kit is hours, not poor results. Thomas Wallis kept 228 tools and used 55. My bench holds three today.
What is the difference between carving in your hands and carving at the bench?
Workholding, mostly. Cutting a small figure freehand means the piece turns as you work, so fiber direction shifts constantly and one hand stays busy gripping. Bench work pins the material down, frees both hands for the tool, and lets you measure your depth. Architectural and furniture ornament has always been bench work.
Which wood should I buy for my first carving?
Ask for basswood in North America or limewood in Britain and Europe. Both are Tilia, around 410 lbf on the Janka scale, with tightly packed fibers that shear rather than crumble. Butternut suits a second project. Leave oak, maple, and any board carrying knots or figure until your edge control is dependable.
Can I learn wood carving online, or do I need in-person classes?
Both work, and they teach different halves. Filmed lessons let you replay one cut until your hand copies it, and repetition is most of how this skill arrives. What a recording cannot do is notice you. Someone standing at your shoulder sees the grip and the bevel angle and says so in seconds. I teach both ways.
Why does my carving look fuzzy instead of smooth?
Two separate faults give identical fuzz, so diagnose before fixing. Test the steel first by shaving end grain using only the mass of your hand, and hone it if it drags rather than shaves. If the edge passes that test, you were travelling against the lie of the fibers, so come at the shape from the opposite end of the curve.