
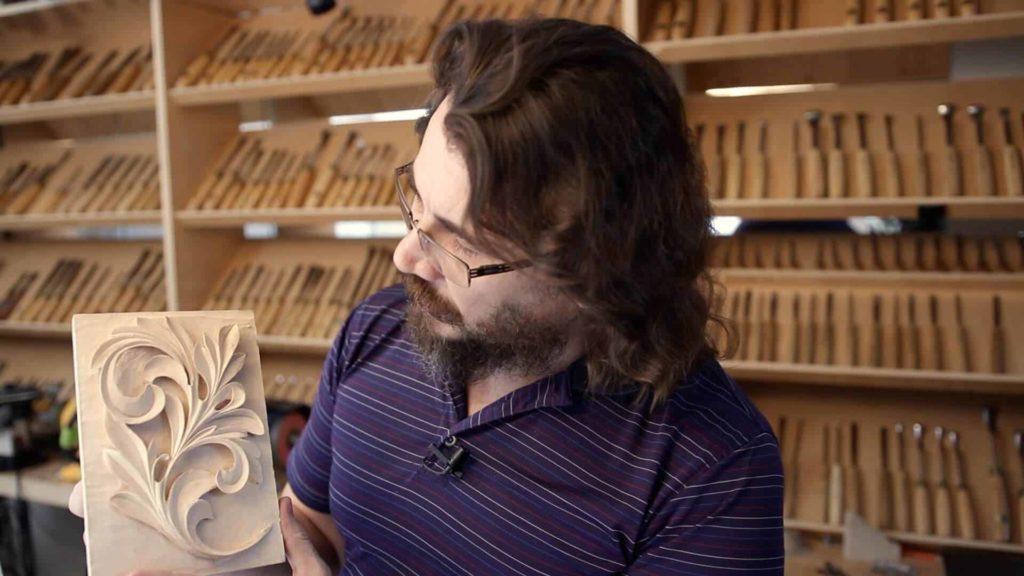
Alexander Grabovetskiy, woodcarver, School of Woodcarving · Published 2021
What makes a carved Byzantine acanthus leaf look right?
Quick answer: A finished Byzantine acanthus is right when every ridge climbs uphill from its eye and never falls back. Glued layers vanish into one solid piece, edges look paper thin over thick wood, and turned sideways the leaf makes one smooth arc downhill, with no straight line and no stripes.
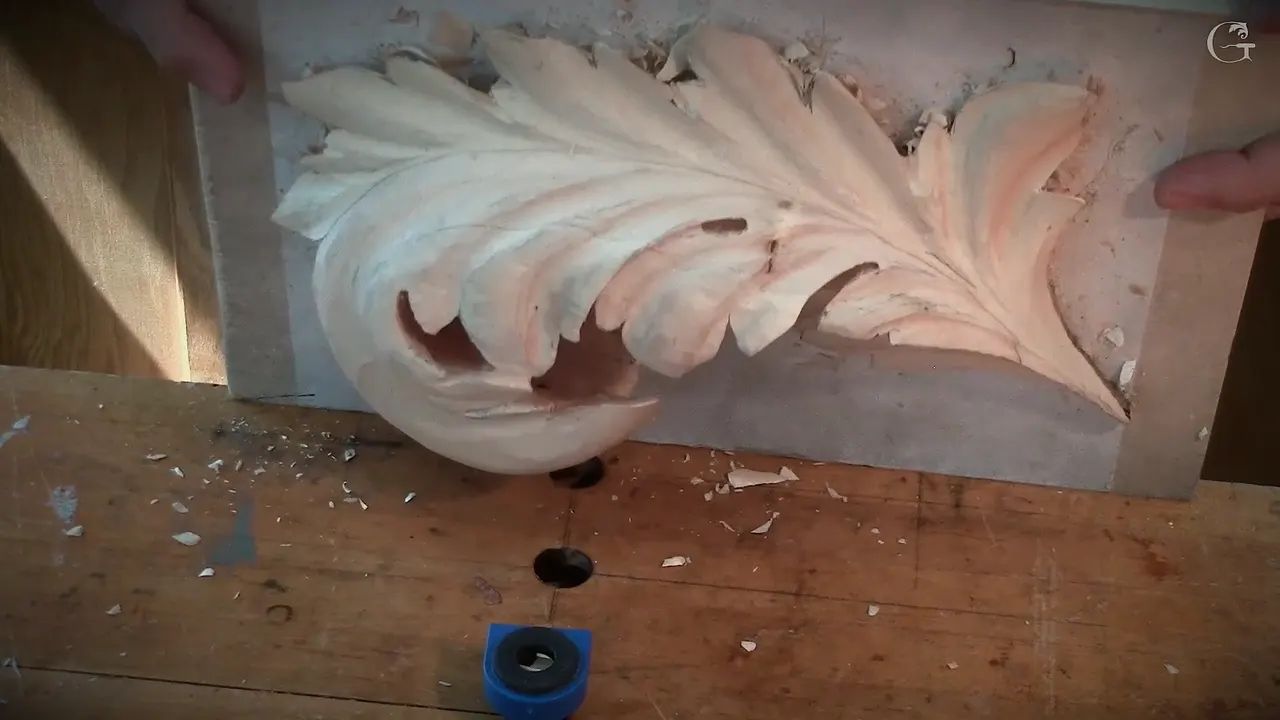
A Byzantine acanthus that looks right is a leaf whose convex climbs. From every eye the ridge goes uphill and never falls back. The layers read as one piece of wood, and the edges seem paper thin while the leaf stays thick and solid behind them.
You carved for a week. Now you stand over the panel, something looks off, and you can't name it. Byzantine wood carving on this panel means a leaf built up in layers that rolls up off the board and turns back, so there is a lot to look at. Acanthus leaf carving of any kind ends with that look. Here you get the checks I gave my class in Maine, each one with the lesson where it came up, so you can watch me do it on my own acanthus.
Have you ever finished a carving and felt something was wrong before you knew what it was? Would you like to know where to look first? Start with the eyes, and go around the leaf one check at a time.
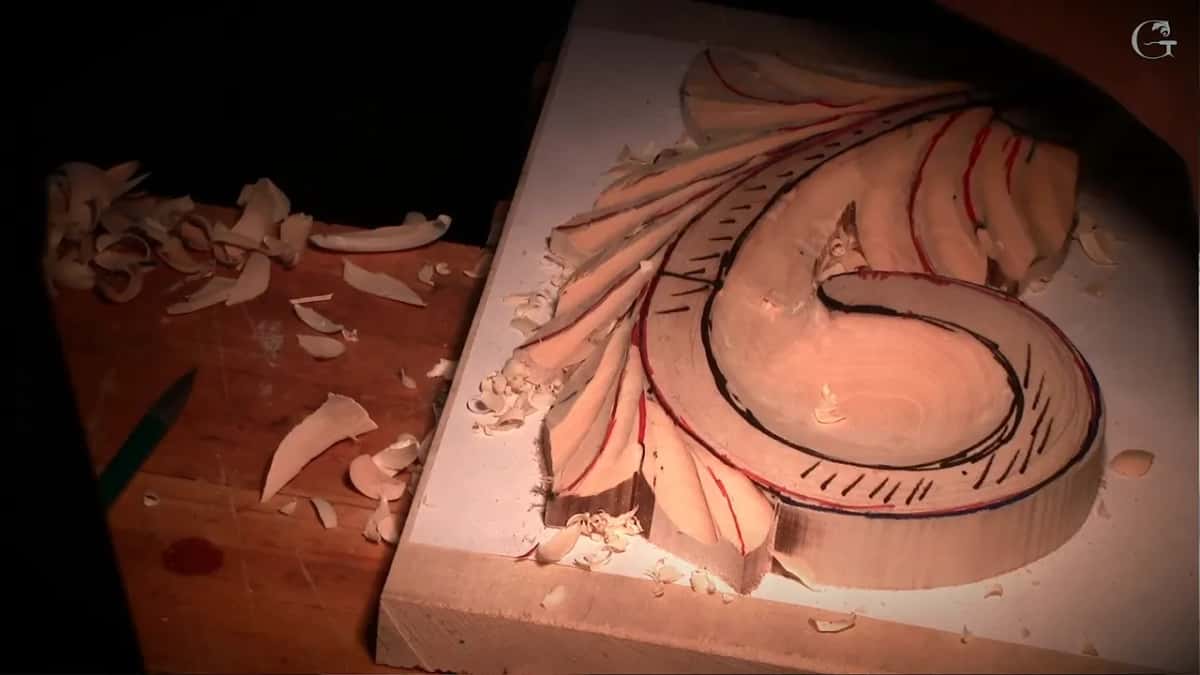
What the finished Byzantine leaf has to show
Every convex climbs out of its eye and never falls backward.
Seen side on, the leaf makes one smooth arc, and nothing in it is flat or stiff.
Glue lines between the layers are gone.
Where two parts meet, the big one rides on top of the small one, even when your eye argues.
An edge can look like paper, but the wood behind it is thick.
Channels stay shallow. I teach this leaf for gold, the way I told the class it was done.
Add a detail in one place and you add it everywhere, and most facets come off.
Does the convex climb out of every eye?
It has to. During lesson 3 I asked the whole class to come and stand around me for this one, because I wanted all of you to see what I was after. My eye was carved and my concave was blended in, and it was still no bueno. I said I would like to see the convex going uphill but not going backward, and to get that I carved the concave beside it much deeper, same tool, keeping some space and staying inside the black line. Then it looks like a more organic movement.
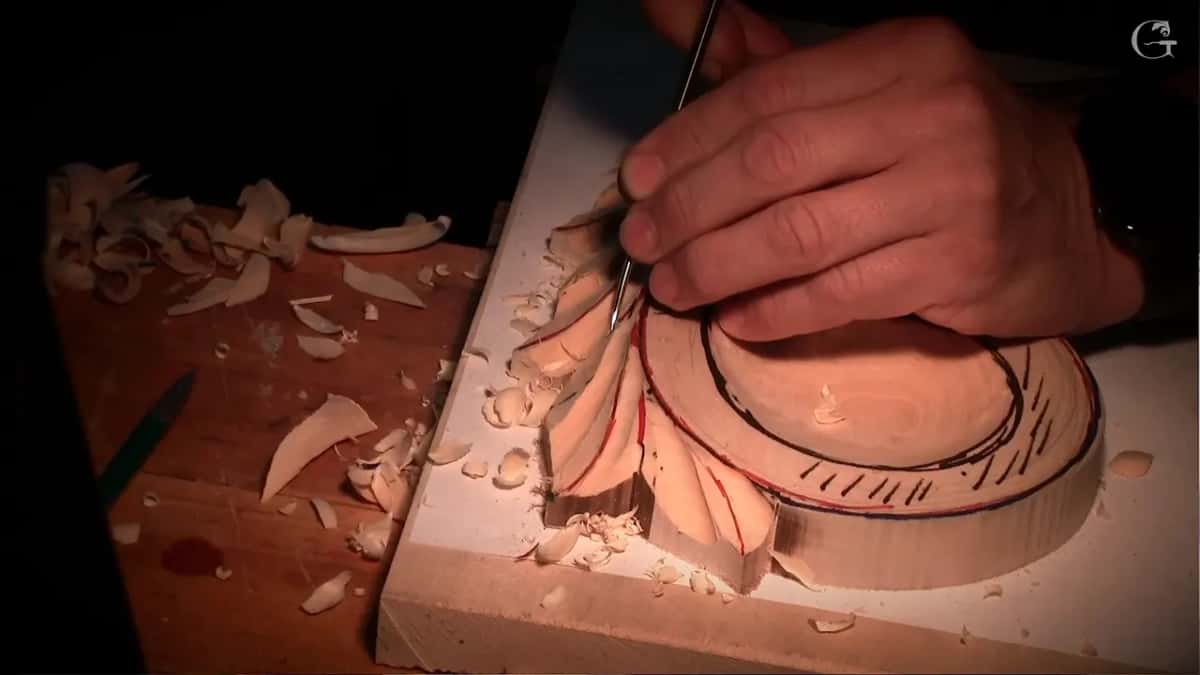
Out of that one eye, the whole area turns into a pipe running all the way from one end to the other, raised and exaggerated. Pipes are really important in the Byzantine style, I said in lesson 4, and I said it twice. It is okay to dig a little deeper on the left side, I said, as long as you see a really pronounced pipe. A bit later I said even some damage is okay, because we are after a really good shadow effect.
Earlier in that lesson, with one pronounced pipe raised up, I turned the light off. With the light gone, you can see in the shadows that it is a true convex. Do you see it, I asked. Some of the room did.
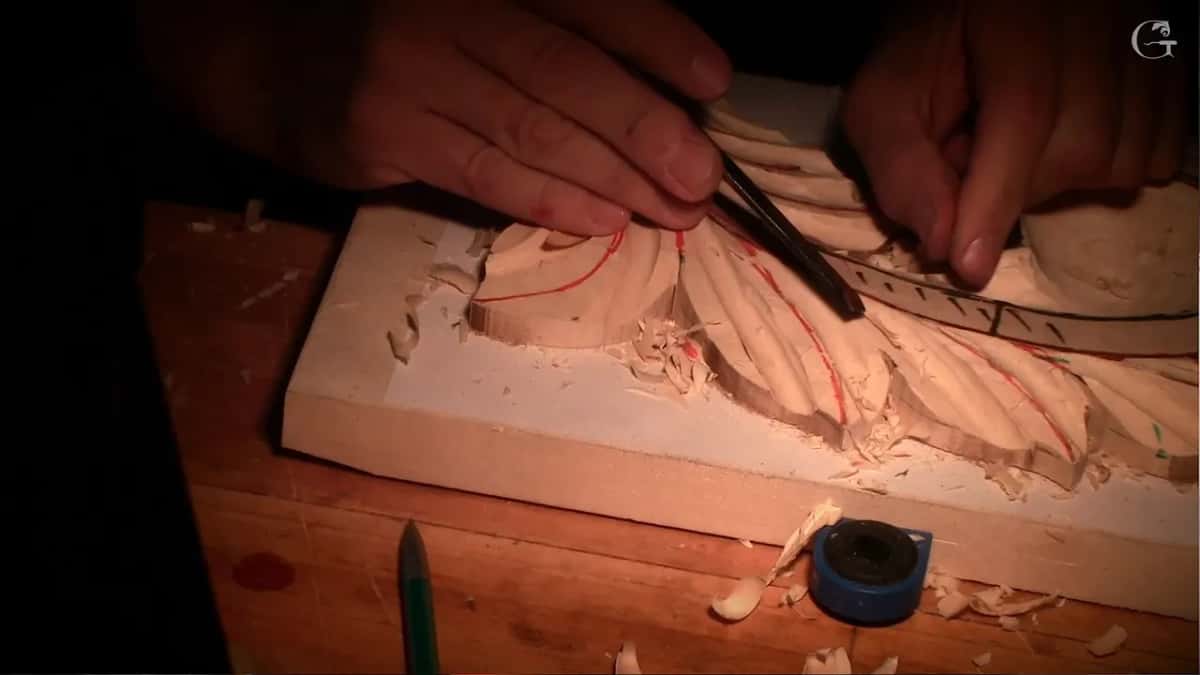
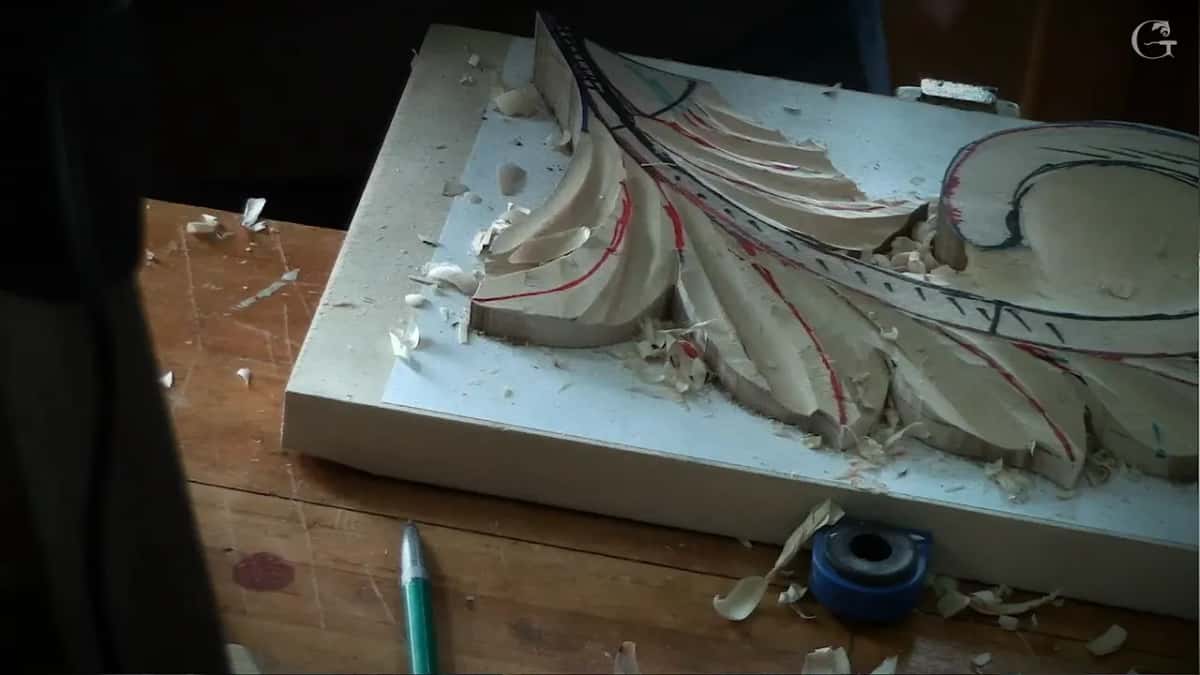
What does the leaf show you when you turn it?
A full 3D arc. Back in lesson 1, while we drew the design, I showed the swirl on this design going up, up, up and then backward, and I called it full 3D. By lesson 6 I said it was supposed to be 3D right now. Look at the side, I said. Don't make a stupid movement there, because you want a really nice transition downhill, a beautiful arc, and no straight lines. I reminded them of the arabesque idea, where nothing runs straight.
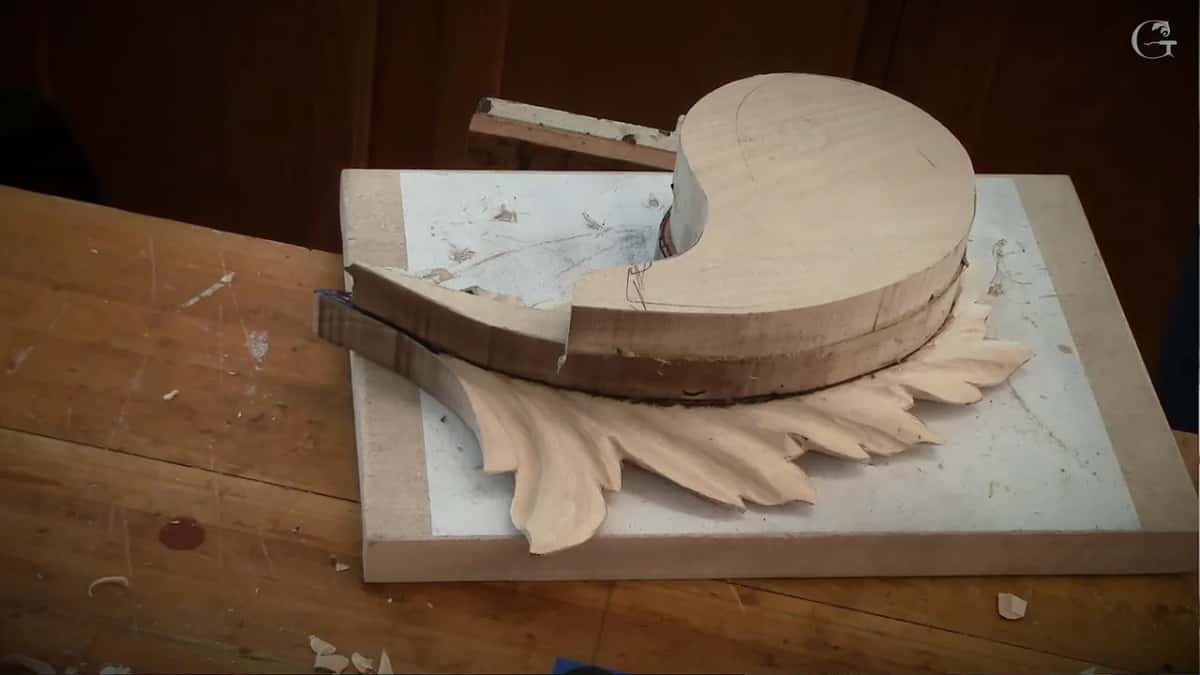
Lesson 7 brought it up again. Make sure you create that arc and make sure it flows, or it will look stupid as a straight line. Later in the same lesson I looked at mine and did not see a 3D movement yet, so I blended it better. Now it was much better. I am always checking from different points of view.
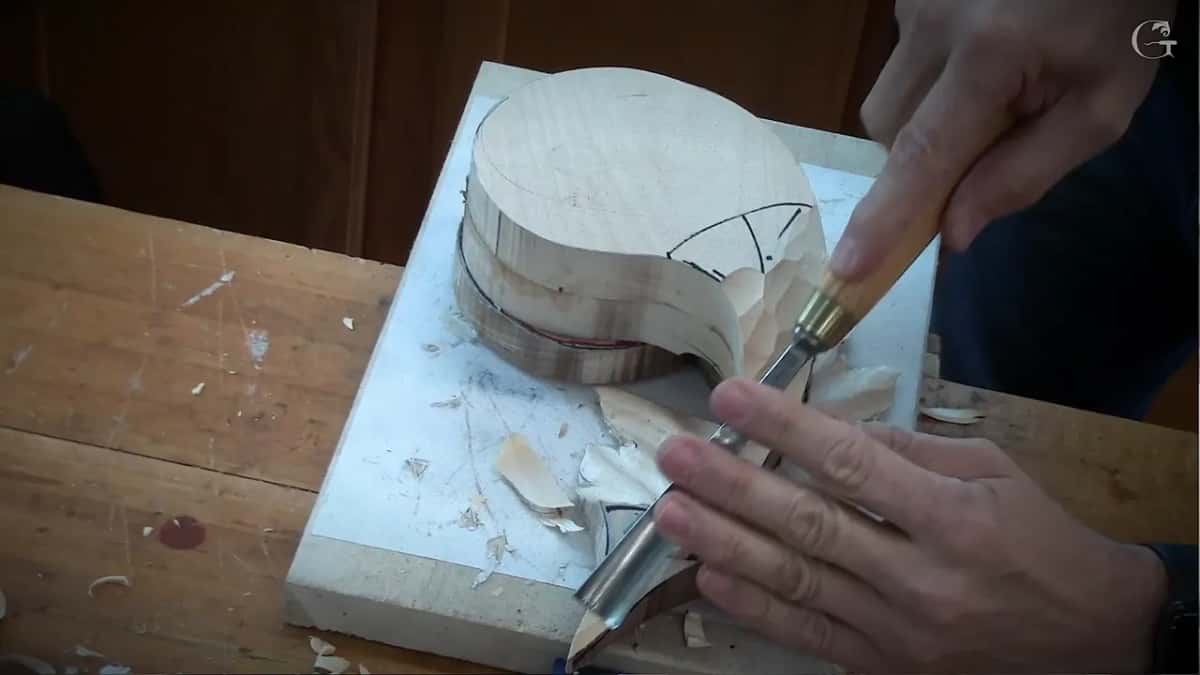
The side shows you proportion too. My middle line in lesson 8 split one leaf about 60 and 40. Looking at it straight on, you don't know that. Look from the side, and then it makes sense.
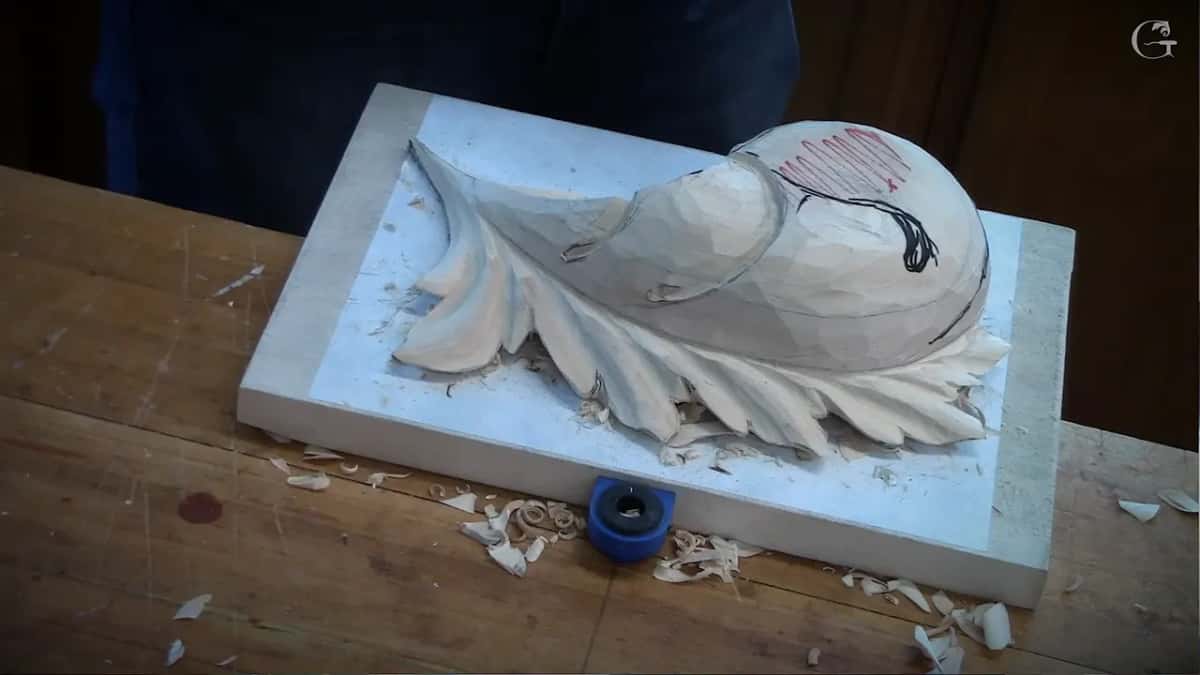
Can anyone find the glue line?
Nobody should. Before the second piece went on in lesson 1, I told everyone that people would not even know how in the world you did it, because it will look solid, like it was done from one piece. The finished panel has to pass that test.
On my panel in lesson 7 I even moved the glue line. While blending, it shifted to the side by about a sixteenth of an inch, near 1.6 mm. I pointed at it for the camera. Blended like that, you don't even see it, and it reads as a solid piece. One part stayed untouched in that lesson for the same reason. We want to make sure it looks like it's the same piece.
Clean up your marker. In lesson 6 I showed the class what happens if you don't, with marker left in my joint. Where there was no marker, it blended really nicely. You don't even see the seam.
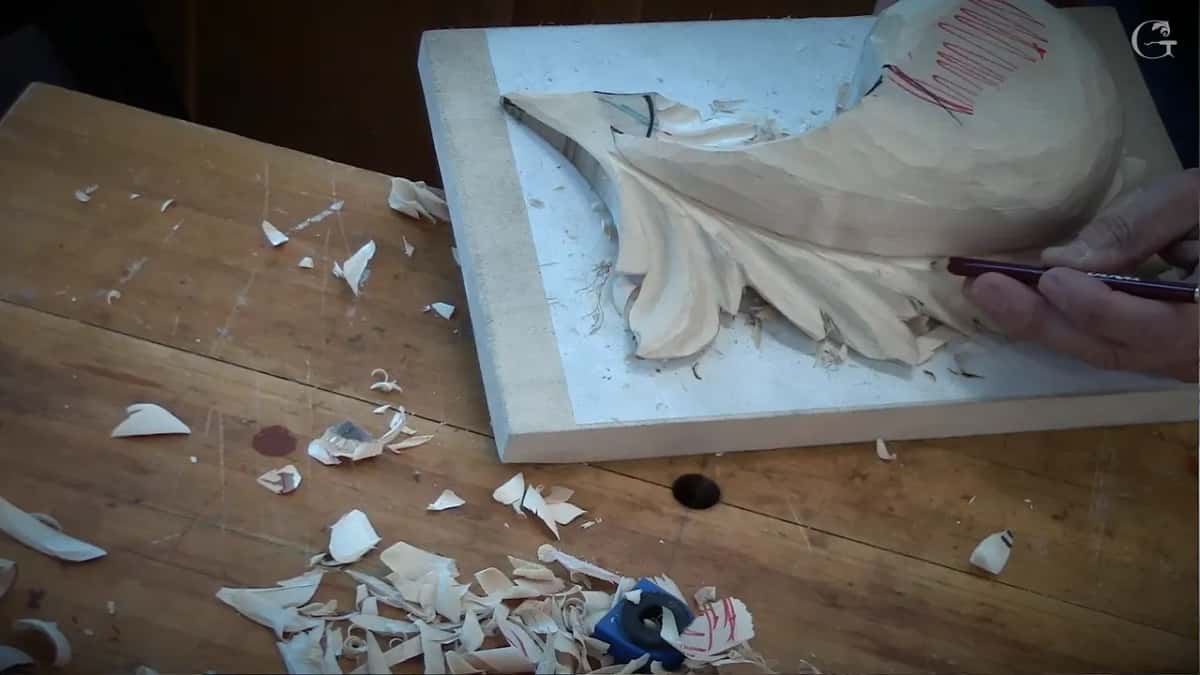
Which leaf goes over which?
The bigger part goes over the smaller one. Pay attention, I told the room in lesson 10. One leaf looked higher than the part beside it, and it felt almost like the higher one had to lie on top. But it's wrong. Everything follows the flow, so the bigger part still overlaps the smaller part, and I carved it that way with the number 11 at 3 mm, about 1/8 inch.
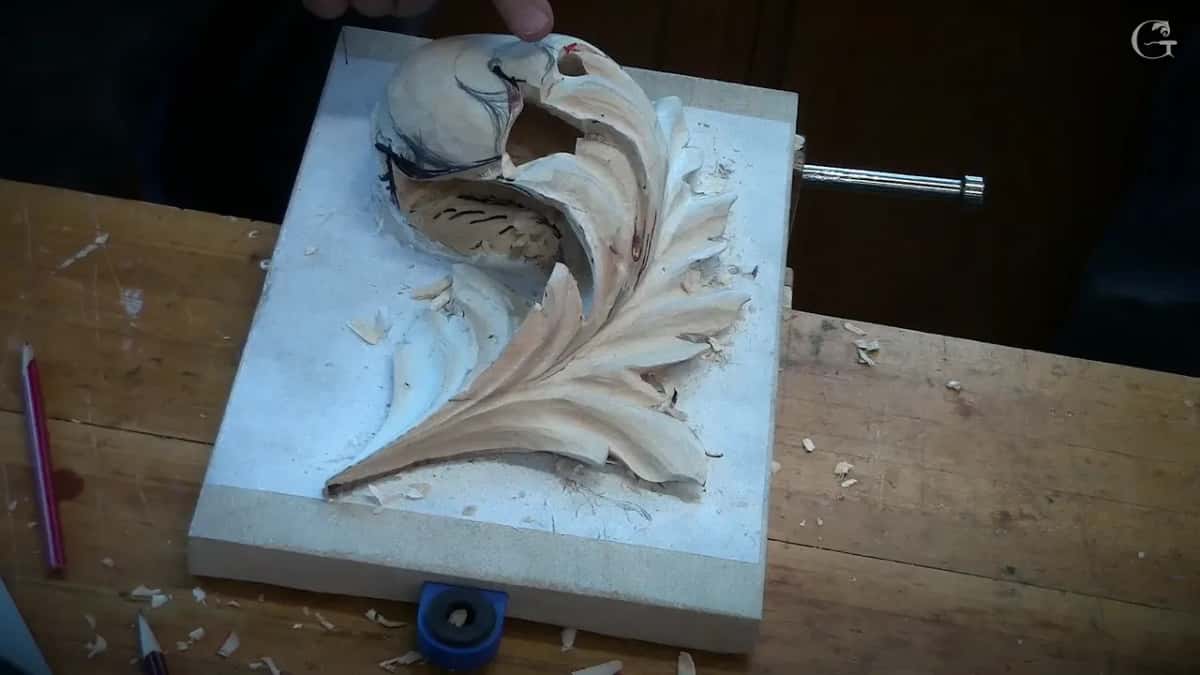
Then each overlap gets cleaned deeper with the 1 mm number 11, near 1/32 inch, flute turned to 3 o'clock. Underneath, the wood stays connected at the bottom, but it still looks like it's separated. Look for exactly that effect. Every time you see an overlapping leaf, clean it a little deeper, and on the first layer too.
Is the edge paper thin and still solid?
It should look that way, and it should be both. Keep an eye on how far you carve, I told them in lesson 5, and really get to the edge if you want it to look light and almost airy. It's thick, I said, but people will think it's paper thin.
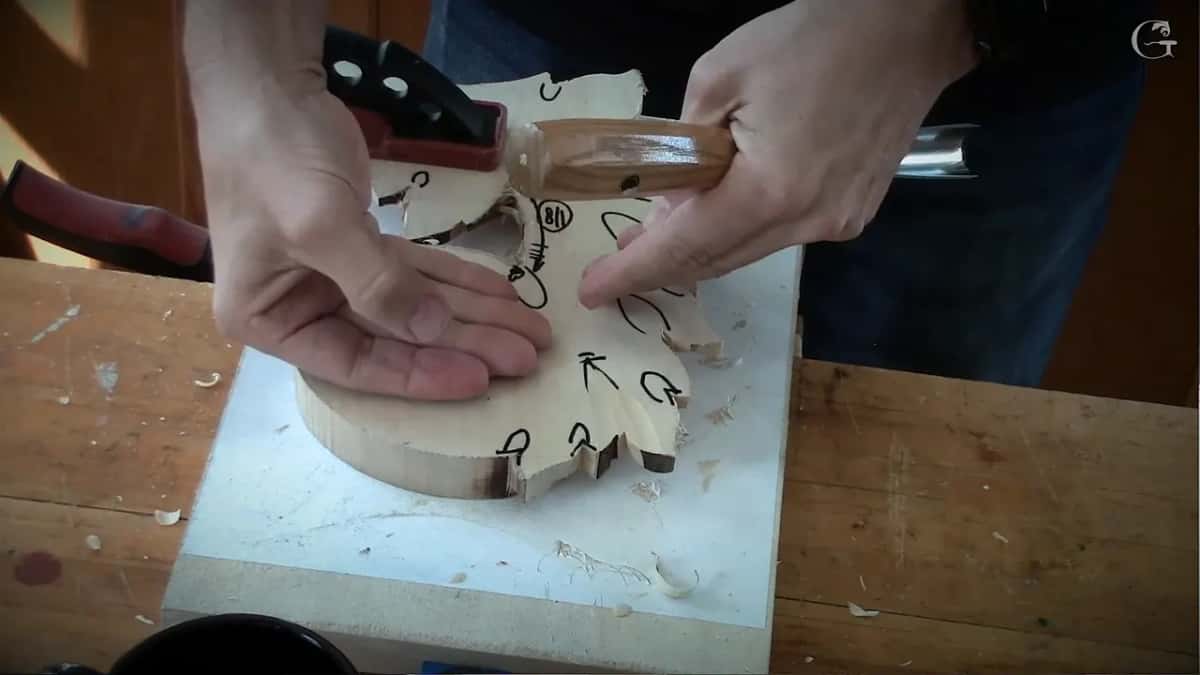
Lesson 10 is where I took a flatter tool, a number 2, and brought every edge out, or as close to the edge as you can. A number 12 knife makes that a lot easier if you have one. It's going to look really light, I said. It looks paper thin, but it's solid. Then no sharp corners. All movements flowing, and clean, clean, clean.
Back in lesson 2 we left room for undercutting, so the shadows would go even deeper later. The hole through a leaf is optional. In lesson 9 I said you don't need to do it, and it still looks good without it, but with the hole it looks even better. Another spot did not go all the way through. It looks like a hole, but it's not.
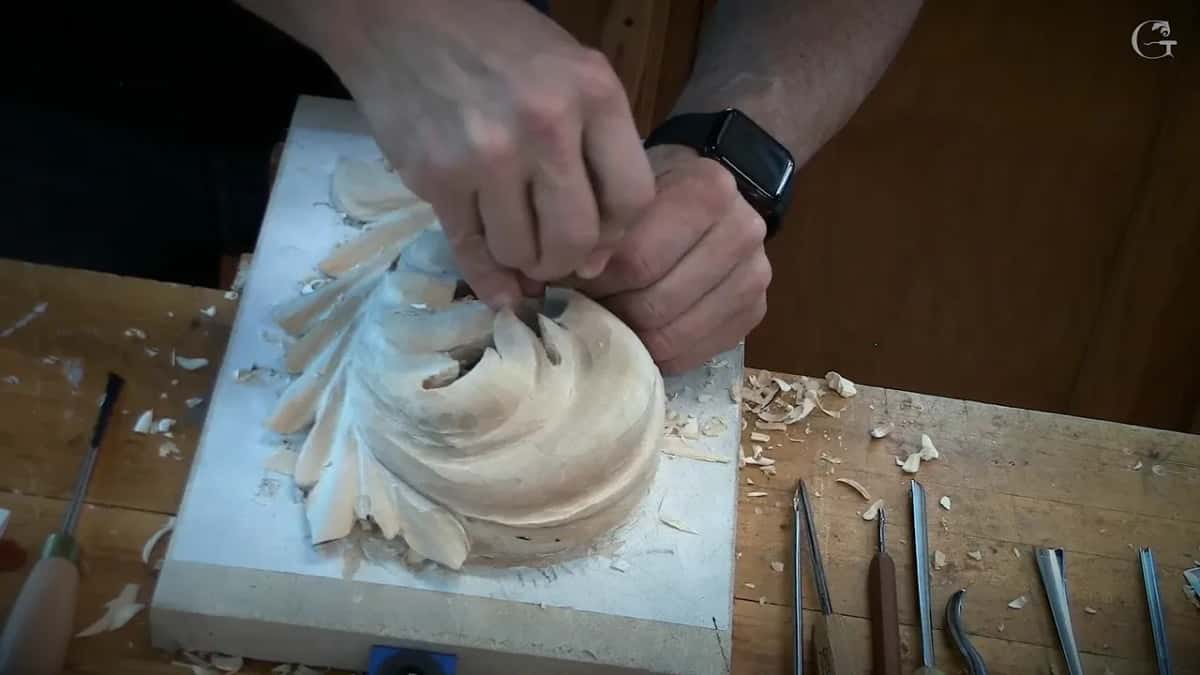
Be careful at this stage. Don't put your hand on it. The more you take off, the more fragile it gets, and if you overdo it, you will break it.
Why is a Byzantine leaf never stripey?
Gold. Lesson 5 is where I told the class that a Byzantine acanthus was never left as bare wood, or stained, or shellacked. It was always gold leaf, I said, and those cavities and channels made a big problem for the gold back then, because the leaf was thicker than it is today. Before Italian gesso, they used red clay as the first coat, and red clay is really thick. So they carved it without too many details, but with a really beautiful shape.
That is how I told the story of the gilding, and it is how I teach this leaf. Some versions you will see carry many stripes down the sides. The Byzantine didn't do that, I said.
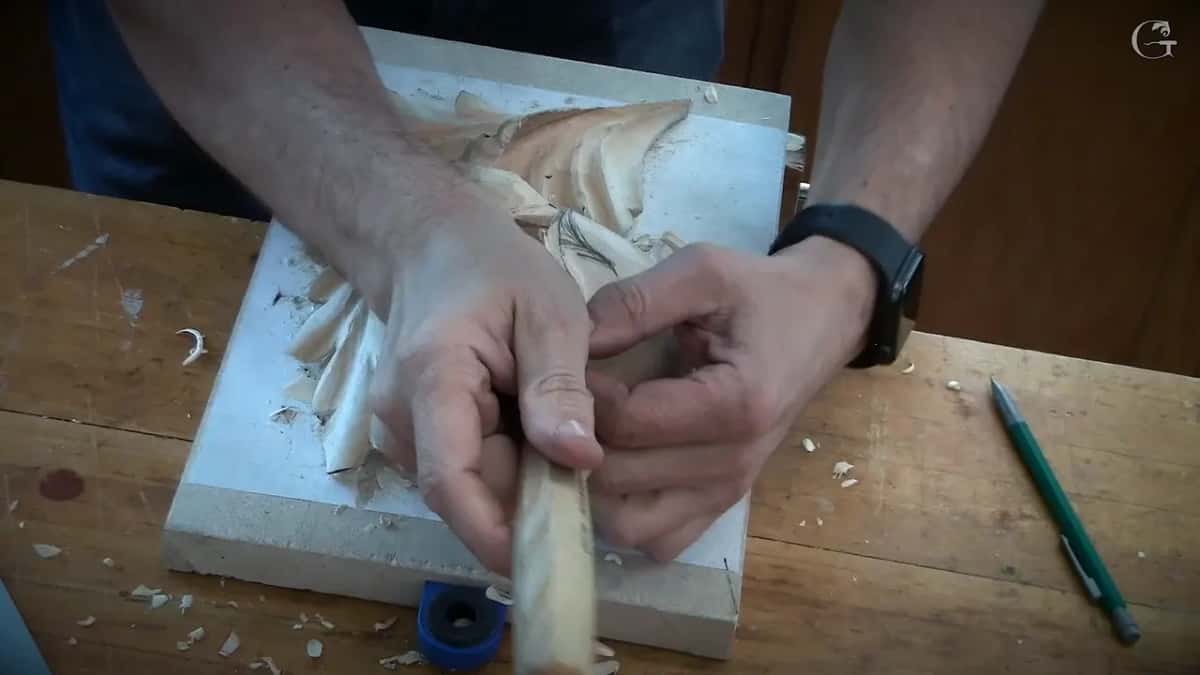
So the last details stay light. On the big head in lesson 10 I added extra concaves, but only as an indication of the movement, nothing deep. We don't want to lose the overall shape, I said, or it gets too stripey, and I don't like too stripey. Every concave makes a big difference, so don't carve them too deep.
If you add a detail once, where else does it go?
Everywhere. At the very end of lesson 10, after the background was done, I showed Bill one more thing. I added extra micro separations at the end of one leaf. There is no end to what you can do, I said, but since I did that, now I have to do it everywhere. So I started adding them here and there, carefully, because now it gets more fragile.
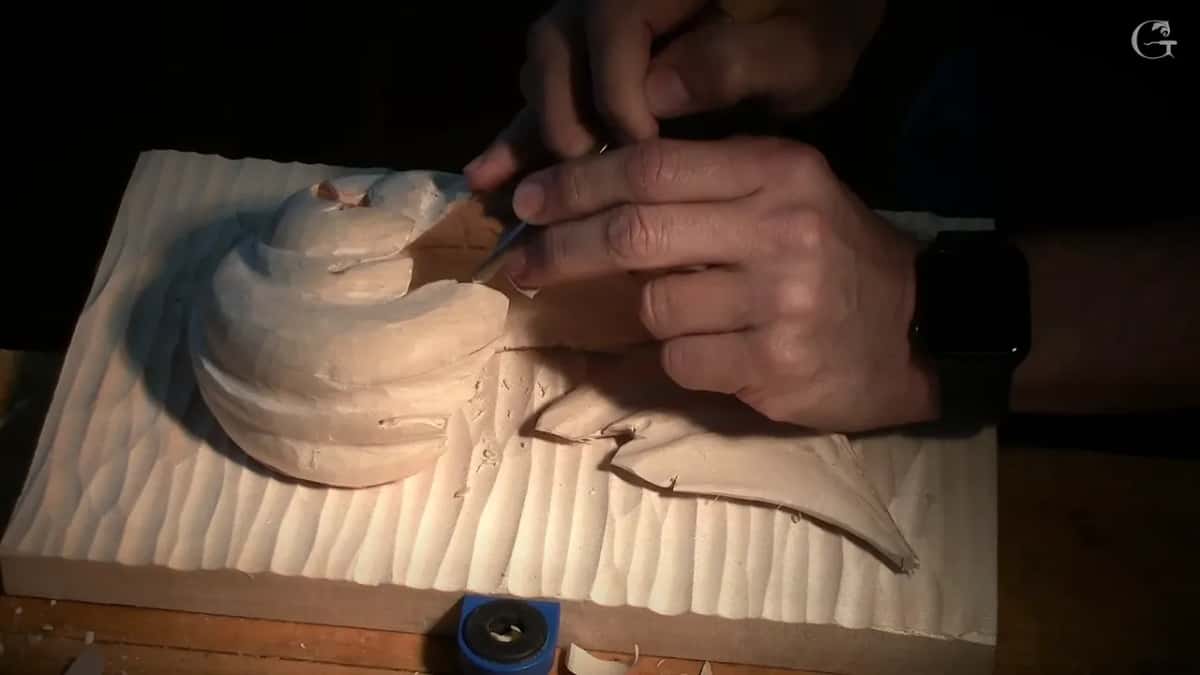
Those extra details add curliness. I asked the room if I could even say that word. It gives the leaf one more layer of detail, and now that I had done it once, I was going to add it everywhere.
The same rule shows up much earlier. Working concave, convex, concave down one section in lesson 4, I said it would be exactly the same everywhere.
How do the lights and your hand check the surface?
Lights on show the facets. In the last part of lesson 10, someone in the room said that with the lights you can see the facets, and you can. I pointed at one section. Really strong facets. I took a flatter gouge and attacked them at an angle, almost like shaving, until they disappeared. Once I caught the grain. No bueno.
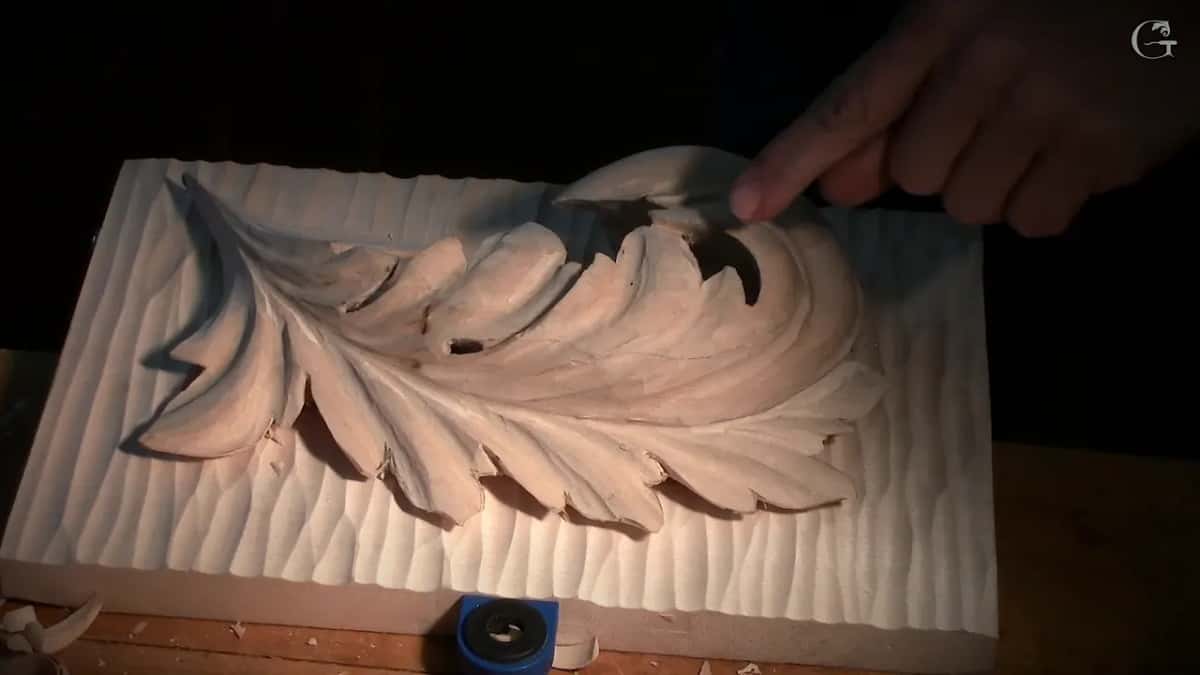
You don't have to take every facet. My words in lesson 4 were to try their best to eliminate most of them, not all, and that if they could not, it's okay. I still love a finish right off the chisel, with no sandpaper.
Your hand finds more than your eye. People who came to churches love to touch the carving, I told the room during lesson 5. Which is okay, we made it that way. We feel much better than we see. The human hand can detect one thousandth of an inch, about 0.025 mm, and the eye cannot. On furniture, you feel it. You feel where the high spot is. Scientists have tested how fine a ridge a fingertip can feel. Your sense of touch counts here.
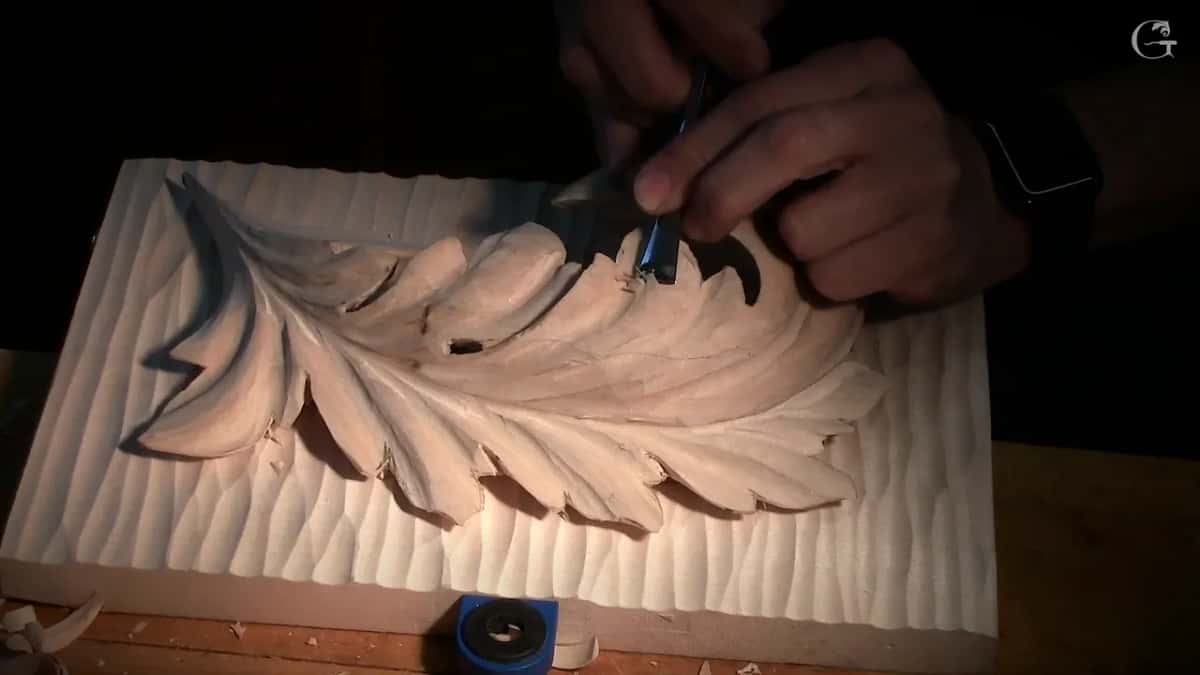
What do you do with a spot you don't like?
Carve it away and keep going. Late in lesson 9 I found a spot on my own leaf that I did not like, and said that is what you get if you watch online. I change it if I don't like something. It was a little thing that just didn't look really nice, so I took it out and opened up the whole area. Would it still be organic? Much more organic, I said, because one separation was still there and it was still in Fibonacci.

I was okay with the rest of it. But who knows, I said, maybe by the end of the day we would change something else.
Earlier ones happened too. The arch on one leaf in lesson 7 was not really nice and I didn't like the movement, so I went back in with the same tool. One line in lesson 4 was a little too straight, and I said I needed to move my concave a little to the left to get it flowing.
What each check looks like in acanthus leaf carving
Check to make | What you should see on the leaf | Byzantine reason |
|---|---|---|
Follow each convex | Climbs uphill from the eye, never backward | Exaggerated pipes |
Turn it sideways | One beautiful arc downhill, no straight lines | Full 3D |
Hunt the seam | The layers look like one solid piece | Layered height |
Check each overlap | Bigger part lies over the smaller part | Flow first |
Feel the edges | Paper thin to look at, yet solid | Airy look |
Count the channels | Shallow indications only, so nothing looks stripey | Gold leaf |
Match every detail | One extra separation means the same everywhere | More curliness |
How finished does it have to be?
Finished enough that the shape reads. In the last lesson I said I was not going to do the details yet. I would probably work on it a little later. But that is how it's supposed to look, I told them, and I said it twice.
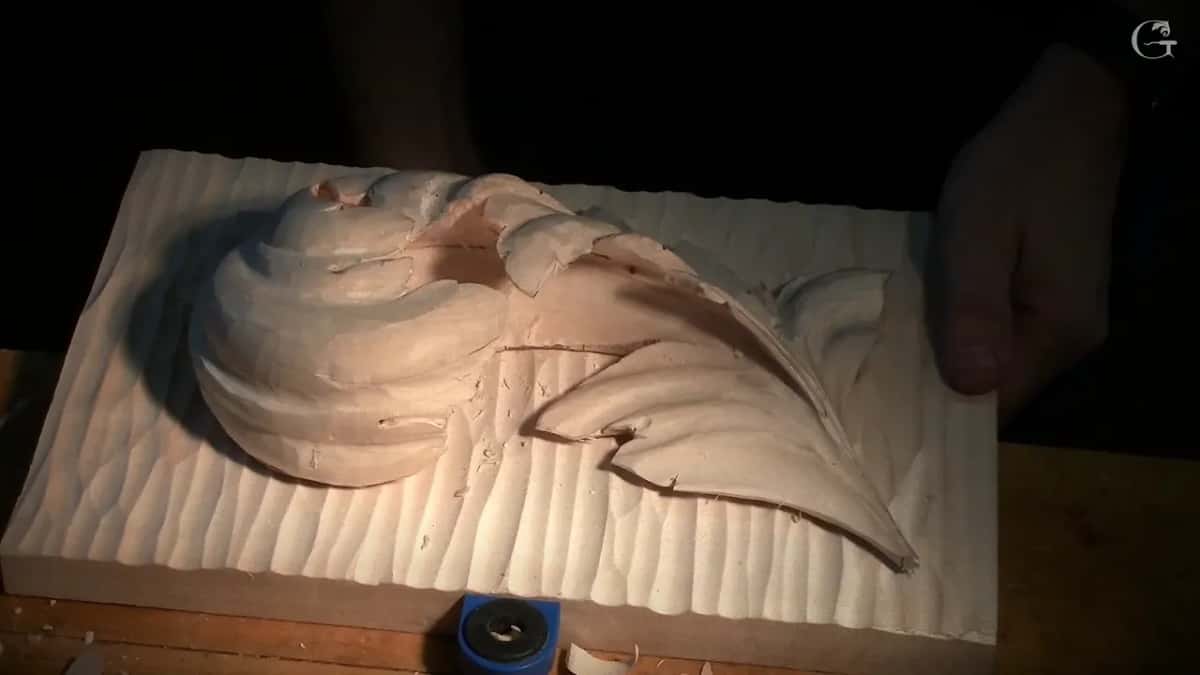
Then the background, so it would look good on a wall somewhere. Otherwise, I said, it's going to end up in a garage. My piece was almost 100% done, and I could have spent a lot longer cleaning and cleaning. When you upload your one photo for the final assessment, I look at it and certify you based on your progress.
Would you like your leaf to climb off the board instead of lying flat on it? All ten lessons are in Carving Byzantine Acanthus, with every check above in them, and your School Access opens every one of them.
How it's done
- Look at it side on. When you look at the side, the leaf should make a nice transition downhill in one beautiful arc, never a straight line.
- Trace each ridge up from its eye. The convex goes uphill and not backward. Where it falls back, carve the concave next to it deeper.
- Search for the seam. Blend until the glue line is gone and the stack looks like it was done from one piece of wood.
- Clean every overlap. Where one leaf goes over another, clean underneath a little deeper using the 1 mm (1/32 inch) number 11.
- Bring the edges out. Work out to the edge with a flatter tool until it looks paper thin. Keep your hand off it now, because it is fragile.
- Take off most facets. Not all. Shave the big ones with a flat gouge held at an angle.
Frequently asked questions
Why does my carved convex look like it falls backward?
On my own leaf in lesson 3 the fix was the hollow beside it. I took the same tool and carved that concave much deeper, keeping some space and staying inside my line, and then the ridge went uphill. After that the movement looked more organic.
Do I have to remove every facet?
Most, not all. My class heard me say to try their best on the facets, and that it was okay if some stayed. A flatter gouge, tilted, shaves the big ones off, but I still love a surface straight from the chisel.
Can your hand feel what your eye misses?
Much better than the eye can see, I said in class. The human hand can detect one thousandth of an inch, about 0.025 mm, and the eye cannot. People who came to churches loved to touch the carving, and on furniture you feel for the high spot.
What to carve next