
Alexander Grabovetskiy, woodcarver, School of Woodcarving · Published 2017
How do you carve a flower rosette in wood?
Quick answer: Flower rosettes are carved in low relief from a basswood block two and a half inches square by three eighths thick, 64 mm by 10 mm. You scribe the finished depth first, 7 mm, stab the outline barely a sixteenth of an inch deep, then take the ground down across the grain and punch it even.
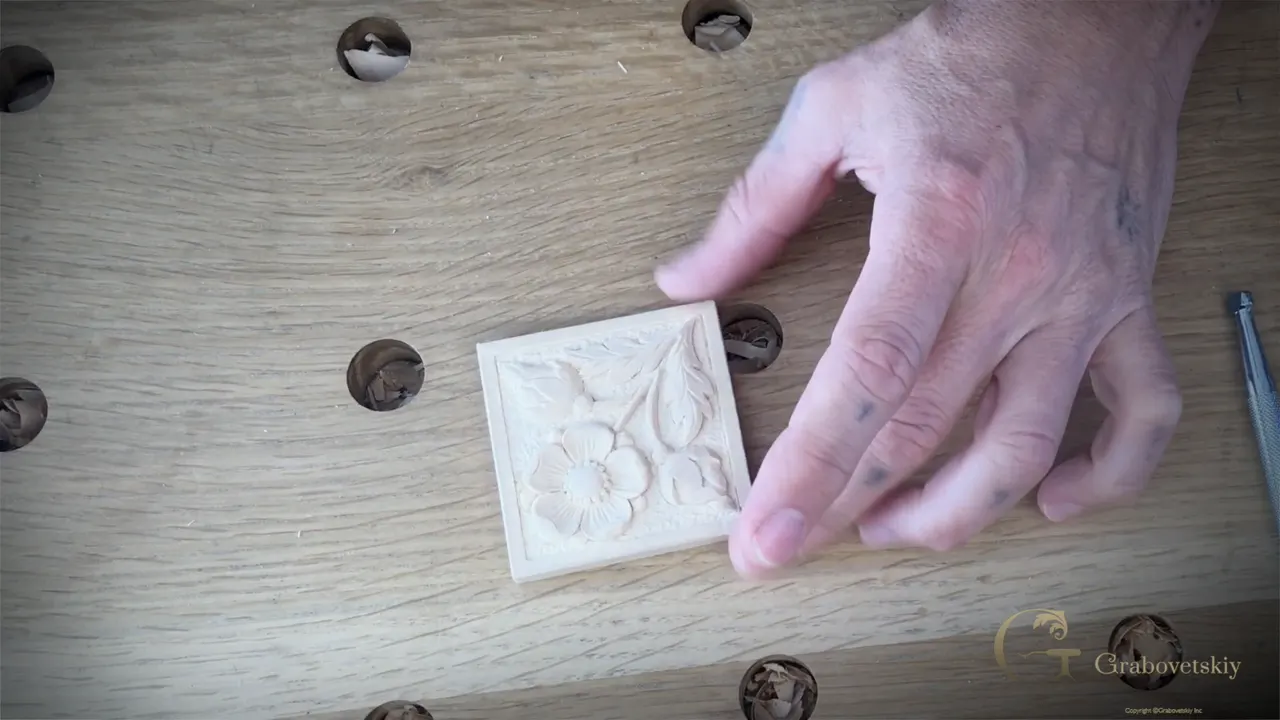
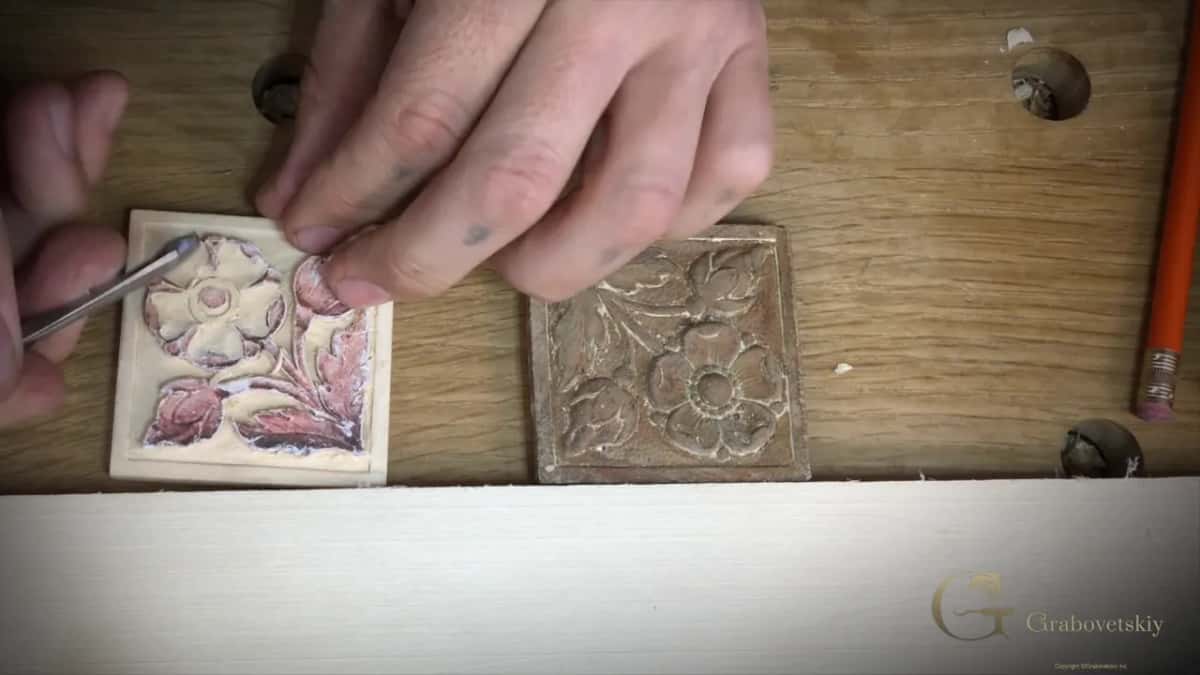
Nine of these went to the customer who ordered them and one stayed on my bench. Do you want a real carved flower on a cabinet door instead of a pattern that looks stamped out by a machine? Is there a knife and one small gouge in a drawer somewhere? Then you have enough for this one.
What is a rosette in wood carving?
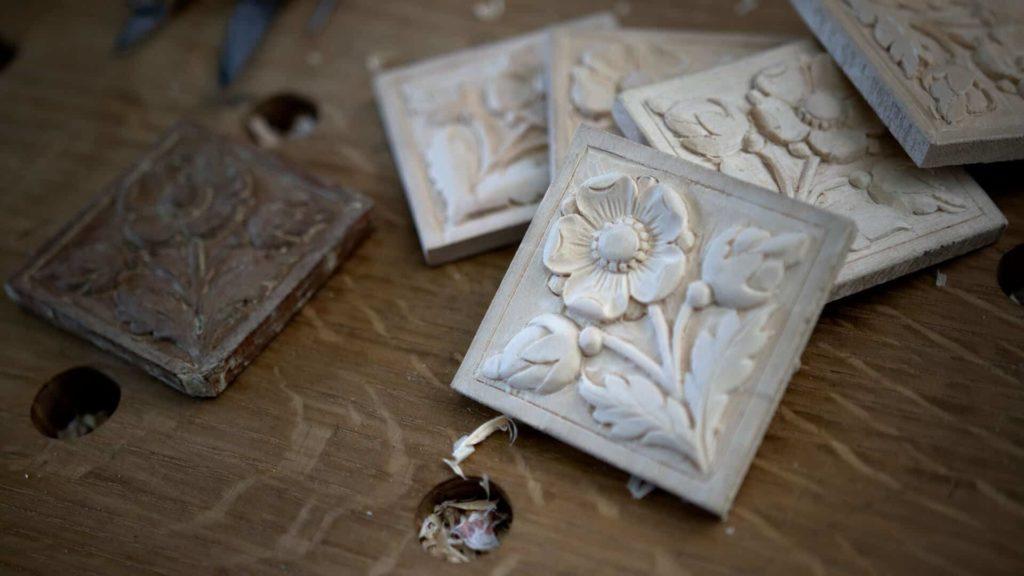
A rosette is a small panel with a flower carved inside a raised border, and this one is a copy of an original piece. Shallow work, all of it. The block runs 10 mm thick, three eighths of an inch, and the flower stands about 7 mm out of that.
I like this flower. Simple design, and still a good one, because you can put it almost anywhere. Architectural carving takes it, and so does furniture. Back when I built custom kitchens there was a manufacturer around every corner selling cabinets cheaper than mine, and one carved detail on a hood is what sold mine anyway.

Small is not the same as easy. Every ridge shows at this size, and there is nowhere on a panel this small to lose one.
What wood do you use for a small carved rosette?
Basswood, the same wood the old carvers reached for. American basswood, lindenwood, limewood. One tree, three names, depending where you live.
It is a soft wood, and a knife just digs into it really nicely.
For a long time now I have found it among the best woods to carve.
What size block does a rosette need?
Two and a half inches square by three eighths thick, which is 64 mm square by 10 mm. I ran ten of them through the planer for this class. Nine were the order and one stayed here.
I usually carve one extra. Customers come back years later asking for more of what I made them, and a kept prototype lets me match it instead of guessing. That habit has saved me more work than any tool I own.
Ten millimetres is not much wood, and you will spend this whole project deciding how little to remove rather than how much.

How do you transfer a drawing onto a block of wood?
Photograph the original straight down with a phone, square the photo up, scale it to true size, and print it at one to one. No special camera. My phone and a Microsoft scanning app get the picture square, and the app does that part automatically, which is the part that matters.
Then I bring the image into SketchUp and scale it until the rosette measures exactly two-and-a-half inches, which is 64 mm. I used AutoCAD for years. SketchUp is quicker now, and I print through its layout side, because for some reason those prints come out more accurate. Maybe that is just me.
One to one means an inch on paper equals an inch of wood, and a centimetre equals a centimetre. The drawing rescales to any size you like, and paper size is no limit, so you can print it full size.
When I design something myself, I still like to draw it right on a piece of wood. Copying a piece somebody else already drew is different work, and faster.

Can you glue a paper pattern to wood with spray glue?
Spray adhesive holds a paper pattern down well enough to carve straight through it, and it beats wood glue here because you do not wait for it. I use yellow glue for plenty of things. Not this.
Spray both faces, the paper and the block, then leave it about a minute. Touch it with your hand. If nothing sticks to your skin it is ready. You cannot press them together right away.
Before any of that, run a block plane over the face. My planer leaves faint trail marks from a nick in one knife, and a couple of angled strokes take them off so the paper glues down better.
Spray glue has one cost. It leaves residue, and near the end you will be lifting the last shreds of paper off a finished flower with the tip of a knife. So it does not live on my bench every day.


How deep do you carve a small rosette?
Nine thirty-seconds of an inch on this piece, 7.14 mm, and not a shaving deeper. A quarter inch plus a thirty-second. I got that number by standing the original against a fresh block, eyeballing the edge, and nicking it with a knife.
Then the marking gauge goes into the nick and scribes a line right round all four sides. Now the depth lives on the wood instead of in my head. I never carve below it. Neither should you.
Of that 10 mm, 7 leaves as chips. Around 3 mm is all that holds the panel together, an eighth of an inch, which is why the mallet stays gentle for the whole project.


What holds a small carving still while you work?
Let it sit loose between two bench stops so you can turn it. My bench is drilled with 20 mm holes, about three quarters of an inch, and two stops drop straight in. I could lock the panel down, but I really don't need to.
Rotation is the whole trick. I turn the piece all the time, so it is not fastened to anything. It just butts against a block.
A scrap of wood clamped to any table does the same job. Nothing more to a bench stop than that.

What does sweep mean on a wood carving gouge?
Sweep is the curve of the gouge edge, and the number stamped on the tool tells you how deep that curve runs. A number 3 is nearly flat, and a number 9 comes close to half a circle.
At the start of this rosette I just guess. Hold tools against the drawn petal until one curve sits down on the line, and that tool becomes the tool for those petals on all ten blocks. Then it stays out on the bench where I can find it again.
For the main flower the winner was a number 6, half an inch wide, 13 mm, by Ashley Iles. A number 9 fitted the smaller petals under it, and a number 3 grounding tool did the flat work around everything. Which tool does what, and why, is the whole of All About Tools for Wood Carving.

Why do carvers use a fishtail gouge?
The corners. A fishtail gouge flares out toward its edge like the tail of a fish, so the two corners of that edge reach into a tight spot a parallel sided blade cannot enter. Somebody asked whether I really use them. I use them in everything I carve.
Given the same sweep at the same width in both shapes, I buy the fishtail every time.
Reaching a corner is not the same as forcing one. This rosette has a lot of weak spots, small parts that snap right out if you push too hard, so ease in and stop early.

How hard should you hit a gouge with a mallet?
Barely. First pass round the flower, each stab goes down about a sixteenth, 1.5 millimetres, driven with a small brass mallet, and that is deep enough for now. Hit it properly and the panel snaps, because 10 mm of basswood does not forgive a confident arm.
Stand the gouge on the drawn line, tap, rotate the panel, tap again. Round the whole flower like that. I went too deep on one of the small petals with the camera running and said so out loud. It's not right, and you should not do that.
Wood carving is an art of deduction, and once you have taken too much there is no putting it back.

Should you carve with the grain or across it?
Across the grain, for the bulk of the waste that rings the flower. Check which way the grain runs first, every time, then take the material off at right angles to it. Across is the safest way, and still one hard hit can destroy the flower.
The tool rotates as it travels. Watch my hand and you will see the gouge turning through every pass, and the whole time I keep an eye on my line.
Do not carve down to the line at this stage. Leave a sixteenth proud of it, one and a half millimetres. That last bit comes off later.

What gives a clean background in relief carving?
Hold the tool almost parallel to the wood and take shallow passes with a nearly flat gouge. Presented low, a number 3 grounding tool gives you control that a steep angle never will.
Do not begin a pass at the edge. Start somewhere away from it, because at the edge you can miss, and you do not know what the grain will do there. I begin somewhere safe and work to the line.
Where the ground needs a deeper stop cut, I use the knife, then hook the chip and lift it out. Some carvers say hooking harms the tool. Wood against metal, and metal wins.
The last pass, taken right up to the line, is the one I call a clean cut, and it wants real care. In this trade a tool is supposed to be really, really sharp, and a sharp grounding tool is what leaves the clean result.


How wide should the border around a rosette be?
Five thirty-seconds of an inch on this design, about 4 mm, on every side. I read it off the original with an aluminium architect's scale, the one I have used for years, because I can put my pencil marks right on the aluminium.
Two small things here. Mark the border lines all the way across and they meet in a cross at each corner, so stop every line short. Then carve a shallow channel a thirty-second outside the main line, less than a millimetre, and the work goes a lot easier.
On the last rosette I skipped the gauge entirely. Middle finger against the edge of the block as a fence, pencil on the line, pull the finger toward you, rotate, repeat. A pencil and a finger, and the line came out straight enough.

Why is the background on antique carvings covered in tiny dots?
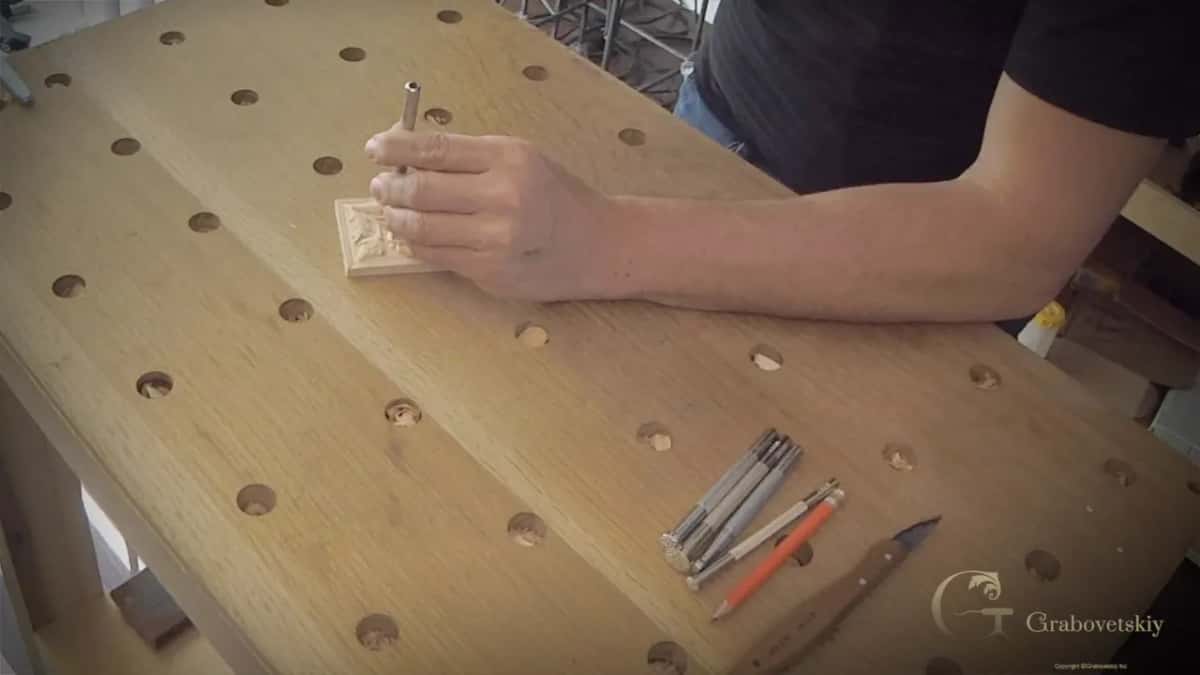
A bubbly background is a ground covered in small round dents, punched in with a steel tool instead of carved. My name for it, anyway. The original rosette carried one, and up close, whoever made that piece used tools shaped much like mine.
My punches are sold for leather craft, in a set, and not that expensive. Different faces give different textures, so I pick whichever comes closest to the piece I am copying.
One fact here changes how you carve the whole panel. The punch presses the fibres down, so the ground drops a thirty-second of an inch, under a millimetre, all by itself. So I stop lowering the background while it is still almost level with the border, and let the punch finish that last bit.
I used a mallet on this one. A hammer will do the same job if you don't hit it too hard.
Is it cheating to use a background punch?
Carvers have punched grounds for generations, and mostly they did it to hide a background that came out uneven. A bumpy ground gets punched and suddenly reads as one even texture across the whole panel. Honest enough, and still a good one.
In some European traditions reaching for a punch marked you as no professional. That was the case. I do not see why you wouldn't use one, because it gives you really good results.
On the rosette I carved with only a knife I left the ground bumpy and wavy on purpose, knowing the punch was coming. You can make your own punch as well. Take an ordinary framing nail, work the end with a file, and you have a design of your own.
Gouge or veiner, what is the difference?
A true gouge can be stood on the wood and rotated to scribe a full circle, and a veiner cannot. That is the test.
Gouges run up to number 9. Number 10 and number 11 are veiners, and a V tool is something else again, because neither will spin you a clean round. I still call them all gouges at my bench. Easier to remember.
On this rosette the test earns its keep at the centre of the flower. The centre is a dome inside a ring, both round, so I hold tools against the drawing until one spins the exact circle I need, then rotate it in place. Carefully, without overdoing it.

What stops tiny carved details from snapping off?
Make a couple of light passes instead of one hard push. With the ring of tiny beads around the flower centre, take the outside corners off first, right round the ring, then round what is left. Once the corners are gone, the rounding is much easier.
Micro work means my lamp comes in, and I use it a lot on small details, because I can see much better with it.
The same principles run on a small carving as on a big one. Smaller, that is all. Every ridge counts for more, so one slip at this scale finishes the piece, and nothing puts it right. The reasoning behind those principles is what Principles of Design in Wood Carving is for.

Can you carve a rosette with only a knife?
A chip carving knife did most of the work on one of these ten, and it came out pretty close to the original. Outline straight down, hold the knife like a pencil, pull it toward you, and soft basswood gives you no problem.
I call this carving on steroids. Production carving, if you want the polite name. Faster than gouge work, but less accurate, and I still prefer gouges.
Somebody watching asked me to list every tool I use. A piece like this, I could. For the Gibbons work that list would run for pages, and some of it you would never need to buy, because the tools you already own reach the same result by another road.
Watch the knife only workshop and you will see where a knife starts to struggle. The struggle is real, and still a knife carves a lot more than you would think.
Which wood carving tool should a beginner buy first?
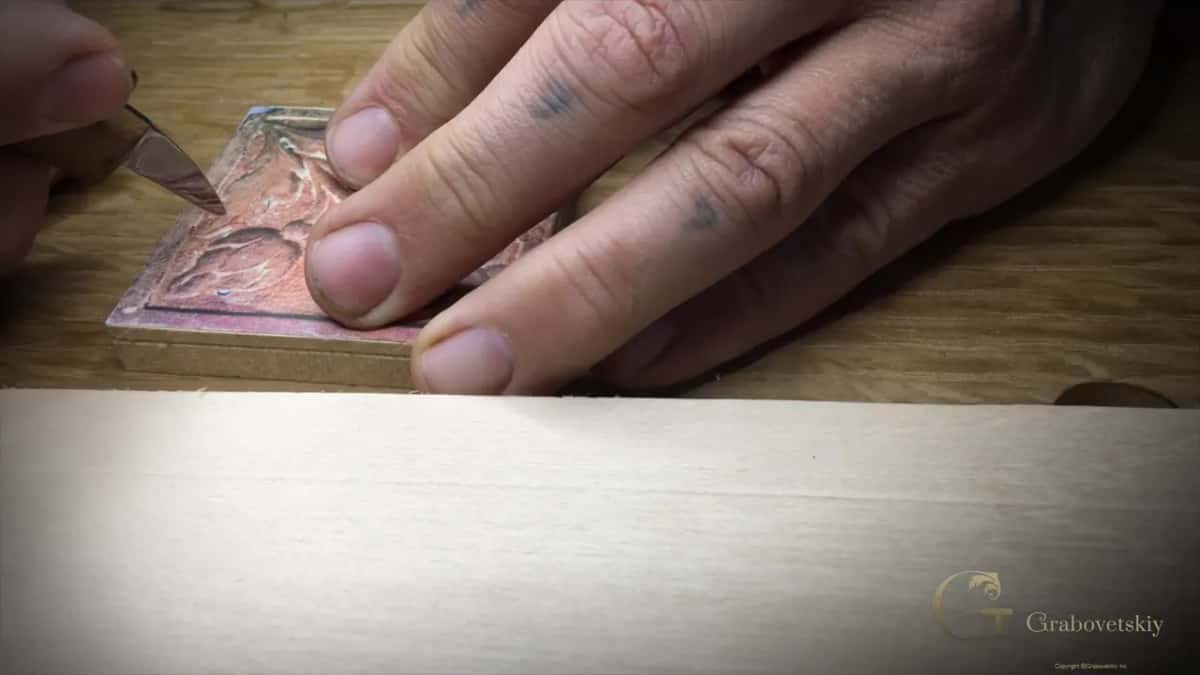
A chip carving knife, and master that before you buy anything else. One knife will carve beautiful things. The name does not mean cheap, by the way. A good one costs real money. I have several brands, and what I like is good steel.
I know what one knife can do. At nineteen I was in a Soviet jail, not for any crime, for what I believed. The Soviet Union collapsed while I was inside. There was no food, nothing, and somehow you had to survive in there, and I got one potato a day because I could carve. One potato. I carved mirror frames and coffee tables and small jewelry boxes, and the boxes were what the administration wanted most.
All I had at the start was a knife. A small gouge came later. So when somebody tells me they cannot begin because they have no tools, I know exactly how untrue that is.
You do not have to rob a bank to carve. Get one knife, learn to sharpen it, and come stand at the bench with us.
Do you need a router plane for relief carving?
A small router plane is a must have for relief work. Mine is a small Veritas and it works miracles on a ground this size. Lie-Nielsen make a fine one too, more classical to look at, where Veritas looks modern.
Set the depth ring first, right at your scribed line, and the ring becomes a stopper that keeps every part of the ground the same thickness. Then back it off and work in passes of a sixteenth or so, one and a half millimetres, until you are a thirty-second above the line, not quite one millimetre, and leave that last shaving for the cleaning cut.
One more detail. Keep a scrap block of the same height beside the panel, a leftover from cutting the blanks is fine. Near the edge of the panel the plane rests on it, and the block becomes your reference.
A router plane is a hand tool, so nothing here is powered, and its blade wants the same really sharp edge as every gouge you own.

Should you sand a wood carving?
True carving should come out of the chisel, so I leave most of mine alone. I'm not recommending sandpaper. There is nothing wrong with it either, and I will say that as often as anybody needs to hear it.
If a rosette looks rough to you, take a block, touch the high points, stop. I did exactly that on the last one with a block marked 80 grit that feels closer to 220, and I stayed off the details entirely.
Some carvers leave everything choppy, every knife mark showing, and it looks like what it is, which is work done by a hand. One man I know makes a good living selling relief carvings finished that way. All about form, and all about your preference.

Is a small rosette a good first project?
People call this one a beginner project and I am not sure I agree. The design is simple. Size is what makes it hard, because a mistake you would carve away on a big panel has nowhere to go on a square 64 mm across.
What it teaches is restraint. The background alone trains you not to go too deep, over and over, for as long as the ground takes to clear.
Send me photographs when you finish and I will look at them properly and write you a certificate of completion. Not a download. Me, at this bench, looking at your work.
If you have never held a gouge, start with First Cuts for Beginners and come back to this. The lessons map lays the road out in order, the old carving books cost nothing to read tonight, and what Access costs sits on one page with no surprises. People usually want to know who is teaching before they ask the price, which is fair, so here I am.
So there is a scrap of basswood on your shelf, all 10 mm of it, and a flower drawn on a scrap of paper. Where does the first carving go? Come and find out at the bench, and by the third rosette your hand will know before I say it. Shall we carve?
All of that lives in Carving Flower Rosette. Seven workshops, filmed at this bench, one rosette carved with a full rack of gouges and another with almost nothing but a knife.
| The job | Reach for | Size |
|---|---|---|
| Stabbing the main flower outline | A number 6 fishtail, Ashley Iles | half inch, 13 mm |
| The smaller petals under the flower | A number 9 | small |
| Opening up the inside of the flower | A number 8 | about half inch, 13 mm |
| Doming the centre and dropping its ring | A number 5 | quarter inch, 6 mm |
| Clearing and levelling the ground | A number 3 grounding tool | several widths |
| Outlines, leaves, and most of one rosette | A number 12 chip carving knife | any |
| Separating weak spots before you carve them | A V tool | small and micro |
| The ring of beads round the flower centre | A micro number 1 and a tiny number 9 | tiny, not marked |
| Reaching the tightest corners of the ground | A front bent micro gouge | under 1/16 in, 1.5 mm |
| Levelling a background quickly | A small router plane | set the depth ring first |
| Texturing the ground at the end |
How it's done
- Print the pattern the size of the original. Photograph the original straight down, square the photo up, and scale it so the rosette prints at exactly 64 mm, two-and-a-half inches. One inch on paper equals one inch of wood.
- Plane the block and spray the pattern down. Take the planer marks off the face with a block plane. Spray both the paper and the block, wait about a minute until nothing sticks to your hand, then press the two together.
- Scribe the depth onto all four edges. Stand the original against a fresh block, nick the edge with the knife tip, and run a marking gauge round from there. Nine thirty-seconds, 7.14 mm. Never carve below that scribed line, not by a shaving.
- Stab the outline barely a sixteenth deep. Stand a number 6 on the drawn line and tap it with a small brass mallet, about 1.5 mm, a bare sixteenth. Rotate the panel and repeat right round the flower.
- Lower the ground crossways to the grain. Check which way the grain runs, then work the waste off across it with a number 8, rotating the tool as it travels. Stop a sixteenth above the line, 1.5 millimetres.
- Shape the flower, then the leaves. Work each petal with the gouge whose curve drops onto the drawn line, then the leaves with a knife. Ease in around the small parts, because those are the weak spots.
- Round the middle and carve the beads. Rotate a small number 5 to raise the dome, drop the outer ring by a thirty-second, under one millimetre, then slice the corners off each tiny bead before rounding it.
- Punch the ground and stop. Work a leather craft punch over the background with a mallet or a hammer, and tap lightly. The punch drops the ground a thirty-second lower on its own, and the rosette is finished.
Key takeaways
- The block is 64 mm square and 10 mm thick, which in inches is two-and-a-half by three-eighths, and 7 mm of that comes out.
- Scribe the finished depth on all four sides before the first carving, and never go below the line.
- Find the sweep by holding gouges against the drawn petal, then keep that one tool out for all ten blocks.
- Tap, never hit. A sixteenth of an inch per stab, 1.5 mm, or a 10 mm panel snaps.
- Remove the ground at right angles to the grain and leave a sixteenth above the scribed line for the last pass.
- Leave the background a thirty-second high, because the punch pushes the fibres that far down by itself.
- One chip knife carves most of this rosette, and it is the first tool worth owning.
Frequently asked questions
Can a beginner carve a flower rosette?
Beginners can carve this rosette, though the small size makes it harder than it looks. Nothing about the design is complicated. A square 64 mm across leaves nowhere to hide a mistake, so it is a good practice piece for how careful you are.
How thick does the wood need to be for a carved rosette?
Three eighths of an inch, 10 mm, is enough for this design. The finished carving goes 7.14 millimetres deep, nine thirty-seconds, which leaves around 3 mm holding the panel together. Scribe that line round all four edges before you start.
What tools do you need to carve a rosette?
You can carve most of it with a chip knife, and I did that on one of the ten. With gouges the list stays short. Two sizes start the flower, a number 6 at half an inch and a number 9 for the small petals, then a number 8, a number 5, and a number 3 to level the ground.
What to carve next
More on this: The rosette as an ornament, Tilia, the tree behind basswood and limewood, Basswood, its working properties and density, Relief sculpture, high relief and low, Chip carving and the knife named for it, The router plane and its depth stop, Wood grain, and why direction matters, Sandpaper and the older abrasives before it